Navigation

    • Register
    • Login
    • OpenHardware.io
    • Categories
    • Recent
    • Tags
    • Popular
    1. Home
    2. tssk
    3. Posts
    • Profile
    • Following
    • Followers
    • Topics
    • Posts
    • Best
    • Groups

    Posts made by tssk

    • ArduinoShrink

      Today I came across interesting project https://github.com/nerdralph/ArduinoShrink that promises smaller and faster code for ATmega168 and 328 MCUs at 4 to 16 MHZ.

      But the library is not compatible with mysensors

      wiring.c.o (symbol from plugin): In function `delayMicroseconds':
      (.text+0x0): multiple definition of `main'
      sketch/mys-868-node.ino.cpp.o (symbol from plugin):(.text+0x0): first defined here
      collect2: error: ld returned 1 exit status
      exit status 1
      Error compiling for board Arduino Pro or Pro Mini.
      

      Would it be possible to make it compatible? Is the problem maybe in the know limitation that when the pin is not known at compile time?

      posted in Development
      tssk
      tssk
    • RE: 💬 Battery Powered Sensors

      @Gilles-BILLARD Damn! Why did I order UNO if I could use another Pro Mini for programming... 🙂

      posted in Announcements
      tssk
      tssk
    • RE: How to manage dynamic number of sensors?

      In case someone is interested in the code for mysensors mqtt gateway using the DS2482.h library from https://github.com/paeaetech/paeae. The temperature conversion code is from example. I am omitting the mysensors setup.

      ...
      
      #include <DS2482.h>
      #include <Ethernet.h>
      #include <MySensors.h>
      #include <Wire.h>
      
      
      DS2482 ds( 0 );  //channels ds2482-800 is 0 to 7, DS2482-100 is just set 0
      byte dsData[8]; //holding for onewire capture
      byte dsAddr[8]; //1wire wire address and CRC
      
      MyMessage msgAddr( 0, V_ID );
      MyMessage msgTemp( 0, V_TEMP );
      
      
      void setup() {
      
        //Uses Wire library to communicate with DS2482 so be sure to call Wire.begin() before using the library.
        Wire.begin();
        ds.reset();
      
      }
      
      void presentation() {
      
        // Send the sketch version information to the gateway and Controller
        sendSketchInfo( SKETCH_NAME, SKETCH_MAJOR_VER "." SKETCH_MINOR_VER );
      
      }
      
      void loop() {
      
        #ifdef MY_DEBUG
          Serial.println( "DBG: loop start" );
        #endif
      
        ds.wireResetSearch();
        ds.wireReset();
        ds.wireSkip();
        //need to send high power to bus??  Adding 5 volts to devices makes it work.
        ds.wireWriteByte( 0x44 ); //convert temperature on all devices
        delay( 1000 );
      
        byte sensorId = 0;
        while( ds.wireSearch( dsAddr ) ) {
      
          #ifdef MY_DEBUG
            Serial.print( sensorId );
            Serial.print( " : " );
          #endif
      
          char sensorAddr[17]; //eg. 280838211713012D
      
          for( int i = 0; i < 8; i++ ) {
            
            sensorAddr[i*2] = ( dsAddr[i] >> 4 ) + 0x30;
            if ( sensorAddr[i*2] > 0x39 ) {
              sensorAddr[i*2] += 7;
            }
            
            sensorAddr[i*2+1] = ( dsAddr[i] & 0x0f ) + 0x30;
            if ( sensorAddr[i*2+1] > 0x39 ) {
              sensorAddr[i*2+1] += 7;
            }
      
          }
      
          sensorAddr[16]  = '\0'; //always zero terminate string
          
          #ifdef MY_DEBUG
            Serial.print( sensorAddr );
            Serial.print( "\n" );
          #endif
      
          send( msgAddr.setSensor( sensorId ).set( sensorAddr ) );
      
          #ifdef MY_DEBUG
            Serial.print( sensorId );
            Serial.print( " : " );
          #endif
      
          if ( ds.crc8( dsAddr, 7 ) != dsAddr[7] ) {
            Serial.print( "CRC is not valid!" );
            return;
          }
      
          /*
          //test if device code DS18B20
          if ( dsAddr[0]==0x28 ) {
      
          //test if device code MAX31850
          if ( dsAddr[0]==0x3B ) {
          */
      
          //read temperature data.
          ds.wireReset(); //ds.reset();
          ds.selectChannel( 0 ); //necessary on -800
          ds.wireSelect( dsAddr );
          ds.wireWriteByte( 0xbe ); // Read Scratchpad command
      
          //display hex values of scratchpad
          for ( int i = 0; i < 9; i++ ) { // we need 9 bytes
            dsData[i] = ds.wireReadByte();
      
            #ifdef MY_DEBUG
              if ( dsData[i] < 16 ) {
                Serial.print( "0" );
              }
              Serial.print( dsData[i], HEX );
            #endif
          }
          
          //convert to decimal temperature
          int LowByte = dsData[0];
          int HighByte = dsData[1];
          int TReading = ( HighByte << 8 ) + LowByte;
          int SignBit = TReading & 0x8000; // test most sig bit
          if ( SignBit ) // negative
          {
                  TReading = ( TReading ^ 0xffff ) + 1; // 2's comp
          }
      
          float Tc_100 = (double) TReading * 0.0625;
      
          if ( SignBit ) { // If its negative
                  Tc_100 = 0 - Tc_100;
          }
      
          //print temp for each device
          #ifdef MY_DEBUG
            Serial.print( " : " );
            Serial.println( Tc_100 );
          #endif
      
          send ( msgTemp.setSensor( sensorId ).set( Tc_100, 2 ) );
      
          sensorId++;
        }
      
        #ifdef MY_DEBUG
          Serial.println( "DBG: loop end" );
        #endif
      
        delay( 60000 );
      }
      

      I am of course happy for any feedback. Especially if I am doing anything stupid as I am no programmer 🙂

      posted in Development
      tssk
      tssk
    • RE: How to manage dynamic number of sensors?

      @zboblamont Thanks for the tip. I am trying to avoid hardcoding any addresses - maybe I find out that it will be necessary at some point. But so far it looks fine:

      23:08:43.873 -> 0 MCO:BGN:INIT GW,CP=R-NGA---,FQ=8,REL=255,VER=2.3.2
      23:08:44.438 -> 585 GWT:TPC:IP=192.168.1.113
      23:08:45.468 -> 1589 MCO:BGN:STP
      23:08:45.468 -> 1591 MCO:REG:NOT NEEDED
      23:08:45.468 -> 1595 MCO:BGN:INIT OK,TSP=NA
      23:08:45.468 -> 1597 GWT:TPC:IP=192.168.1.113
      23:08:46.464 -> 2600 GWT:RMQ:CONNECTING...
      23:08:46.464 -> 2611 GWT:RMQ:OK
      23:08:46.464 -> 2613 GWT:TPS:TOPIC=1wire-out/0/255/0/0/17,MSG SENT
      23:08:46.497 -> 2619 GWT:TPS:TOPIC=1wire-out/0/255/3/0/11,MSG SENT
      23:08:46.497 -> 2625 GWT:TPS:TOPIC=1wire-out/0/255/3/0/12,MSG SENT
      23:08:46.497 -> DBG: loop start
      23:08:47.559 -> 0 : 280838211713012D
      23:08:47.559 -> 3704 GWT:TPS:TOPIC=1wire-out/0/0/1/0/42,MSG SENT
      23:08:47.592 -> 0 : 5A014B467FFF0C1044 : 21.62
      23:08:47.626 -> 3753 GWT:TPS:TOPIC=1wire-out/0/0/1/0/0,MSG SENT
      23:08:47.692 -> 1 : 28A82B7D17130189
      23:08:47.692 -> 3825 GWT:TPS:TOPIC=1wire-out/0/1/1/0/42,MSG SENT
      23:08:47.692 -> 1 : 53014B467FFF0C102D : 21.19
      23:08:47.758 -> 3876 GWT:TPS:TOPIC=1wire-out/0/1/1/0/0,MSG SENT
      23:08:47.824 -> 2 : 28949D2816130138
      23:08:47.824 -> 3948 GWT:TPS:TOPIC=1wire-out/0/2/1/0/42,MSG SENT
      23:08:47.824 -> 2 : 5F014B467FFF0C1012 : 21.94
      23:08:47.858 -> 3999 GWT:TPS:TOPIC=1wire-out/0/2/1/0/0,MSG SENT
      23:08:47.924 -> 3 : 282C3C2A16130167
      23:08:47.924 -> 4071 GWT:TPS:TOPIC=1wire-out/0/3/1/0/42,MSG SENT
      23:08:47.957 -> 3 : 56014B467FFF0C107B : 21.37
      23:08:47.990 -> 4122 GWT:TPS:TOPIC=1wire-out/0/3/1/0/0,MSG SENT
      23:08:48.057 -> 4 : 28FC801F16130104
      23:08:48.057 -> 4194 GWT:TPS:TOPIC=1wire-out/0/4/1/0/42,MSG SENT
      23:08:48.057 -> 4 : 5C014B467FFF0C10D7 : 21.75
      23:08:48.123 -> 4245 GWT:TPS:TOPIC=1wire-out/0/4/1/0/0,MSG SENT
      23:08:48.190 -> 5 : 2832312A161301C3
      23:08:48.190 -> 4317 GWT:TPS:TOPIC=1wire-out/0/5/1/0/42,MSG SENT
      23:08:48.190 -> 5 : 58014B467FFF0C10C2 : 21.50
      23:08:48.223 -> 4368 GWT:TPS:TOPIC=1wire-out/0/5/1/0/0,MSG SENT
      23:08:48.322 -> 6 : 28CAD31F16130180
      23:08:48.322 -> 4440 GWT:TPS:TOPIC=1wire-out/0/6/1/0/42,MSG SENT
      23:08:48.322 -> 6 : 57014B467FFF0C1038 : 21.44
      23:08:48.356 -> 4489 GWT:TPS:TOPIC=1wire-out/0/6/1/0/0,MSG SENT
      23:08:48.422 -> 7 : 28FFE4493118014F
      23:08:48.422 -> 4560 GWT:TPS:TOPIC=1wire-out/0/7/1/0/42,MSG SENT
      23:08:48.422 -> 7 : 58014B467FFF0C10C2 : 21.50
      23:08:48.488 -> 4612 GWT:TPS:TOPIC=1wire-out/0/7/1/0/0,MSG SENT
      23:08:48.555 -> 8 : 28FF345E311801AF
      23:08:48.555 -> 4683 GWT:TPS:TOPIC=1wire-out/0/8/1/0/42,MSG SENT
      23:08:48.555 -> 8 : 5B014B467FFF0C1007 : 21.69
      23:08:48.621 -> 4734 GWT:TPS:TOPIC=1wire-out/0/8/1/0/0,MSG SENT
      23:08:48.687 -> 9 : 28FF094131180165
      23:08:48.687 -> 4806 GWT:TPS:TOPIC=1wire-out/0/9/1/0/42,MSG SENT
      23:08:48.687 -> 9 : 55014B467FFF0C10BE : 21.31
      23:08:48.721 -> 4855 GWT:TPS:TOPIC=1wire-out/0/9/1/0/0,MSG SENT
      23:08:48.787 -> 10 : 28FFE513311802A3
      23:08:48.787 -> 4927 GWT:TPS:TOPIC=1wire-out/0/10/1/0/42,MSG SENT
      23:08:48.820 -> 10 : 51014B467FFF0C10AB : 21.06
      23:08:48.853 -> 4980 GWT:TPS:TOPIC=1wire-out/0/10/1/0/0,MSG SENT
      23:08:48.920 -> 11 : 28FF2B1F31180231
      23:08:48.920 -> 5052 GWT:TPS:TOPIC=1wire-out/0/11/1/0/42,MSG SENT
      23:08:48.920 -> 11 : 56014B467FFF0C107B : 21.37
      23:08:48.986 -> 5103 GWT:TPS:TOPIC=1wire-out/0/11/1/0/0,MSG SENT
      23:08:48.986 -> DBG: loop end
      
      posted in Development
      tssk
      tssk
    • RE: How to manage dynamic number of sensors?

      @mfalkvidd I did not see it - thanks for mentioning it.

      I think this is what I was looking for - the sketch uses one MyMessage msg(0,V_TEMP); for values from all DS18B20 with such code construction

        // Read temperatures and send them to controller 
        for (int i=0; i<numSensors && i<MAX_ATTACHED_DS18B20; i++) {
            ...
            // Send in the new temperature
            send(msg.setSensor(i).set(temperature,1));
            ...
        }
      

      I thought I will need to set up MyMessage msg(0,V_TEMP) x number_of_sensors which would be terrible.

      I guess if I extend the code with MyMessage msg(0,V_ID) to send also the 1wire address it will be what I am looking for.

      Thanks!

      posted in Development
      tssk
      tssk
    • How to manage dynamic number of sensors?

      Hello

      I build mqtt mysensors gateway with DS2482-100 to handle many (currently 15 DS18B20) 1wire sensors.

      My idea was that the gateway will dynamically start to report each attached 1wire sensors 1wire address and value automatically without necessity to change the sketch before attaching new sensor. But from what I see I need to set MyMessage(uint8_t childSensorId, uint8_t variableType); first.

      Is there some best practice pattern how to do it?

      Thanks

      Tomas

      posted in Development
      tssk
      tssk
    • RE: 💬 Battery Powered Sensors

      So I ordered Arduino Uno for programming my Pro Minis. And going to experiment with 2xAA or 3xAA setup without step up booster (they are whining anyway so I will be happy if I get rid of it 🙂

      Thank everyone for help!

      posted in Announcements
      tssk
      tssk
    • RE: 💬 Battery Powered Sensors

      @skywatch said in 💬 Battery Powered Sensors:

      I think you will find that all the 'good stuff' from the low power library is included in mysensors sleep function anyway.

      So when I use sleep() mysensors library overloads the generic arduino sleep?

      I suggest using minicore (it is easy to install and all works from within the arduino IDE you are used to) and set internal oscillator and disable BoD. You will need a programmer (a few dollars) or you can use another arduino as programmer. but that is more time consuming to set up and easier to mess up as well!

      I look at the git repo and I more confused now. I thought it is some kind of bootloader/firmware I flash. What is Arduino core? I never heard that term.

      Good that you got rid of the booster!

      I wonder why the booster is recommended here https://www.mysensors.org/build/battery ? Or did I misinterpreted?

      posted in Announcements
      tssk
      tssk
    • RE: 💬 Battery Powered Sensors

      @tssk said in 💬 Battery Powered Sensors:

      I removed the step up booster connected + directly to VCC but the node stopped working - only the arduino onboard led is constantly on.

      The problem was that the batteries I used were not completely fresh. I googled that Arduino pro mini need at least 2.7V to operate. Using fresh batteries the node is working. And it shows 6.0mA in sleep and 25.4mA when transmitting.

      So using the stepup booster adds 6.5mA in sleep and 65mA when transmitting to consumption?

      I also found LowPower library (https://github.com/rocketscream/Low-Power) but it seems to interfere with mysensors library (https://github.com/rocketscream/Low-Power/issues/80). Any experience?

      posted in Announcements
      tssk
      tssk
    • RE: 💬 Battery Powered Sensors

      I removed the step up booster connected + directly to VCC but the node stopped working - only the arduino onboard led is constantly on.

      I also tried to measure the step up booster alone and it is showing 0.05 at 20mA on multimeter settings.

      I am now really confused and I am not sure what to conclude from that...

      posted in Announcements
      tssk
      tssk
    • RE: 💬 Battery Powered Sensors

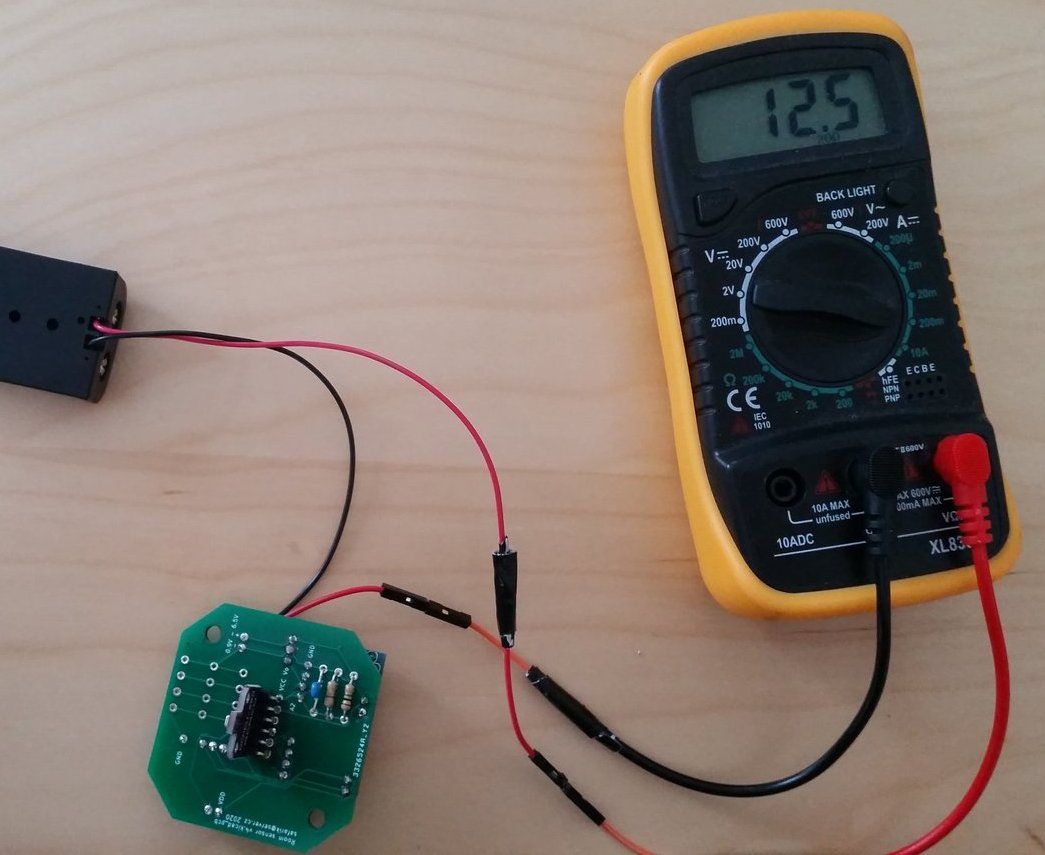
      I hope I am measuring it correctly.

      It shows 12.5 when in sleep and up to 90 when transmitting/measuring.

      Any one can interpret that for me please? 🙂

      IMG_20210225_151612.jpeg

      posted in Announcements
      tssk
      tssk
    • RE: 💬 Battery Powered Sensors

      @TheoL I see so you measure every tim e but send only sometimes. Nice idea thanks.

      posted in Announcements
      tssk
      tssk
    • RE: 💬 Battery Powered Sensors

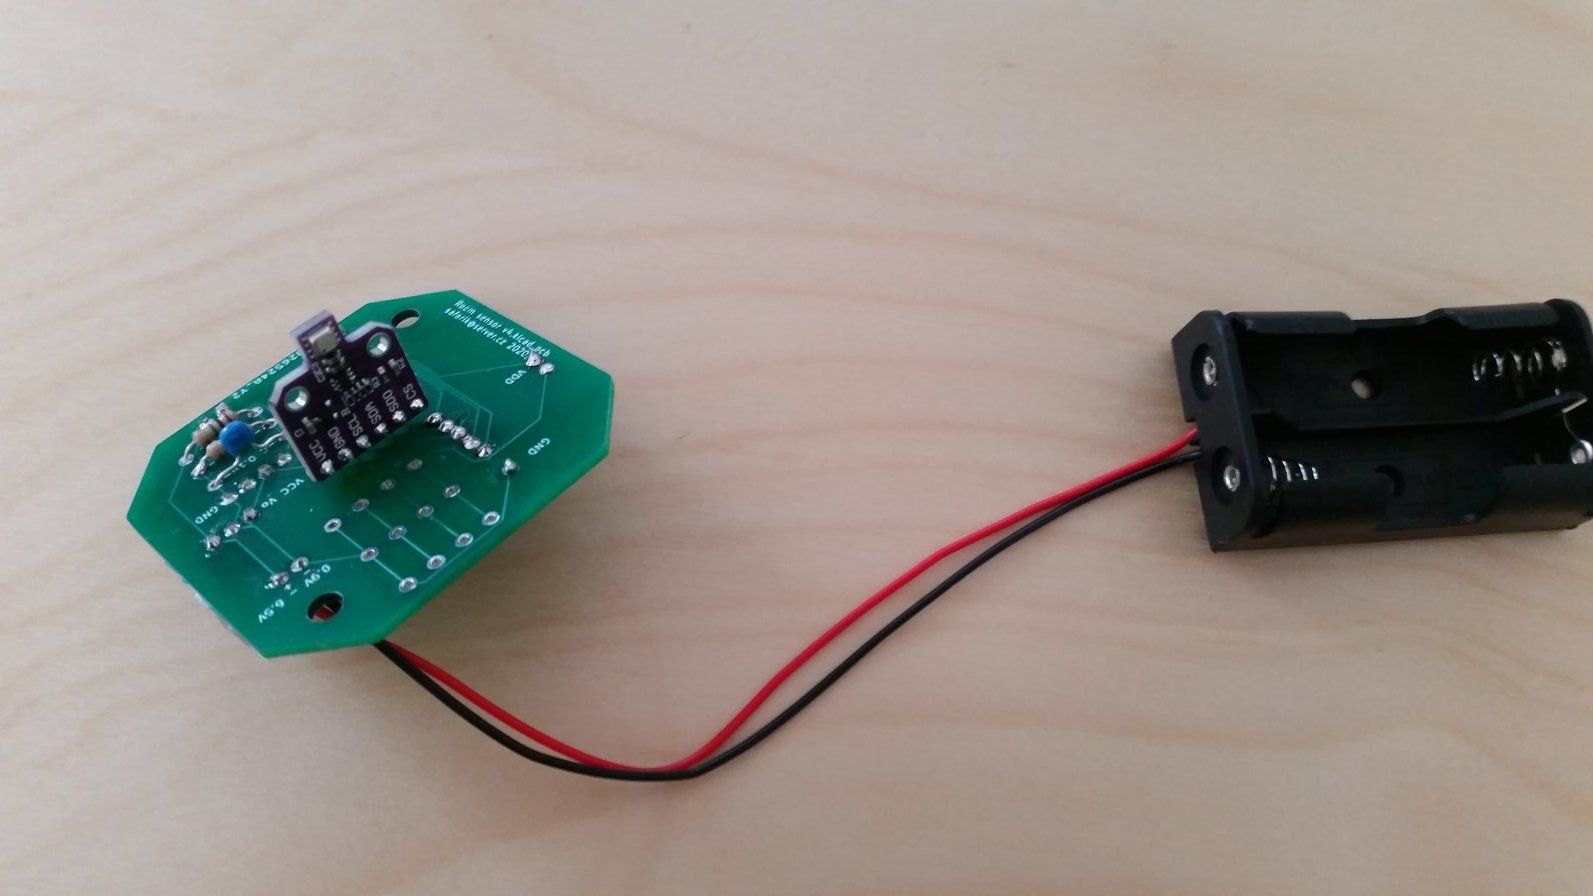
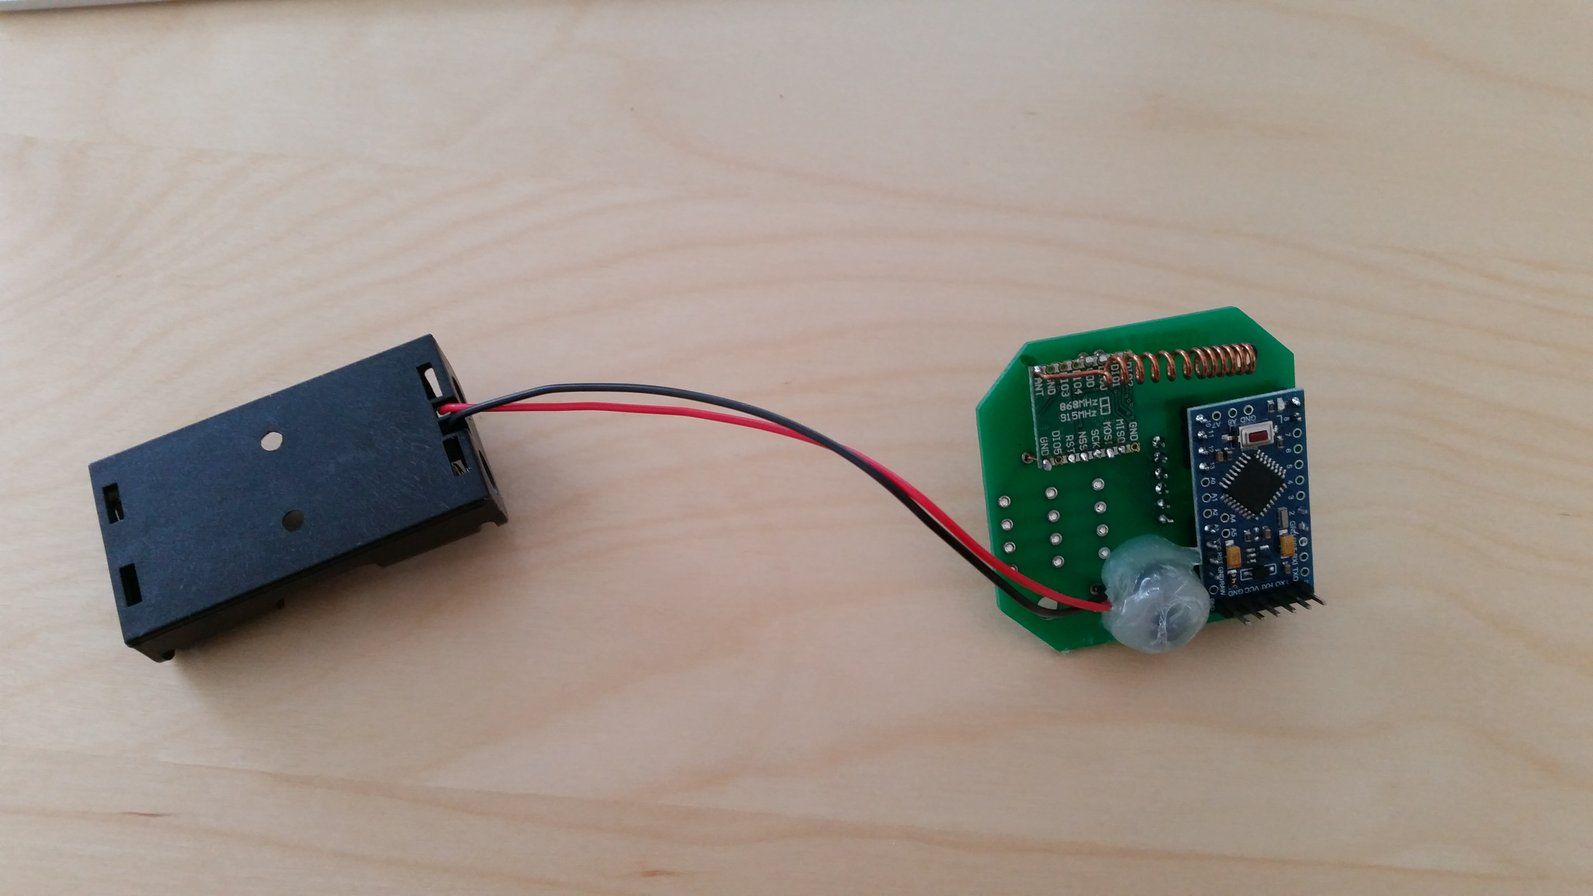
      IMG_20210225_121037.jpeg

      IMG_20210225_121053.jpeg

      posted in Announcements
      tssk
      tssk
    • RE: 💬 Battery Powered Sensors

      @skywatch

      • This is room sensor and I would like to react to changes in temperature and airquality - I was thinking that I could prolong the interval up to 12min. What do you think is optimal measurements rate for room thermostat?

      • Is it possible / necessary to put the radio module to sleep? How to do that?

      • So far I did not mess with the Arduino bootloader but I would like to 🙂 Any link that I could read about it? And specifically about the minicore you mention?

      • I do not understand what you mean by the pull-up resistors?

      • I have my node in the middle of the room around 20-24C that sould not be the problem. Actually it is it main purpose to provide data for optimal room temperature.

      • I included step up boosted based on recommendation on the https://www.mysensors.org/build/battery page. I thought it should use the batteries most efficiently. I think I could go with 3 AA batteries. Will I need to regulate the voltage or can I power the radio and bme modules directly?

      posted in Announcements
      tssk
      tssk
    • RE: 💬 Battery Powered Sensors

      @mfalkvidd

      • I did not know that I need to turn BME off ů how to do that?

      • Only thing I found is that Arduino has deepSleep() - but I am not sure if I can use it.

      • I am using the default Bw125Cr45Sf128 but thinking about testing Bw125Cr48Sf4096 to achieve greater range.

      • Booster is the whining one - https://www.laskarduino.cz/step-up-boost-menic-s-me2108-33v-480ma/

      • Is there a way I can measure power draw with multimeter?

      // Enable debug prints
      //#define MY_DEBUG
      
      // Enable passive mode
      #define MY_PASSIVE_NODE
      
      // Passive mode requires static node ID
      #define MY_NODE_ID 100
      
      // Enable and select radio type attached
      //#define MY_RADIO_RF24
      //#define MY_RADIO_NRF5_ESB
      //#define MY_RADIO_RFM69
      #define MY_RADIO_RFM95
      
      //#define MY_DEBUG_VERBOSE_RFM95
      #define MY_RFM95_FREQUENCY (RFM95_868MHZ)
      //#define MY_RFM95_MODEM_CONFIGRUATION RFM95_BW31_25CR48SF512
      #define MY_RFM95_CS_PIN 8
      #define MY_RFM95_IRQ_PIN 2
      
      #include <MySensors.h>
      #include <Wire.h>
      #include <SPI.h>
      #include <Adafruit_Sensor.h>
      #include "Adafruit_BME680.h"
      
      #define BME_SCK 13
      #define BME_MISO 12
      #define BME_MOSI 11
      #define BME_CS 10
      
      //#define SEALEVELPRESSURE_HPA (1013.25)
      
      // Initialize general message
      MyMessage msgTemp( 1, V_TEMP );
      MyMessage msgHumi( 2, V_HUM );
      MyMessage msgAirq( 3, V_LEVEL );
      
      //Adafruit_BME680 bme; // I2C
      Adafruit_BME680 bme(BME_CS); // hardware SPI
      //Adafruit_BME680 bme(BME_CS, BME_MOSI, BME_MISO,  BME_SCK);
      
      void setup()
      {
        analogReference(INTERNAL);
      
        if (!bme.begin()) {
          Serial.println( "ERR: BME680 not found" );
          while (1);
        }
        // Set up oversampling and filter initialization
        bme.setTemperatureOversampling(BME680_OS_8X);
        //bme.setPressureOversampling(BME680_OS_4X);
        bme.setHumidityOversampling(BME680_OS_2X);
        bme.setIIRFilterSize(BME680_FILTER_SIZE_3);
        bme.setGasHeater(320, 150); // 320*C for 150 ms
      
        delay(2000);
        
      }
      
      void presentation()
      {
      	// Send the sketch version information to the gateway and controller
      	sendSketchInfo("Room sensor", "4.0");
      
      	// Register all sensors to gw (they will be created as child devices)
        wait(100);
      	present( 1, S_TEMP );
        wait(100);
        present( 2, S_HUM );
        wait(100);
        present( 3, S_AIR_QUALITY );
      
      }
      
      void loop()
      {
      
        int batt = analogRead( A3 );
        // 1M, 470K divider across battery and using internal ADC ref of 1.1V
        // Sense point is bypassed with 0.1 uF cap to reduce noise at that point
        // ((1e6+470e3)/470e3)*1.1 = Vmax = 3.44 Volts
        // 3.44/1023 = Volts per bit = 0.003363075
        int battP = batt / 10;
        #ifdef MY_DEBUG
            float battV  = batt * 0.003363075;
            Serial.print( "Battery Voltage: " );
            Serial.print( battV );
            Serial.println(" V");
            Serial.print( "Battery percent: " );
            Serial.print( battP );
            Serial.println(" %");
        #endif
        wait(100);
        sendBatteryLevel( battP );
        
      
        if (! bme.performReading()) {
          Serial.println( "ERR: BME680 reading failed" );
          return;
        }
        
        float temp = bme.temperature;
        #ifdef MY_DEBUG
          Serial.print( "DBG: Temperature = " );
          Serial.print( temp );
          Serial.println( " C" );
        #endif
        wait(100);
        send(msgTemp.set( temp, 2 ));
        
        /*
        float pres = bme.pressure/100.00;
        #ifdef MY_DEBUG
          Serial.print( "DBG: Pressure = " );
          Serial.print( pres );
          Serial.println( " hPa" );
        #endif
        wait(100);
        send(msgPres.set(pres,2));
        */
        
        float humi = bme.humidity;
        #ifdef MY_DEBUG
          Serial.print( "DBG: Humidity = " );
          Serial.print( humi );
          Serial.println( " %" );
        #endif
        wait(100);
        send(msgHumi.set( humi, 2 ));
        
        /*
        float alti = bme.readAltitude(SEALEVELPRESSURE_HPA);
        #ifdef MY_DEBUG
          Serial.print( "DBG: Approx. Altitude = " );
          Serial.print( alti );
          Serial.println( " m" );
        #endif
        wait(100);
        send(msgPosi.set(alti,2));
        */
      
        float airq = bme.gas_resistance / 1000.0;
        #ifdef MY_DEBUG
          Serial.print("DBG: Gas Resistance = ");
          Serial.print( gas );
          Serial.println(" KOhms");
        #endif
        wait(100);
        send(msgAirq.set( airq, 2 ));
        
        
        sleep(10000);
      	//sleep(180000);
      }
      
      posted in Announcements
      tssk
      tssk
    • RE: 💬 Battery Powered Sensors

      Hello

      I would like to ask for help with passive battery powered node I created with following components:

      • Arduino pro mini 8MHz - voltage regulator and power LED removed
      • SX1276 based 868MHz LoRa radio
      • BME680 sensor
      • DC-DC 3.3V step-up booster

      I created a battery measuring circuit according to scheme on this page ( https://www.mysensors.org/build/battery ).

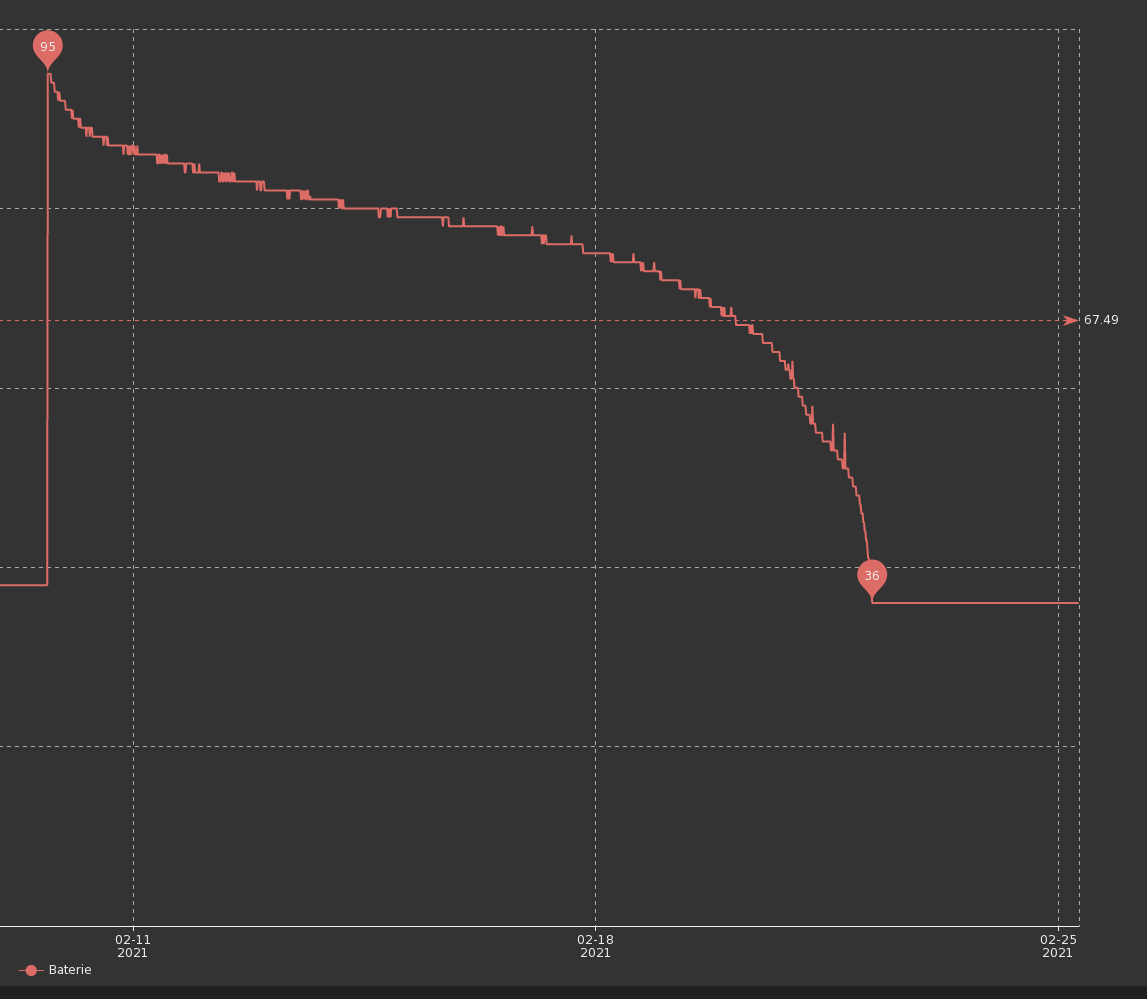
      The problem is the two fresh new AA batteries lasted less than 14 days and stopped when the circuit measured 36%.

      2x1.5V AA Aerocell following start and end values:

      09.02.2021 16:45 102% (start) : 1.610V and 1.610V
      22.02.2021 04:15 36% (end) : 1.001V and -0.150V

      2021-02-25_07-36.png

      The node code is sleeping for 6 minutes between each sensing and sending data.

      sleep(180000);
      

      14 days seems very short to me. Is that normal? Is there something I can to make it last longer?

      Thanks

      posted in Announcements
      tssk
      tssk
    • RE: 💬 Battery Powered Sensors

      @mfalkvidd Thanks.

      posted in Announcements
      tssk
      tssk
    • RE: 💬 Battery Powered Sensors

      @mfalkvidd You are right 🙂 I did not know that.

      SPI: 10 (SS), 11 (MOSI), 12 (MISO), 13 (SCK). These pins support SPI communication, which, although provided by the underlying hardware, is not currently included in the Arduino language.
      LED: 13. There is a built-in LED connected to digital pin 13. When the pin is HIGH value, the LED is on, when the pin is LOW, it's off.

      https://www.arduino.cc/en/pmwiki.php?n=Main/ArduinoBoardProMini

      Should I remove the LED to save power? Or it is marginal?

      posted in Announcements
      tssk
      tssk
    • RE: 💬 Battery Powered Sensors

      So I used hot glue and it is better. Now I can hear the squeal only when I put my ear directly to the PCB. Thanks for the tips.

      @TheoL I have no idea how to measure that.

      I noticed that when the radio is transmitting the LED on the Arduino Pro Mini (not the power one) starts blinking very tiny. I still plan to remove the power LED and voltage regulator from the Arduino.

      posted in Announcements
      tssk
      tssk
    • RE: 💬 Battery Powered Sensors

      @zboblamont It is not electrical noise but audio noise I can hear. Sorry if I use improper terms.

      posted in Announcements
      tssk
      tssk
    • RE: 💬 Battery Powered Sensors

      @canique Thanks for the recommendation if I do not find fix for the model I am using I will consider buying it.

      I will try to hot glue the side with the coil as I found on some pages. Any ideas / warnings? 🙂

      posted in Announcements
      tssk
      tssk
    • RE: 💬 Battery Powered Sensors

      Thanks all for the response.

      @BearWithBeard I will start googling about such solution.

      Do you think using different step up booster might help? Could someone recommend something?

      posted in Announcements
      tssk
      tssk
    • RE: 💬 Battery Powered Sensors

      Hello

      I created battery powered node running on 2x 1.5V AA batteries with DC-DC step up booster. But the step up booster makes audible noise (very tiny beeping) when the radio is transmitting.

      It is this step up booster https://www.laskarduino.cz/step-up-boost-menic-s-me2108-33v-480ma/

      Is there any way to solve it?

      Thanks

      Tomas

      posted in Announcements
      tssk
      tssk
    • RE: 💬 Building a MQTT Gateway

      @frits Cool! So you already had this?

      I was exactly thinking of using most simple HTTP server example from Arduino examples (although you have it nicely dynamic using the defines etc.). But I was not sure if it would not interfere with mysensors library in some way or if maybe mysensors already had such functionality build-in (because if I remember correctly Ethernet gateway return some data to browser of you call the 5003 port).

      posted in Announcements
      tssk
      tssk
    • RE: 💬 Building a MQTT Gateway

      Does anyone know if it would be possible to add static information that would be available over HTTP (default port 80)?

      My idea is to put some kind of description/useful information in the MQTT GW itself. So in case Controller fails. There is some information resource what is the purpose, functionality and how to use it in some limited/emergency way eg. from phone or any computer.

      EDIT: Thinking of it - it might also provide some kind of configuration interface...

      posted in Announcements
      tssk
      tssk
    • RE: Help with bar project....

      Looks the same to me (5V, only 4 relays) except this is controlled by some app over wifi.

      Honestly I am not a person that can give you 100% working solution. Only ideas. I am a beginner myself.

      If I were you I would buy the dispenser, create the extension cord, measure with multi-meter what is happening over the wires when you press individual buttons and try to simulate this. I think if you manage to simulate it manually then you will be able to build some more sophisticated remote control. (The last module you linked would be cool that you could dispense it using voice command. Like "Alexa, rum please! :)" )

      And seriously what is with the joystick? 🙂

      posted in General Discussion
      tssk
      tssk
    • RE: Help with bar project....

      I am not sure the relay will work you need to test that first.

      But if yes then I think it should work in the "Momentary" mode. But:

      • you probably need 6 relays
      • this is infrared so you will need line of sight with the controller
      • and this module runs on 5V not 12V
      posted in General Discussion
      tssk
      tssk
    • RE: Help with bar project....

      According to the following picture there seems to be RJ45 connector.

      https://cdn11.bigcommerce.com/s-cznxq08r7/images/stencil/1280x1280/products/3940/8899/sidebar-010__28625.1591116709.jpg

      So you could create RJ45 socket -> RJ45 connector cable to get in the middle without cutting anything. From there you could easily measure whats happening on the wires and maybe then simulate this with MCU.

      posted in General Discussion
      tssk
      tssk
    • RE: Help with bar project....
      • Is there any connector with which the "original choice selector" is connected to the pump unit? Maybe you could create some extension without cutting the original cable.

      • Joystick seems like a strange controller to me. What is the whole idea you want to achieve with this system?

      • Most of the Arduinos can be powered with 12V.

      • If attaching to the buttons you could use relays to close the circuit and simulate the button press.

      • Do you plan to keep the "original choice selector" or replace it ?

      posted in General Discussion
      tssk
      tssk
    • RE: Help with bar project....

      Hello

      (brainstorming)

      If you have the "original choice selector" you can tap to each wire and see what happens over individual wires when you press each button. An then simulate this from MCU (like arduino).

      Or open the "original choice selector" and connect wires to the existing buttons. (That will probably void warranty.) That wires then you can connect to some MCU and "push" the buttons programmatically.

      Tomas

      posted in General Discussion
      tssk
      tssk
    • RE: What did you build today (Pictures) ?

      @sundberg84 Really like the shape and look of the PCB! I hope I can achieve similar result for my room sensor.

      posted in General Discussion
      tssk
      tssk
    • RE: 💬 Connecting the Radio

      I would like to ask about the radio module connection - I am using SX1276 and I connect it the same way as described by @sundberg84 said in 💬 Connecting the Radio except I additionally connect also RST (NRESET) pin according to this https://github.com/sandeepmistry/arduino-LoRa/blob/master/README.md#semtech-sx1276777879-wiring

      Is it necessary?

      Thanks

      posted in Announcements
      tssk
      tssk
    • RE: What did you build today (Pictures) ?

      Prototype of room sensor for stardard electric box

      • arduino pro mini 3.3V
      • sx1276 radio
      • bme680
      • 2x1.5V AA battery holder
      • battery measuring circuit according to https://www.mysensors.org/build/battery
      • ABB Tango cover (drilled)

      IMG_20201025_141753.jpg IMG_20201025_141837.jpg IMG_20201025_141848.jpg IMG_20201025_141942.jpg IMG_20201025_142159.jpg

      Cover is not fully closed to allow air circulation. But I would preffer some method to drill holes/grill into it - any tips to get decent looking result?

      posted in General Discussion
      tssk
      tssk
    • RE: OH2.5.9 / ethernet gateway / autodiscovery?

      Hello, also beginner here so take my advice with some reserve.

      1 - It seems to me that your ethernet connection does not work - https://www.mysensors.org/apidocs/group__MyGatewayTransportgrp.html

      17:21:06.386 -> 2580 !GWT:TIN:ETH FAIL
      

      Can you ping the gateway?

      2 - I am also using openHab but with MQTT gateway and MQTT binding as I did not find mysensors binding in the official list. But there is no autodiscovery - but I prefer to configure it manually anyway.

      posted in OpenHAB
      tssk
      tssk
    • RE: OpenHAB + ESP8266 Ethernet GW without Radio: "send" does nothing

      I did not even know there was "MySensors binding" as it is not listed in default openhab installation. So I used MQTT binding from the beginning.

      Only thing I noticed is that maybe default sketches needs to be little modified for better behavior as I am writing/asking in Ethernet / MQTT PoE gateway for 16 reed switches:

      I noticed the gateway sends the presentation of sensors all the time but that is not of much use in my setup. On the other hand it is useful to send the actual state periodically as it is known without remembering or if the controller started later than GW. But I have a feeling that I might misused the presentation function. Does any one know if this approach is ok by the "mysensors way"?

      posted in Troubleshooting
      tssk
      tssk
    • RE: Missing data for some sensors when define MY_DEBUG is disabled [SOLVED]

      @mfalkvidd OK, oscilloscope is out of my electronics skills league 🙂 But thank you very much for the explanation!

      posted in Bug Reports
      tssk
      tssk
    • RE: Missing data for some sensors when define MY_DEBUG is disabled [SOLVED]

      @mfalkvidd Sorry for the stupid question - I would understand that for battery but I thought computer as power supply is "strong" enough...?

      posted in Bug Reports
      tssk
      tssk
    • RE: Missing data for some sensors when define MY_DEBUG is disabled [SOLVED]

      @mfalkvidd Thanks adding wait like this helped!

      float temp = bme.temperature; //C
      wait(100);
      send(msgTemp.set(temp,2));
      

      But the node is currently powered from the USB cable from computer using USBtoTTL. How this could "stress" the power supply? USB2TTL->ARDUINO VCC->SX1276

      posted in Bug Reports
      tssk
      tssk
    • RE: OpenHAB + ESP8266 Ethernet GW without Radio: "send" does nothing

      Hello,

      I am using OpenHab with MQTT GW for few weeks and I am pretty happy about this. Reporting data and even setting relays work for me ok.

      What is your issues with it?

      posted in Troubleshooting
      tssk
      tssk
    • Missing data for some sensors when define MY_DEBUG is disabled [SOLVED]

      Hello,

      I noticed that when I remove define MY_DEBUG from Passive node sketch data for some node sensors are not send/received.

      This is sketch I am using and only line I am changing is line 30.

      /*
       * The MySensors Arduino library handles the wireless radio link and protocol
       * between your home built sensors/actuators and HA controller of choice.
       * The sensors forms a self healing radio network with optional repeaters. Each
       * repeater and gateway builds a routing tables in EEPROM which keeps track of the
       * network topology allowing messages to be routed to nodes.
       *
       * Created by Henrik Ekblad <henrik.ekblad@mysensors.org>
       * Copyright (C) 2013-2019 Sensnology AB
       * Full contributor list: https://github.com/mysensors/MySensors/graphs/contributors
       *
       * Documentation: http://www.mysensors.org
       * Support Forum: http://forum.mysensors.org
       *
       * This program is free software; you can redistribute it and/or
       * modify it under the terms of the GNU General Public License
       * version 2 as published by the Free Software Foundation.
       *
       *******************************
       *
       * REVISION HISTORY
       * Version 1.0 - tekka
       *
       * DESCRIPTION
       * Passive node example: This is a passive & independent reporting node
       *
       */
      
      // Enable debug prints
      #define MY_DEBUG
      
      // Enable passive mode
      #define MY_PASSIVE_NODE
      
      // Passive mode requires static node ID
      #define MY_NODE_ID 100
      
      // Enable and select radio type attached
      //#define MY_RADIO_RF24
      //#define MY_RADIO_NRF5_ESB
      //#define MY_RADIO_RFM69
      #define MY_RADIO_RFM95
      
      #define MY_DEBUG_VERBOSE_RFM95
      #define MY_RFM95_FREQUENCY (RFM95_868MHZ)
      //#define MY_RFM95_MODEM_CONFIGRUATION RFM95_BW31_25CR48SF512
      #define MY_RFM95_CS_PIN 8
      #define MY_RFM95_IRQ_PIN 2
      
      #include <MySensors.h>
      #include <Wire.h>
      #include <SPI.h>
      #include <Adafruit_Sensor.h>
      #include "Adafruit_BME680.h"
      
      #define BME_SCK 13
      #define BME_MISO 12
      #define BME_MOSI 11
      #define BME_CS 10
      
      #define SEALEVELPRESSURE_HPA (1013.25)
      
      // Initialize general message
      MyMessage msgTemp( 1, V_TEMP );
      MyMessage msgPres( 2, V_PRESSURE );
      MyMessage msgHumi( 3, V_HUM );
      MyMessage msgPosi( 4, V_POSITION );
      
      //Adafruit_BME680 bme; // I2C
      Adafruit_BME680 bme(BME_CS); // hardware SPI
      //Adafruit_BME680 bme(BME_CS, BME_MOSI, BME_MISO,  BME_SCK);
      
      void setup()
      {
      
        if (!bme.begin()) {
          Serial.println("Could not find a valid BME680 sensor, check wiring!");
          while (1);
        }
        // Set up oversampling and filter initialization
        bme.setTemperatureOversampling(BME680_OS_8X);
        bme.setPressureOversampling(BME680_OS_4X);
        bme.setHumidityOversampling(BME680_OS_2X);
        bme.setIIRFilterSize(BME680_FILTER_SIZE_3);
        //bme.setGasHeater(320, 150); // 320*C for 150 ms
      
        delay(2000);
        
      }
      
      void presentation()
      {
      	// Send the sketch version information to the gateway and controller
      	sendSketchInfo("Passive node", "1.0");
      
      	// Register all sensors to gw (they will be created as child devices)
      	present( 1, S_TEMP );
        present( 2, S_BARO );
        present( 3, S_HUM );
        present( 4, S_GPS );
      }
      
      void loop()
      {
      	// generate some random data
      	//send(msg.set(25.0+random(0,30)/10.0,2));
      
        if (! bme.performReading()) {
          Serial.println("Failed to perform reading :(");
          return;
        }
        
        float temp = bme.temperature; //C
        send(msgTemp.set(temp,2));
      
        float pres = bme.pressure/100.00; //hPa
        send(msgPres.set(pres,2));
      
        float humi = bme.humidity; //%
        send(msgHumi.set(humi,2));
      
        float alti = bme.readAltitude(SEALEVELPRESSURE_HPA);
        send(msgPosi.set(alti,2));
          
      /*
        Serial.print("Pressure = ");
        Serial.print(bme.pressure / 100.0);
        Serial.println(" hPa");
      
        Serial.print("Humidity = ");
        Serial.print(bme.humidity);
        Serial.println(" %");
      
        Serial.print("Gas = ");
        Serial.print(bme.gas_resistance / 1000.0);
        Serial.println(" KOhms");
      
        Serial.print("Approx. Altitude = ");
        Serial.print(bme.readAltitude(SEALEVELPRESSURE_HPA));
        Serial.println(" m");
        */
        
      	sleep(10000);
      }
      

      When define MY_DEBUG is UNcommented. Everything works as expected - I receive data for all 4 sensors in MQTT broker.

      13:20:30.390 ->  
      13:20:30.390 ->  __  __       ____
      13:20:30.390 -> |  \/  |_   _/ ___|  ___ _ __  ___  ___  _ __ ___
      13:20:30.390 -> | |\/| | | | \___ \ / _ \ `_ \/ __|/ _ \| `__/ __|
      13:20:30.390 -> | |  | | |_| |___| |  __/ | | \__ \  _  | |  \__ \
      13:20:30.390 -> |_|  |_|\__, |____/ \___|_| |_|___/\___/|_|  |___/
      13:20:30.390 ->         |___/                      2.3.2
      13:20:30.424 -> 
      13:20:30.424 -> 16 MCO:BGN:INIT NODE,CP=RLNPA---,FQ=8,REL=255,VER=2.3.2
      13:20:30.424 -> 28 TSM:INIT
      13:20:30.424 -> 28 TSF:WUR:MS=0
      13:20:30.424 -> 30 RFM95:INIT
      13:20:30.424 -> 32 RFM95:INIT:PIN,CS=8,IQP=2,IQN=0
      13:20:30.424 -> 47 RFM95:PTX:LEVEL=13
      13:20:30.424 -> 49 TSM:INIT:TSP OK
      13:20:30.424 -> 51 TSM:INIT:TSP PSM
      13:20:30.424 -> 53 TSM:INIT:STATID=100
      13:20:30.424 -> 55 TSF:SID:OK,ID=100
      13:20:30.457 -> 57 TSM:FPAR
      13:20:30.457 -> 59 TSM:FPAR:STATP=255
      13:20:30.457 -> 61 TSM:ID
      13:20:30.457 -> 61 TSM:ID:OK
      13:20:30.457 -> 63 TSM:UPL:DISABLED
      13:20:30.457 -> 65 TSM:READY:ID=100,PAR=255,DIS=1
      13:20:30.457 -> 69 RFM95:SWR:SEND,TO=255,SEQ=0,RETRY=0
      13:20:30.523 -> 122 ?TSF:MSG:SEND,100-100-255-0,s=255,c=3,t=15,pt=6,l=2,sg=0,ft=0,st=OK:0100
      13:20:30.590 -> 184 RFM95:SAC:SEND ACK,TO=0,SEQ=243,RSSI=-64,SNR=9
      13:20:30.623 -> 233 TSF:MSG:READ,0-0-100,s=255,c=3,t=15,pt=6,l=2,sg=0:0100
      13:20:30.623 -> 241 RFM95:SWR:SEND,TO=255,SEQ=2,RETRY=0
      13:20:30.689 -> 299 ?TSF:MSG:SEND,100-100-255-0,s=255,c=0,t=17,pt=0,l=5,sg=0,ft=0,st=OK:2.3.2
      13:20:30.689 -> 307 RFM95:SWR:SEND,TO=255,SEQ=3,RETRY=0
      13:20:30.756 -> 360 ?TSF:MSG:SEND,100-100-255-0,s=255,c=3,t=6,pt=1,l=1,sg=0,ft=0,st=OK:255
      13:20:32.779 -> 2369 RFM95:SWR:SEND,TO=255,SEQ=4,RETRY=0
      13:20:32.849 -> 2437 ?TSF:MSG:SEND,100-100-255-0,s=255,c=3,t=11,pt=0,l=12,sg=0,ft=0,st=OK:Passive node
      13:20:32.849 -> 2447 RFM95:SWR:SEND,TO=255,SEQ=5,RETRY=0
      13:20:32.915 -> 2504 ?TSF:MSG:SEND,100-100-255-0,s=255,c=3,t=12,pt=0,l=3,sg=0,ft=0,st=OK:1.0
      13:20:32.915 -> 2512 RFM95:SWR:SEND,TO=255,SEQ=6,RETRY=0
      13:20:32.981 -> 2566 ?TSF:MSG:SEND,100-100-255-0,s=1,c=0,t=6,pt=0,l=0,sg=0,ft=0,st=OK:
      13:20:32.981 -> 2574 RFM95:SWR:SEND,TO=255,SEQ=7,RETRY=0
      13:20:33.014 -> 2627 ?TSF:MSG:SEND,100-100-255-0,s=2,c=0,t=8,pt=0,l=0,sg=0,ft=0,st=OK:
      13:20:33.014 -> 2635 RFM95:SWR:SEND,TO=255,SEQ=8,RETRY=0
      13:20:33.081 -> 2686 ?TSF:MSG:SEND,100-100-255-0,s=3,c=0,t=7,pt=0,l=0,sg=0,ft=0,st=OK:
      13:20:33.081 -> 2695 RFM95:SWR:SEND,TO=255,SEQ=9,RETRY=0
      13:20:33.147 -> 2748 ?TSF:MSG:SEND,100-100-255-0,s=4,c=0,t=38,pt=0,l=0,sg=0,ft=0,st=OK:
      13:20:33.147 -> 2756 MCO:REG:NOT NEEDED
      13:20:33.147 -> 2758 MCO:BGN:STP
      13:20:35.170 -> 4773 MCO:BGN:INIT OK,TSP=1
      13:20:35.535 -> 5144 RFM95:SWR:SEND,TO=255,SEQ=10,RETRY=0
      13:20:35.601 -> 5203 ?TSF:MSG:SEND,100-100-255-0,s=1,c=1,t=0,pt=7,l=5,sg=0,ft=0,st=OK:21.32
      13:20:35.601 -> 5212 RFM95:SWR:SEND,TO=255,SEQ=11,RETRY=0
      13:20:35.667 -> 5271 ?TSF:MSG:SEND,100-100-255-0,s=2,c=1,t=4,pt=7,l=5,sg=0,ft=0,st=OK:947.89
      13:20:35.701 -> 5279 RFM95:SWR:SEND,TO=255,SEQ=12,RETRY=0
      13:20:35.734 -> 5337 ?TSF:MSG:SEND,100-100-255-0,s=3,c=1,t=1,pt=7,l=5,sg=0,ft=0,st=OK:56.07
      13:20:36.132 -> 5715 RFM95:SWR:SEND,TO=255,SEQ=13,RETRY=0
      13:20:36.198 -> 5775 ?TSF:MSG:SEND,100-100-255-0,s=4,c=1,t=49,pt=7,l=5,sg=0,ft=0,st=OK:558.78
      13:20:36.198 -> 5783 MCO:SLP:MS=10000,SMS=0,I1=255,M1=255,I2=255,M2=255
      13:20:36.198 -> 5789 TSF:TDI:TSL
      13:20:36.198 -> 5791 RFM95:RSL
      
      mosquitto_sub -v -h 192.168.1.227 -t "868-out/#"
      868-out/100/1/1/0/0 21.50
      868-out/100/2/1/0/4 947.91
      868-out/100/3/1/0/1 55.92
      868-out/100/4/1/0/49 558.78
      868-out/100/255/0/0/17 2.3.2
      868-out/100/255/3/0/6 255
      868-out/100/255/3/0/11 Passive node
      868-out/100/255/3/0/12 1.0
      868-out/100/1/0/0/6 (null)
      868-out/100/2/0/0/8 (null)
      868-out/100/3/0/0/7 (null)
      868-out/100/4/0/0/38 (null)
      868-out/100/1/1/0/0 21.32
      868-out/100/2/1/0/4 947.89
      868-out/100/3/1/0/1 56.07
      868-out/100/4/1/0/49 558.78
      868-out/100/1/1/0/0 21.38
      868-out/100/2/1/0/4 947.89
      868-out/100/3/1/0/1 56.10
      868-out/100/4/1/0/49 558.78
      

      When comment OUT line 30 as //define MY_DEBUG - I only receive data for some sensors - I am missing data for sensor id 2.

      13:22:04.062 ->  
      13:22:04.062 ->  __  __       ____
      13:22:04.062 -> |  \/  |_   _/ ___|  ___ _ __  ___  ___  _ __ ___
      13:22:04.062 -> | |\/| | | | \___ \ / _ \ `_ \/ __|/ _ \| `__/ __|
      13:22:04.095 -> | |  | | |_| |___| |  __/ | | \__ \  _  | |  \__ \
      13:22:04.095 -> |_|  |_|\__, |____/ \___|_| |_|___/\___/|_|  |___/
      13:22:04.095 ->         |___/                      2.3.2
      13:22:04.095 -> 
      13:22:04.095 -> 16 RFM95:INIT
      13:22:04.095 -> 24 RFM95:INIT:PIN,CS=8,IQP=2,IQN=0
      13:22:04.128 -> 38 RFM95:PTX:LEVEL=13
      13:22:04.128 -> 40 RFM95:SWR:SEND,TO=255,SEQ=0,RETRY=0
      13:22:04.228 -> 157 RFM95:SAC:SEND ACK,TO=0,SEQ=244,RSSI=-65,SNR=12
      13:22:04.294 -> 206 RFM95:SWR:SEND,TO=255,SEQ=2,RETRY=0
      13:22:04.327 -> 264 RFM95:SWR:SEND,TO=255,SEQ=3,RETRY=0
      13:22:06.384 -> 2318 RFM95:SWR:SEND,TO=255,SEQ=4,RETRY=0
      13:22:06.483 -> 2385 RFM95:SWR:SEND,TO=255,SEQ=5,RETRY=0
      13:22:06.517 -> 2443 RFM95:SWR:SEND,TO=255,SEQ=6,RETRY=0
      13:22:06.583 -> 2496 RFM95:SWR:SEND,TO=255,SEQ=7,RETRY=0
      13:22:06.649 -> 2549 RFM95:SWR:SEND,TO=255,SEQ=8,RETRY=0
      13:22:06.682 -> 2603 RFM95:SWR:SEND,TO=255,SEQ=9,RETRY=0
      13:22:09.136 -> 5038 RFM95:SWR:SEND,TO=255,SEQ=10,RETRY=0
      13:22:09.202 -> 5095 RFM95:SWR:SEND,TO=255,SEQ=11,RETRY=0
      13:22:09.235 -> 5154 RFM95:SWR:SEND,TO=255,SEQ=12,RETRY=0
      13:22:09.667 -> 5582 RFM95:SWR:SEND,TO=255,SEQ=13,RETRY=0
      13:22:09.733 -> 5640 RFM95:RSL
      
      mosquitto_sub -v -h 192.168.1.227 -t "868-out/#"
      868-out/100/255/0/0/17 2.3.2
      868-out/100/255/3/0/11 Passive node
      868-out/100/1/0/0/6 (null)
      868-out/100/3/0/0/7 (null)
      868-out/100/1/1/0/0 21.39
      868-out/100/3/1/0/1 56.28
      868-out/100/4/1/0/49 559.49
      868-out/100/1/1/0/0 21.45
      868-out/100/3/1/0/1 56.22
      868-out/100/4/1/0/49 559.31
      

      Am I doing something wrong?

      posted in Bug Reports
      tssk
      tssk
    • RE: Which radio / wireless module to choose? Please recommend

      I finished gateway for my attic - What did you build today (Pictures) ?:

      As this will be under roof but without any isolation I try to put small silica gel bag (I collect them from other electronics packaging) inside and will see. I think it should be suitable. I am thinking of adding temperature and humidity sensor... that could also help me show how much humidity is around the year actually.

      I might use the resin / epoxy stuff for some watering projects 🙂

      posted in Hardware
      tssk
      tssk
    • RE: What did you build today (Pictures) ?

      MYS PoE MQTT Gateway with 868Mhz LoRa radio in IP55 85mm x 85mm box

      • arduino pro mini 3.3V clone
      • SX1276 with spring antenna
      • W5500 lite
      • 5V 802.3at power over ethernet splitter (gutted)
      • SPELSBERG IP55 box

      gw1.jpeg gw2.jpeg gw3.jpeg

      posted in General Discussion
      tssk
      tssk
    • RE: Which radio / wireless module to choose? Please recommend

      @skywatch Thanks for tips. I do not think there will be any problem with inhouse - nodes. And regarding the nodes in beehives - I expect that bees maintain +10C at least. But that is one of the things I want to find out 🙂

      Any experience with silica gel packages in the box with node?

      posted in Hardware
      tssk
      tssk
    • RE: Which radio / wireless module to choose? Please recommend

      I would like to thank everyone for suggestions and comments.

      I did 3 quick tests with two SX1276 based chips (868MHz LoRa) I already had.

      I made simple 5V poe powered mysensors mqtt gateway with arduino pro mini 3.3V, W5500 lite and SX1276 radio
      test-gateway.jpg

      Simple 9V battery powered mysensors passive node with arduino pro mini 3.3V, BME680 (for some reason the sensor does not work when connected over SPI with the radio module at the same time - I have to investigate that ) and SX1276 radio
      test-node.jpeg

      First test was inside house - I placed the node inside the freezer on the opposite side of house (approx 15m from gw) with concrete ceiling between. All messages were delivered.

      Second test was outside the house - I placed the node under the beehives (approx 50m from gw). All messages were delivered.
      test-ok.png

      Third test was also outside the house - I placed the node at the end of our property (approx 140m from gw). But no message was delivered.
      test-notok.png

      I expected 140m would not be problem for LoRa chip but I think this may be improved with some antenna fiddling. But overall I am very happy with the results. So my current decision is to go with this setup but to use 2 or 3 1.5V AA batteries instead of 9V.

      posted in Hardware
      tssk
      tssk
    • RE: Ethernet / MQTT PoE gateway for 16 reed switches

      So I finally changed the splitter connector to USB micro and it is a bit more polished now 🙂

      IMG_20200928_134535.jpg

      I also connected it to openHab2 via MQTT binding. So in case any one is interested here is the configuration for the thing and items.

      Bridge mqtt:broker:openhab [ host="localhost" ] {
        Thing topic mag "Magnety" {
          Channels:
            Type contact : pin17  [ stateTopic="mag-out/0/17/1/0/16", on="1", off="0"]
            Type contact : pin16  [ stateTopic="mag-out/0/16/1/0/16", on="1", off="0"]
            Type contact : pin15  [ stateTopic="mag-out/0/15/1/0/16", on="1", off="0"]
            Type contact : pin14  [ stateTopic="mag-out/0/14/1/0/16", on="1", off="0"]
            Type contact  : pin1  [ stateTopic="mag-out/0/1/1/0/16", on="1", off="0"]
            Type contact  : pin0  [ stateTopic="mag-out/0/0/1/0/16", on="1", off="0"]
            Type contact  : pin2  [ stateTopic="mag-out/0/2/1/0/16", on="1", off="0"]
            Type contact  : pin3  [ stateTopic="mag-out/0/3/1/0/16", on="1", off="0"]
            Type contact  : pin4  [ stateTopic="mag-out/0/4/1/0/16", on="1", off="0"]
            Type contact  : pin5  [ stateTopic="mag-out/0/5/1/0/16", on="1", off="0"]
            Type contact  : pin6  [ stateTopic="mag-out/0/6/1/0/16", on="1", off="0"]
            Type contact  : pin7  [ stateTopic="mag-out/0/7/1/0/16", on="1", off="0"]
            Type contact  : pin8  [ stateTopic="mag-out/0/8/1/0/16", on="1", off="0"]
            Type contact  : pin9  [ stateTopic="mag-out/0/9/1/0/16", on="1", off="0"]
            Type contact : pin19  [ stateTopic="mag-out/0/19/1/0/16", on="1", off="0"]
            Type contact : pin18  [ stateTopic="mag-out/0/18/1/0/16", on="1", off="0"]
            }
      }
      
      Contact mag17 "Magnet 17" <window> { channel="mqtt:topic:openhab:mag:pin17" }
      Contact mag16 "Magnet 16" <window> { channel="mqtt:topic:openhab:mag:pin16" }
      Contact mag15 "Magnet 15" <window> { channel="mqtt:topic:openhab:mag:pin15" }
      Contact mag14 "Magnet 14" <window> { channel="mqtt:topic:openhab:mag:pin14" }
      Contact mag1  "Magnet 1"  <window> { channel="mqtt:topic:openhab:mag:pin1" }
      Contact mag0  "Magnet 0"  <window> { channel="mqtt:topic:openhab:mag:pin0" }
      Contact mag2  "Magnet 2"  <window> { channel="mqtt:topic:openhab:mag:pin2" }
      Contact mag3  "Magnet 3"  <window> { channel="mqtt:topic:openhab:mag:pin3" }
      Contact mag4  "Magnet 4"  <window> { channel="mqtt:topic:openhab:mag:pin4" }
      Contact mag5  "Magnet 5"  <window> { channel="mqtt:topic:openhab:mag:pin5" }
      Contact mag6  "Magnet 6"  <window> { channel="mqtt:topic:openhab:mag:pin6" }
      Contact mag7  "Magnet 7"  <window> { channel="mqtt:topic:openhab:mag:pin7" }
      Contact mag8  "Magnet 8"  <window> { channel="mqtt:topic:openhab:mag:pin8" }
      Contact mag9  "Magnet 9"  <window> { channel="mqtt:topic:openhab:mag:pin9" }
      Contact mag19 "Magnet 19" <window> { channel="mqtt:topic:openhab:mag:pin19" }
      Contact mag18 "Magnet 18" <window> { channel="mqtt:topic:openhab:mag:pin18" }
      

      Quick preview in openHab2 PaperUI
      openhab.png

      I would also like to share the arduino code as I have some question.

      #include <Ethernet.h>
      #include <MySensors.h>
      
      
      #define SKETCH_NAME "Magnety"
      #define SKETCH_MAJOR_VER "1"
      #define SKETCH_MINOR_VER "0"
      
      byte pins[] = { 17, 16, 15, 14, 1, 0, 2, 3, 4, 5, 6, 7, 8, 9, 19, 18 };
      int sentValues[16] = { 1, 1, 1, 1, 1, 1, 1, 1, 1, 1, 1, 1, 1, 1, 1, 1 };
      
      MyMessage messages[16] = {
              MyMessage( 17, V_TRIPPED )
              ,MyMessage( 16, V_TRIPPED )
              ,MyMessage( 15, V_TRIPPED )
              ,MyMessage( 14, V_TRIPPED )
              ,MyMessage(  1, V_TRIPPED )
              ,MyMessage(  0, V_TRIPPED )
              ,MyMessage(  2, V_TRIPPED )
              ,MyMessage(  3, V_TRIPPED )
              ,MyMessage(  4, V_TRIPPED )
              ,MyMessage(  5, V_TRIPPED )
              ,MyMessage(  6, V_TRIPPED )
              ,MyMessage(  7, V_TRIPPED )
              ,MyMessage(  8, V_TRIPPED )
              ,MyMessage(  9, V_TRIPPED )
              ,MyMessage( 19, V_TRIPPED )
              ,MyMessage( 18, V_TRIPPED )
      };
      
      void setup()
      {
      
              byte pinsCount = sizeof( pins ) / sizeof( pins[0] );
              for( byte i = 0; i < pinsCount; i++ )
              {
                      pinMode( pins[i], INPUT );
              }
      
      }
      
      void presentation()
      {
              // Send the sketch version information to the gateway and Controller
              sendSketchInfo(SKETCH_NAME, SKETCH_MAJOR_VER "." SKETCH_MINOR_VER);
      
              byte pinsCount = sizeof( pins ) / sizeof( pins[0] );
              for( byte i = 0; i < pinsCount; i++ )
              {
                      //This seems not to be usefull with openhab mqtt bindings
                      //present( pins[i], S_DOOR );
                      //But this seems to be more uefull when controller is started after gateway
                      send( messages[i].set( sentValues[i] ) );
              }
      }
      
      void loop()
      {
      
              int value;
      
              // Short delay to allow buttons to properly settle
              sleep(5);
      
              byte pinsCount = sizeof( pins ) / sizeof( pins[0] );
              for( byte i = 0; i < pinsCount; i++ )
              {
                      value = digitalRead( pins[i] );
                      if ( value != sentValues[i] ) {
                              // Value has changed from last transmission, send the updated value
                              send( messages[i].set( value==HIGH ? 1 : 0 ) );
                              sentValues[i] = value;
                      }
              }
      
      }
      

      I noticed the gateway sends the presentation of sensors all the time but that is not of much use in my setup. On the other hand it is useful to send the actual state periodically as it is known without remembering or if the controller started later than GW. But I have a feeling that I might misused the presentation function. Does any one know if this approach is ok by the "mysensors way"?

      Of course I welcome any suggestion for improvments 🙂

      Thanks

      posted in My Project
      tssk
      tssk
    • RE: Which radio / wireless module to choose? Please recommend

      @zboblamont said in Which radio / wireless module to choose? Please recommend:

      All my Nodes have 2xAA and are still going after 2 years..

      So you think that something like Arduino Pro Mini 3.3V + DHT22 or BME280 + 433/868 radio module would run on 2x1.5V AA battery ok? No extra components (like step up) or modifications like removing LED or regulator from Arduino?

      posted in Hardware
      tssk
      tssk
    • RE: Which radio / wireless module to choose? Please recommend

      @zboblamont The reasoning for putting the GW in the attic were:

      • most of the sensors I plan would be in the house level just under which has wooden ceiling so there would be good connection

      • if ignoring one brick wall there would be "line" of sight to the beehives position

      • I have no problem going to attic in case something breaks on the GW and it would be connected by ethernet sending data to MQTT broker

      But I would like to use as good communications modules as possible because in the future I would like to add more sensors around the house where also thick concrete ceilings are. And I would not like to run anither type of radio for that.

      posted in Hardware
      tssk
      tssk
    • RE: Which radio / wireless module to choose? Please recommend

      @mfalkvidd Thank you for your suggestions! Can I please have additional questions?

      Can be bought for different frequency bands

      I am in Europe/Czech Republic so it should be 433MHz / 868MHz. Is there any difference between these two especially regarding range / antenna complexity?

      Should I look for specific chip vendor or is the quality all the same?

      Could you help me understand why different modules for GW and node are mentioned by @NeverDie said in Second setup, choosing a radio ? I can reach every corner of our property with a RFM69HCW on the GW and a non-amplified RFM69CW on the node.

      If you pay the extra royalty to Semtech for LoRa, do not use FSK.

      Do I understand it correctly that LoRa technical parameters (especially power consumption and range) are better than FSK mode (altough more expensive and lower throughput - but that is probably not important for transmitting few numbers)?

      ( I already have two SX1278 433Mhz chips and two SX1276 868Mhz chips that I bought for testing. But I was little bit disappointed when I found out that RH_RF95 does not support the FSK mode as it limited my options to choose what mode to use. Also I notice that 433Mhz modules were provided with a little different spring antennas than 868Mhz ones. )

      A 9V battery is not a good choice.

      I do not understand the electricity stuff much more than + - and number of volts (discovering Arduino onboard regulator was like Christmas for me!) so I wanted to keep things simple (not to add additional modules like step up convertor) and better give a bit more juice than less (I am not sure how would all the sensors and radio module work with 2x1.5V). Would the 9V really so inefficient? What about 3x1,5V?

      posted in Hardware
      tssk
      tssk
    • Which radio / wireless module to choose? Please recommend

      Hello,

      (sorry if this is a duplicate but I could not quite find answers for my questions)

      I would like to build radio/wireless sensors running on battery and I am not sure what radio / wireless modules to choose. I would like to achieve:

      • sensors based on Arduino Pro Mini 3.3V or 5V (I like the size)
      • sensors powered by 9V battery (seem easy to connect and powerful enough to me)
      • about 7 or 10 temperature sensors inside my house (13m x 7m 2 stores)
      • if possible I would like to put simillar sensors approx 50m from the house inside beehive
      • not too expensive as ( plan to buy about 10 modules )
      • easy to solder/connect to standard 2,54mm DPS

      My idea was to put the gateway to attic at the side were the beehives are.

      I prefer to use same module for everything but from some forum post I got impression that the GW might better use different module?

      Should I use LoRa mode or FSK mode?

      Could someone please recommend modules I should buy? And what kind of antenna?

      In case you have some comment for my preferences I will be happy to head them as I am new to this.

      Thank you very much

      Tomas

      posted in Hardware
      tssk
      tssk
    • RE: Ethernet / MQTT PoE gateway for 16 reed switches

      @Yveaux Thanks for the tips

      you could have used a nano (saves separate usb socket)

      That is a good point, but I already bought 10x Pro Mini because I plan to also make some sensors where size matters (I would like to have sensors in standard light switch box). And my idea was to use the same HW as much as possible because of spare parts (I have no idea how reliable these things are - this is why did not solder it directly but used the headers) and also I can reuse experience from each sensor build for another (I expect that there are small details than might differ between different boards).

      I wonder how you go with all the cabling from here? I usually prefer a more decentralized approach, where each (or maybe a couple) sensor has its own node. These can then be battery powered and cabling will be minimal.

      I already have the wiring ready from the time when I build my house, actually these reed switches are drilled in to the window frame and all the cables lead to the same place - shed under stair that I call "server room" 🙂 Original idea was that it will be connected to some standard alarm system like Paradox or Honeywell.

      But with the planned room sensors I will most probably go for the battery powered sensors with some sort of radio connection (another aspect that mysensors solution will easily provide) as leading the cables now to each room would be very complicated and messy.

      posted in My Project
      tssk
      tssk
    • Ethernet / MQTT PoE gateway for 16 reed switches

      Hello,

      few days ago I accidentally came across mysensors (how is it that I did not find it earlier as I am looking into rpi, arduino and home automation for about 2 years?) and I was exited from the first moment . For some time now I was working on several small sensors for my home but did not really like any of the solutions I met so far - my idea was ethernet + poe + rest api + simple progressive mobile UI. Closest I got was arduino pro mini with W5500 + 5V poe splitter + custom sketch using webduino to provide REST API + mozilla iot gateway.

      I had (nearly) finished the HW for my window/door reed switches. But I got into trouble with REST API + mozilla iot gateway. Testing the REST API worked ok from browser but somehow the mozilla iot gateway was unable to load all the presented switches reliably. I have to say that until this problem I had quite a good experience with it - I had it connected to few thermometers and relays to operate heating.

      I saw the sample sketches for mysensors + mycontroller.org and it "just clicked" to my idea. I edited the sketch and installed mycontroller and successfully tested both Ethernet Gateway and MQTT Gateway in few hours. I think I will stick with MQTT for more compatibility (I did not find any description about the mysensors communication protocol so I have no idea how standardized it is).

      So I want to share my HW + say thanks for the great project!

      IMG_20200821_130334.jpg
      Designed to be powered over usb micro (so it can run without poe) as these chargers are everywhere now.

      IMG_20200821_130347.jpg
      The barrel connector is temporary until I modify the poe splitter output to usb micro.

      IMG_20200821_130658.jpg
      Sample connection - I have such reed switches installed in my windows and doors.

      Of course I will be happy for any constructive criticism and suggestions (I do not have any education in electronics so try not to be very harsh about my circuit design and soldering though 😉 ).

      posted in My Project
      tssk
      tssk