plant watering node
-
This is my first MySensors sketch, I did some test sketches but they were mainly to be familiarized with the different MySensors "Build" sketches.
I wanted to irrigate my garden already, when I had set up the garden I had already laid cables and pipes for irrigation.
I also knew that in the middle of the garden I wanted to have a sort of I / O module with which I could measure the soil moisture and control the water valves.
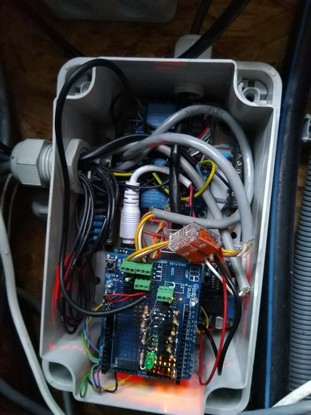
This I / O module I had already made with an Arduino Uno and a relay card and a voltage regulator to control both the valves and the uno with one power supply (24VDC for the valves).I searched for a long time for a good and reliable communication layer between this I / O and the central unit.
Thanks to a tip from someone at work, I came out on Domoticz as controller and that's how I came across MySensors as an ideal self-build protocol.In the end I made a sketch, adjusted the hardware design and finally arrived at what I now built.
At first I thought of an RF communication layer, but actually ethernet also appeared to work, and I had already built a cat5 cable so that choice was easy, even considering I think a wired connection is more reliable than a wireless one.I have used 4 soil moisture sensors that control via a transistor circuit, so there is only voltage on the sensors when they are read.
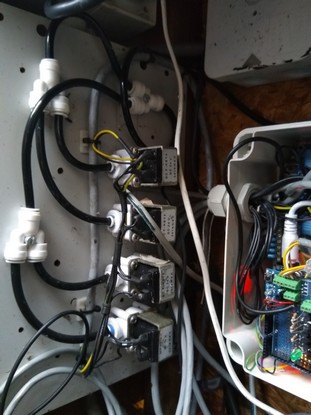
I also used 4 relays to control the four water valves.
In order to determine whether it is not too cold to water, I initially had two dallas temperature sensors in mind, but in the end they were nine.
I now measure the soil temperature at 4 depths (100, 50, 20, 10 cm), at 10cm above the ground, and at 1.5 meters.
In addition, I measure the soil temperature of the border, the water temperature and the temperature of the node.
finally I have made a rain sensor, I only have to install it.When programming I had some problems, at first the sensors reacted wrongly when it was wet they were domoticz that it was dry and vice versa.
but after some help from here on the forum I have been able to solve this.
link textAfter that I had some problems with getting the Dallas sensors working, but again I got help from the forum, and eventually the use of a 2K2 resistor instead of a 4K7 turned out to be the solution.
link text
I have used the unique sensor adress in the sketch to be shure that the sensors still are the same.For a long time the node has been at my desk to test, and after the nine dallas sensors have been working, I have installed everything outside.
From the 5 volt via the voltage regulator I also feed the Luftdaten sensor that I have hanging in the garden.
What I still have to do;
Last adjustments, including the reading time (is now at 1 minute, and this will be 15 minutes)
Placing the Rain sensor.
Replace food for a more water-resistant version.The final sketch, the comment's are in dutch.
/******************************************************************
 Created with PROGRAMINO IDE for Arduino - 06.09.2018 10:28:51
 Project     :Tuin beregening bij de put
 Libraries   :Mysensors en andere
 Author      :Dzjr
 Description :Sensor Node via Ethernet
******************************************************************/

// Debug uitgang via serieel (USB)
#define MY_DEBUG

// Ethernet
// Enable gateway ethernet module type
#define MY_GATEWAY_W5100

//Enable MY_IP_ADDRESS //we gebruiken geen DHCP
#define MY_IP_ADDRESS 192,168,0,145

// Gateway en Subnet
#define MY_IP_GATEWAY_ADDRESS 192,168,0,1
#define MY_IP_SUBNET_ADDRESS 255,255,255,0

// De Ethernet Poort
#define MY_PORT 5003

// Het MAC address, DEAD BEEF FEED = Standaard
#define MY_MAC_ADDRESS 0xDE, 0xAD, 0xBE, 0xEF, 0xFE, 0xED


#define MY_NODE_ID 10 // sensor node nummer, alleen voor RF
#include <Ethernet.h>
#include <SPI.h>
#include <MySensors.h>
#include <DallasTemperature.h>
#include <OneWire.h>


// Relais stukje
#define RELAY_PIN 2  // Arduino I/O voor het eerste relais
#define NUMBER_OF_RELAYS 4 // Totaal aangesloten relais
#define RELAY_ON 0  // GPIO waarde voor Aan
#define RELAY_OFF 1 // GPIO waarde voor Uit


// Dallas temp stukje
#define COMPARE_TEMP 1 // 1= zenden alleen bij verandering 0= direct zenden
#define ONE_WIRE_BUS 6
#define TEMPERATURE_PRECISION 12
#define MAX_ATTACHED_DS18B20 13
unsigned long SLEEP_TIME = 300; //slaaptijd tussen twee metingen in ms
OneWire oneWire(ONE_WIRE_BUS); //Een oneWire-exemplaar instellen om te communiceren met alle OneWire-apparaten
DallasTemperature sensors(&oneWire); //OneWire naar Dallas
float lastTemperature[MAX_ATTACHED_DS18B20];
int numSensors=0;
bool receivedConfig = false;
bool metric = true;

DeviceAddress Probe01 = { 0x28, 0xFF, 0x9B, 0x0D, 0xB3, 0x17, 0x04, 0xA9 }; // op print
DeviceAddress Probe02 = { 0x28, 0xB2, 0xC9, 0x77, 0x91, 0x11, 0x02, 0x9F }; // temp op -100 cm
DeviceAddress Probe03 = { 0x28, 0xED, 0x25, 0x77, 0x91, 0x13, 0x02, 0xFF }; // temp op -50 mtr
DeviceAddress Probe04 = { 0x28, 0xC5, 0x51, 0x77, 0x91, 0x0B, 0x02, 0x00 }; // temp op -20 cm
DeviceAddress Probe05 = { 0x28, 0xDC, 0x25, 0x77, 0x91, 0x13, 0x02, 0x25 }; // temp op -10 cm
DeviceAddress Probe06 = { 0x28, 0x54, 0x96, 0x77, 0x91, 0x08, 0x02, 0xA0 }; // temp op 10 cm
DeviceAddress Probe07 = { 0x28, 0x1F, 0x11, 0x43, 0x98, 0x25, 0x00, 0x8B }; // temp op 150 cm
DeviceAddress Probe08 = { 0x28, 0xFF, 0x0A, 0x63, 0x73, 0x16, 0x05, 0x9F }; // temp van water in put
DeviceAddress Probe09 = { 0x28, 0x98, 0x9C, 0x77, 0x91, 0x19, 0x02, 0xD7 }; // temp in border


// Initialiseer temperatuurbericht
MyMessage msg(0, V_TEMP);


//vochtsensoren stukje
#define CHILD_ID_MOISTURE1 11
#define CHILD_ID_MOISTURE2 12
#define CHILD_ID_MOISTURE3 13
#define CHILD_ID_MOISTURE4 14
#define CHILD_ID_RAIN 15
#define VOCHT_TRANS_PIN 7
#define VOCHT_PUT_1_PIN A0
#define VOCHT_PUT_2_PIN A1
#define VOCHT_PUT_3_PIN A2
#define VOCHT_PUT_4_PIN A3
#define REGEN_PIN A4
#define WACHTTIJD_VOCHT 30000 // tijd tussen twee metingen in miliseconden
#define STABILISEERTIJD 5000 // wachttijd voor metingen

MyMessage msg11(CHILD_ID_MOISTURE1, V_LEVEL);
MyMessage msg12(CHILD_ID_MOISTURE2, V_LEVEL);
MyMessage msg13(CHILD_ID_MOISTURE3, V_LEVEL);
MyMessage msg14(CHILD_ID_MOISTURE4, V_LEVEL);
MyMessage msg15(CHILD_ID_RAIN, V_TEXT);
int lastsoilValue11 = 0;
int lastsoilValue12 = 0;
int lastsoilValue13 = 0;
int lastsoilValue14 = 0;
int lastrainValue = 0;

// lowest and highest sensor readings:
const int sensorMin = 0;     // sensor minimum
const int sensorMax = 1024;  // sensor maximum


void before()
{sensors.begin();

  for (int sensor=1, pin=RELAY_PIN; sensor<=NUMBER_OF_RELAYS; sensor++, pin++) {
    // Set de Relais pinnen als uitgang
    pinMode(pin, OUTPUT);
    // Set relais uitgang als laatst bekende waarde (uit eeprom geheugen)
    digitalWrite(pin, loadState(sensor)?RELAY_ON:RELAY_OFF);
  }

  }

void setup()
{
 sensors.setWaitForConversion(false);
  pinMode(VOCHT_TRANS_PIN,OUTPUT);
  sensors.setResolution(TEMPERATURE_PRECISION);
 }

void presentation()
{
  // Send the sketch version information to the gateway and Controller
  sendSketchInfo("Beregening bij de Put", "1.1");

   numSensors = sensors.getDeviceCount();

  for (int i=0; i<numSensors && i<MAX_ATTACHED_DS18B20; i++)
  for (int sensor=1, pin=RELAY_PIN; sensor<=NUMBER_OF_RELAYS; sensor++, pin++)


      {
    // Register all sensors to gw (they will be created as child devices)
    present(i+21, S_TEMP);
    present(sensor, S_BINARY);
    present(CHILD_ID_MOISTURE1, S_MOISTURE);
    present(CHILD_ID_MOISTURE2, S_MOISTURE);
    present(CHILD_ID_MOISTURE3, S_MOISTURE);
    present(CHILD_ID_MOISTURE4, S_MOISTURE);
    present(CHILD_ID_RAIN, S_INFO);
  }
}


void loop()

{
{
  // Fetch temperatures from Dallas sensors
  sensors.requestTemperatures();

  // query conversion time and sleep until conversion completed
  int16_t conversionTime = sensors.millisToWaitForConversion(sensors.getResolution());

  wait(conversionTime);

  // Read temperatures and send them to controller
  for (int i=0; i<numSensors && i<MAX_ATTACHED_DS18B20; i++) {

    // Fetch and round temperature to one decimal
   // float temperature = static_cast<float>(static_cast<int>((getControllerConfig().isMetric?sensors.getTempCByIndex(i):sensors.getTempFByIndex(i)) * 10.)) / 10.;
  float temperature;
    // voor geadreseerde sensoren
    switch (i)  {
      case 0:
        temperature = sensors.getTempC(Probe01);
        break;
      case 1:
        temperature = sensors.getTempC(Probe02);
        break;
      case 2:
        temperature = sensors.getTempC(Probe03);
        break;
      case 3:
        temperature = sensors.getTempC(Probe04);
        break;
      case 4:
        temperature = sensors.getTempC(Probe05);
        break;
      case 5:
        temperature = sensors.getTempC(Probe06);
        break;
      case 6:
        temperature = sensors.getTempC(Probe07);
        break;
      case 7:
        temperature = sensors.getTempC(Probe08);
        break;
      case 8:
        temperature = sensors.getTempC(Probe09);
        break;
      default:
        temperature = sensors.getTempCByIndex(Probe09);
        break;
    }

    // Only send data if temperature has changed and no error
    #if COMPARE_TEMP == 1
    if (lastTemperature[i] != temperature && temperature != -127.00 && temperature != 85.00) {
    #else
    if (temperature != -127.00 && temperature != 85.00) {
    #endif

      // Send in the new temperature
      send(msg.setSensor(i+21).set(temperature,1));
      // Save new temperatures for next compare
      lastTemperature[i]=temperature;
    }
    }
    }
{
  //Vochtmetingen
  digitalWrite(VOCHT_TRANS_PIN,HIGH);
  wait(STABILISEERTIJD); // metingen stabiliseren

  int moistureLevel11 = (analogRead(VOCHT_PUT_1_PIN)) / 5.23;
    if (moistureLevel11 != lastsoilValue11) {
    send (msg11.set(moistureLevel11));
    lastsoilValue11 = moistureLevel11;}

  int moistureLevel12 = (analogRead(VOCHT_PUT_2_PIN)) / 5.23;
    if (moistureLevel12 != lastsoilValue12) {
    send (msg12.set(moistureLevel12));
    lastsoilValue12 = moistureLevel12;}

  int moistureLevel13 = (analogRead(VOCHT_PUT_3_PIN)) / 5.23;
    if (moistureLevel13 != lastsoilValue13) {
    send (msg13.set(moistureLevel13));
    lastsoilValue13 = moistureLevel13;}

  int moistureLevel14 = (analogRead(VOCHT_PUT_4_PIN) / 5.23);
    if (moistureLevel14 != lastsoilValue14) {
    send (msg14.set(moistureLevel14));
    lastsoilValue14 = moistureLevel14;}

  int rainLevel = map(analogRead(REGEN_PIN), sensorMin, sensorMax, 0, 3);

   switch (rainLevel) {
 case 0:    // Sensor is droog
    send(msg15.set("Het is droog"));
    break;
 case 1:    // Sensor raakt nat
    send(msg15.set("Het Regent"));
    break;
 case 2:   // Sensor is volledig bedekt met water
    send(msg15.set("Zware Regen"));
    break;
  }


  digitalWrite(VOCHT_TRANS_PIN,LOW);

  wait(WACHTTIJD_VOCHT);
}
}

void receive(const MyMessage &message)

{
  // We only expect one type of message from controller. But we better check anyway.
  if (message.type==V_STATUS)
  {
    // Change relay state
    digitalWrite(message.sensor-1+RELAY_PIN, message.getBool()?RELAY_ON:RELAY_OFF);
    // Store state in eeprom
    saveState(message.sensor, message.getBool());
  }
  }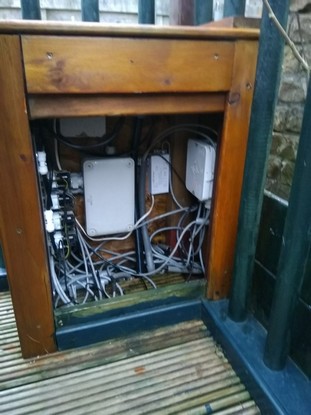
-
Nice work. I did someting like this but much simplified. Only one temperature sensor,one soil moisture that i never used , and a 24v AC controlled by 5v DC.
Do you know that this 24v valved(our european ones )work better with low voltage dc, because don't heat up, but need a start up kick from 9v or so and then decrease it to 5v and at that voltage they hold open position and don't get hot .
Domoticz have a timer for every day on summer,and on winter is off. Soil moisture will help in case of rain but i never finish the integration of this one🤔. Next spring i have to finish this
Thank you for sharing your project.👍 -
Nice work. I did someting like this but much simplified. Only one temperature sensor,one soil moisture that i never used , and a 24v AC controlled by 5v DC.
Do you know that this 24v valved(our european ones )work better with low voltage dc, because don't heat up, but need a start up kick from 9v or so and then decrease it to 5v and at that voltage they hold open position and don't get hot .
Domoticz have a timer for every day on summer,and on winter is off. Soil moisture will help in case of rain but i never finish the integration of this one🤔. Next spring i have to finish this
Thank you for sharing your project.👍Thanks for the compliment!
These valves are warm, but not hot, I do not know what they do when water flows.
I do not dare to say what the valves do with a lower DC voltage, I think they need a higher voltage to turn them on, and after that you can probably go with a lower voltage.
in this one I use 24VDC continuously for the valves.
This part is only the beginning, the water should come from an (underground) rain barrel, but I still have to make and program that control ..
dzjr
-
Very nice. 24V is a bit out of my normal range unfortunately. I bought some of these a while ago:
http://www.aliexpress.com/item/2-Position-3-Way-Electric-Mini-Micro-Solenoid-Valve-Air-Gas-Release-Exhaust-Discouraged-Solenoid-Exhaust/32877728582.html?spm=a2g0s.9042311.0.0.1ec64c4d69FPgm -
Very nice. 24V is a bit out of my normal range unfortunately. I bought some of these a while ago:
http://www.aliexpress.com/item/2-Position-3-Way-Electric-Mini-Micro-Solenoid-Valve-Air-Gas-Release-Exhaust-Discouraged-Solenoid-Exhaust/32877728582.html?spm=a2g0s.9042311.0.0.1ec64c4d69FPgm -
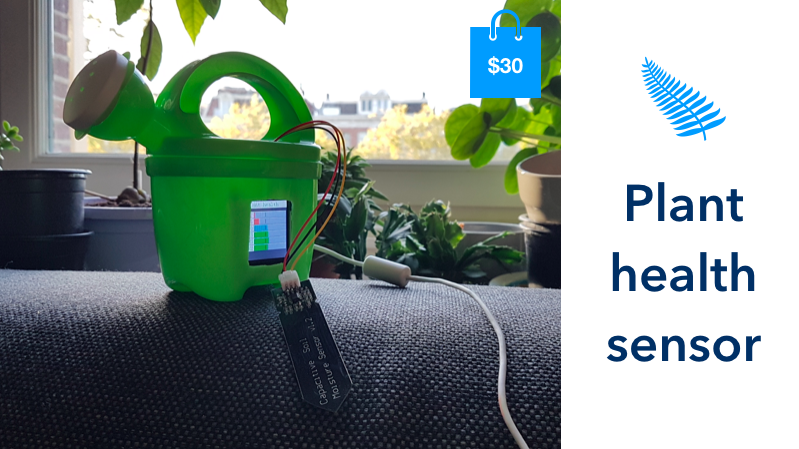
@dzjr Yes it is, in theory. it's a three-way valve. I haven't tested it yet though. For now my plant health monitor just monitors 6 plants. It's part of a large project about privacy in the smart home that I will be revealing in the coming year.
Hello! It looks like you're interested in this conversation, but you don't have an account yet.
Getting fed up of having to scroll through the same posts each visit? When you register for an account, you'll always come back to exactly where you were before, and choose to be notified of new replies (either via email, or push notification). You'll also be able to save bookmarks and upvote posts to show your appreciation to other community members.
With your input, this post could be even better 💗
Register Login