💬 Easy/Newbie PCB for MySensors
-
Hello @sundberg84. I watched your video 9+ 'MySensors Battery Node 2xAA - EasyPCB (Nrf24l01+)and Temp Sensor' . I have two questions about this video:
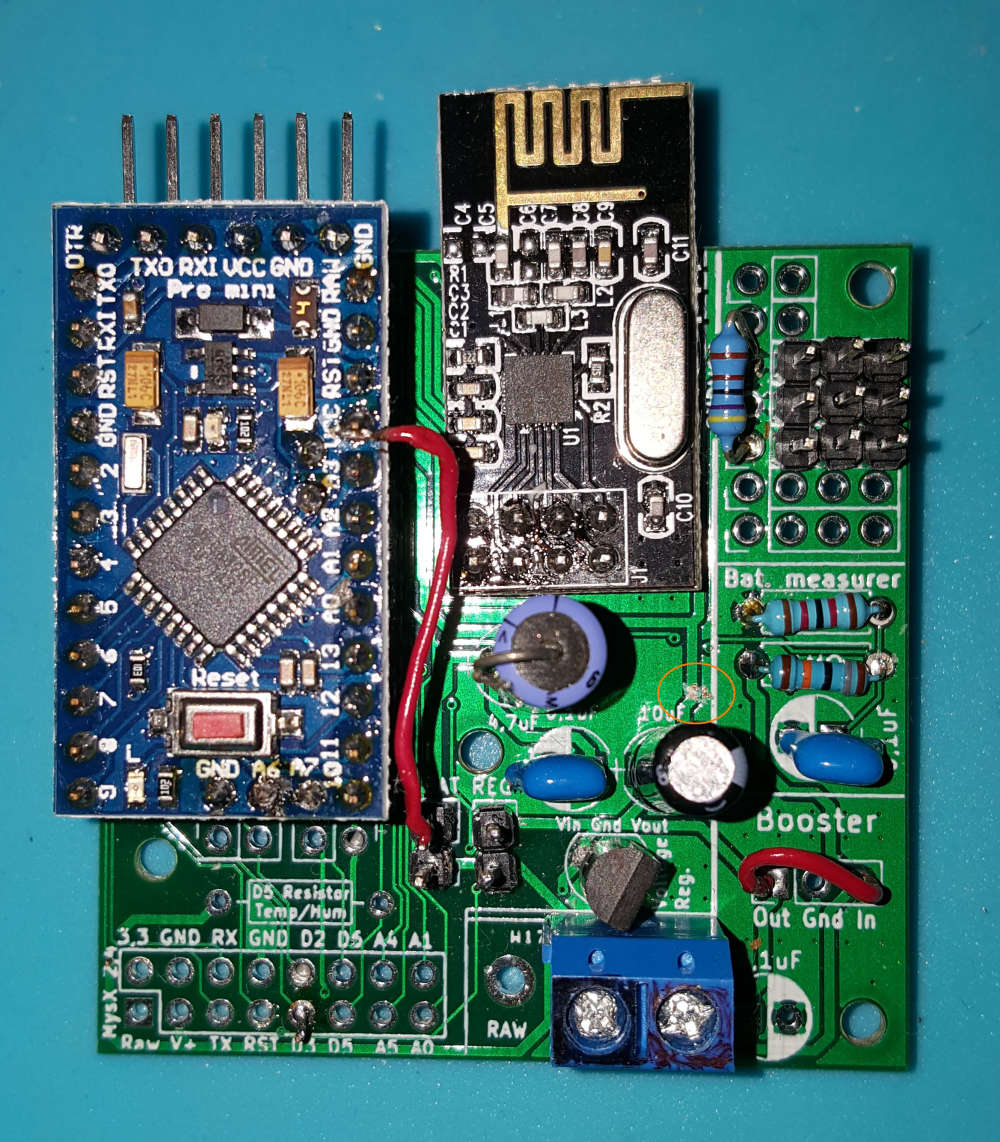
- I noticed you connected the tempsensor to the extra prototype part of the board, but i could not see in the video how you connected signal pin of the sensor to the arduino.
- you added a resistor to D5 Temp/Hum, but you did not add the sensor to the mysX2.4 part of the board. Why is that?
-
Hello @sundberg84. I watched your video 9+ 'MySensors Battery Node 2xAA - EasyPCB (Nrf24l01+)and Temp Sensor' . I have two questions about this video:
- I noticed you connected the tempsensor to the extra prototype part of the board, but i could not see in the video how you connected signal pin of the sensor to the arduino.
- you added a resistor to D5 Temp/Hum, but you did not add the sensor to the mysX2.4 part of the board. Why is that?
@mister_ik said in 💬 Easy/Newbie PCB for MySensors:
Hello @sundberg84. I watched your video 9+ 'MySensors Battery Node 2xAA - EasyPCB (Nrf24l01+)and Temp Sensor' . I have two questions about this video:
- I noticed you connected the tempsensor to the extra prototype part of the board, but i could not see in the video how you connected signal pin of the sensor to the arduino.
- you added a resistor to D5 Temp/Hum, but you did not add the sensor to the mysX2.4 part of the board. Why is that?
I connect it on the back with a normal wire to D5 resistor input. So both of your observations above are correct.
-
@mister_ik said in 💬 Easy/Newbie PCB for MySensors:
Hello @sundberg84. I watched your video 9+ 'MySensors Battery Node 2xAA - EasyPCB (Nrf24l01+)and Temp Sensor' . I have two questions about this video:
- I noticed you connected the tempsensor to the extra prototype part of the board, but i could not see in the video how you connected signal pin of the sensor to the arduino.
- you added a resistor to D5 Temp/Hum, but you did not add the sensor to the mysX2.4 part of the board. Why is that?
I connect it on the back with a normal wire to D5 resistor input. So both of your observations above are correct.
@sundberg84 yes i thought so, but i want to make sure. I have some Rev 10 boards and i was working on a node for my bathroom with a DHT11 sensor. I had some problems with it, therefore watching your video. But it looks like the step up booster was not working correctly. Unfortunately removing the booster i damaged the board because with a new booster the arduino won't get power any more. So this board only works without the booster (and reg jumper connected). Any idea how long this setup (with removed led on arduino) will last on batteries?
-
@sundberg84 yes i thought so, but i want to make sure. I have some Rev 10 boards and i was working on a node for my bathroom with a DHT11 sensor. I had some problems with it, therefore watching your video. But it looks like the step up booster was not working correctly. Unfortunately removing the booster i damaged the board because with a new booster the arduino won't get power any more. So this board only works without the booster (and reg jumper connected). Any idea how long this setup (with removed led on arduino) will last on batteries?
@mister_ik - well, 2-4 weeks more or less unless you reprogram the fuses and bootloader.
-
@mister_ik - well, 2-4 weeks more or less unless you reprogram the fuses and bootloader.
@sundberg84 ooh that is not very long ..i hoped for a couple of months....but then I should consider this board as depreciated and build a new one and use this for development. Thanks for your reaction.
-
@sundberg84 ooh that is not very long ..i hoped for a couple of months....but then I should consider this board as depreciated and build a new one and use this for development. Thanks for your reaction.
@mister_ik you can always use wired to repair the damaged tracks.
-
@sundberg84, thanks so much for this board, I bought 10 of them. This has made my sensor projects much easier and they look better too! I think I will get some of the RFM69 version next.
I have a lot of gel lead acid batteries (the 7.2AH type often used in UPSs), and I have been running an earlier prototype off that. I have now just changed over to your board and this is how I modified it to work the way I wanted:
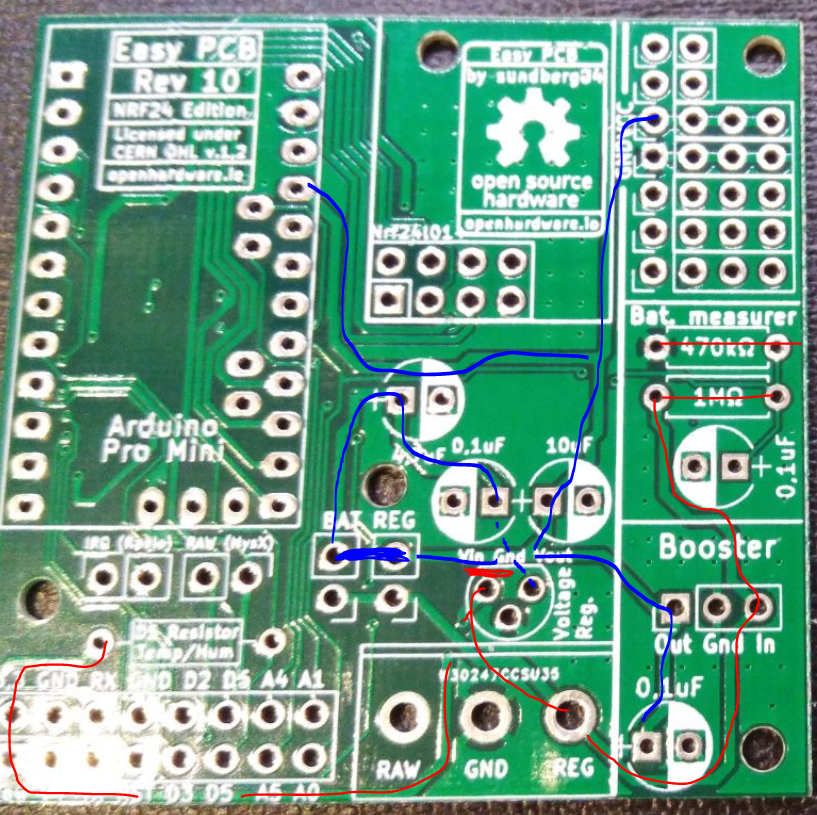
- Cut the track circled
- Hard wired from the regulator side of the battery jumper to VCC on the Pro Mini
- Bridged the booster In to Out
- Changed the battery measuring resistors to 12k/180k for greater range
This enabled me to run the board off 12V, keep an eye on the battery voltage, and run the rest from the LE33 regulator. It seems to be managing so far, with 3 x DS18B20 temperature sensors. I'm monitoring the fridge outside, inside and freezer temperatures with this module.
-
@sundberg84, thanks so much for this board, I bought 10 of them. This has made my sensor projects much easier and they look better too! I think I will get some of the RFM69 version next.
I have a lot of gel lead acid batteries (the 7.2AH type often used in UPSs), and I have been running an earlier prototype off that. I have now just changed over to your board and this is how I modified it to work the way I wanted:
- Cut the track circled
- Hard wired from the regulator side of the battery jumper to VCC on the Pro Mini
- Bridged the booster In to Out
- Changed the battery measuring resistors to 12k/180k for greater range
This enabled me to run the board off 12V, keep an eye on the battery voltage, and run the rest from the LE33 regulator. It seems to be managing so far, with 3 x DS18B20 temperature sensors. I'm monitoring the fridge outside, inside and freezer temperatures with this module.
@ajay100 - Hi!
Really nice to see you found your way of using my PCB, its just the way I want it :)
I tried to follow along here, are you using the LEd33 to convert 12v to 3.3v? I guess you tried RAW and the voltage regulator on your pro mini and found out it was bad due to cheap clones?If you cut the trace just above the volt.reg and put a jumper from REG to Vin on the Volt reg, and added a jumper from Bat (top) to Reg (top) you would also feed everything with whatever comes out from the LE33.
 (I think)
 -
@ajay100 - Hi!
Really nice to see you found your way of using my PCB, its just the way I want it :)
I tried to follow along here, are you using the LEd33 to convert 12v to 3.3v? I guess you tried RAW and the voltage regulator on your pro mini and found out it was bad due to cheap clones?If you cut the trace just above the volt.reg and put a jumper from REG to Vin on the Volt reg, and added a jumper from Bat (top) to Reg (top) you would also feed everything with whatever comes out from the LE33.
(I think)@sundberg84, I've just tried it and that is a better solution than mine for running everything from the LE33. Thanks for taking the time to work that out!
Cheers - Andrew
-
Hey @sundberg84 I just saw the new rev.10, congratulations on the upgrade!
I still have a bunch of rev 9, do you happen to have images/manual for previous version somewhere? link or a pdf?
Thanks! -
Hey @sundberg84 I just saw the new rev.10, congratulations on the upgrade!
I still have a bunch of rev 9, do you happen to have images/manual for previous version somewhere? link or a pdf?
Thanks!@dakipro - sorry, everything was saved here on oh.
Is there something special you need? I can maybe send it to you, like schematics or what are you looking for? -
Zip files with old revisions get stored on openhardware.io but is not exposed in any good way for the end user today. They're only accessible for the manufacturers.
I will see if I can show it somehow. Maybe a new tab on the project page listing old revisions with download links.
-
Thank you @hek , I think this might be useful feature
I however do not see any data in there, is it something for project owner to allow?
I tried both as guest and as logged inn, I do see the rows, but no data in fields, screenshot: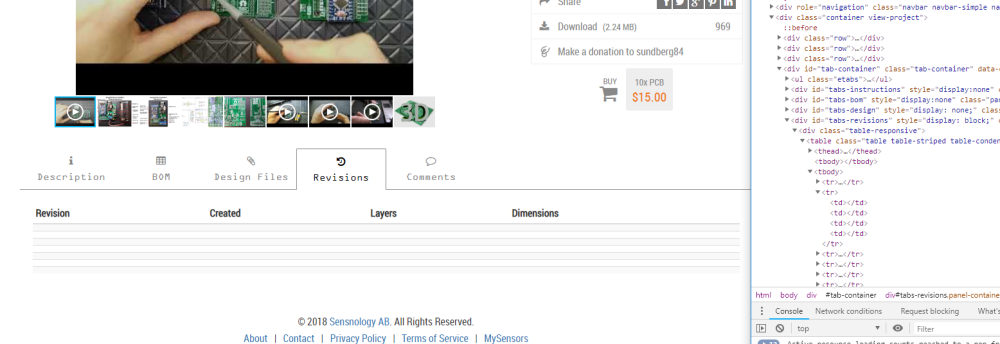
@sundberg84 nothing special about now, I figured it out based on older projects. But since I still have about dosen of boards, I will probably need documentation few years from now, so was just hoping to have it somewhere easily available :) Like a downloaded pdf or something
-
Thanks @hek it is certainly helpful. However the most powerful information is actually in the description page, about how to use the board, how to wire it up for different use cases etc. I suppose a previous version of the information tab is not available?
If it could be archived (maybe even linked somewhere) it would be really helpful! -
The documentation at the time of the created revision is actually included in the zip as README.md (markdown).
You should be able to view the file properly formatted in an md-editor or online using I.e.. https://dillinger.io/Uploaded images was never included in the revision dumps unfortunately.
Hello! It looks like you're interested in this conversation, but you don't have an account yet.
Getting fed up of having to scroll through the same posts each visit? When you register for an account, you'll always come back to exactly where you were before, and choose to be notified of new replies (either via email, or push notification). You'll also be able to save bookmarks and upvote posts to show your appreciation to other community members.
With your input, this post could be even better 💗
Register Login