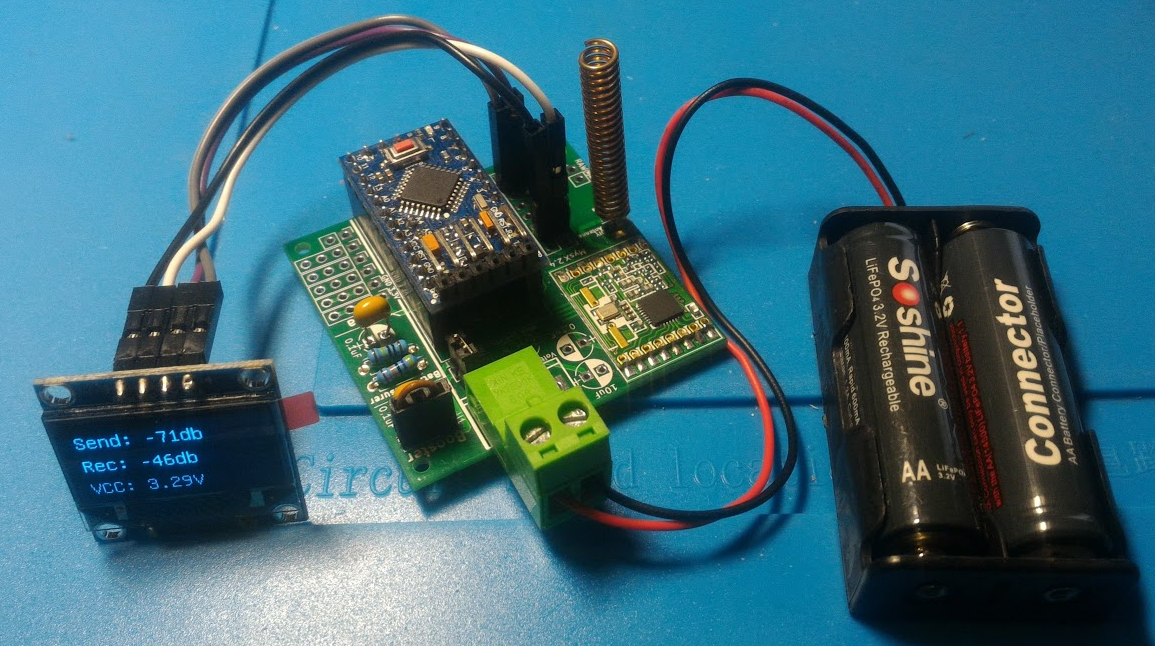
What you should look at is the Adafruit_MAX31855 library Then buy a K-type sensor device online.
https://github.com/adafruit/Adafruit-MAX31855-library
You can also use the cheaper Max6675. Watch the voltage it uses.
You'll have so search a bit, but you can also buy meat-probe style K-type sensors at Aliexpress.
This code may be of use:
/**
*
* The MySensors Arduino library handles the wireless radio link and protocol
* between your home built sensors/actuators and HA controller of choice.
* The sensors forms a self healing radio network with optional repeaters. Each
* repeater and gateway builds a routing tables in EEPROM which keeps track of the
* network topology allowing messages to be routed to nodes.
*
* Created by Henrik Ekblad <henrik.ekblad@mysensors.org>
* Copyright (C) 2013-2015 Sensnology AB
* Full contributor list: https://github.com/mysensors/Arduino/graphs/contributors
*
* Documentation: http://www.mysensors.org
* Support Forum: http://forum.mysensors.org
*
* This program is free software; you can redistribute it and/or
* modify it under the terms of the GNU General Public License
* version 2 as published by the Free Software Foundation.
*
*******************************
*
* DESCRIPTION
*
* PID smoker, in progress
*
*/
#include <AutoPID.h>
//#include <PID_v1.h>
//#define PIN_INPUT 0
//#define RELAY_PIN 6
//auto-pid settings and gains
#define OUTPUT_MIN 0
#define OUTPUT_MAX 3500 // this should not exceed the ASECOND value below.
#define KP 6
#define KI .1
#define KD 10
//Define Variables we'll be connecting to
double setPoint, Output; // autopid
double smokerSetpoint = 90;
double meatSetpoint = 70;
double temperatureA = 0; // Holds the temperature of the first MAX sensor.
double temperatureB = 0; // Holds the temperature of the second MAX sensor.
double temperatureC = 0; // Holds the temperature of the second MAX sensor.
//Define the aggressive and conservative PID Tuning Parameters
//double Kp=2, Ki=5, Kd=1; // the original middle of the road settings.
//double aggKp=4, aggKi=0.2, aggKd=1; // the original aggressive settings.
//double aggKp=2, aggKi=2, aggKd=1;
//double consKp=1, consKi=0.05, consKd=0.25;
/*
* P: the bigger the number the harder the controller pushes.
* I: the SMALLER the number (except for 0, which turns it off,) the more quickly the controller reacts to load changes, but the greater the risk of oscillations.
* D: the bigger the number the more the controller dampens oscillations (to the point where performance can be hindered)
*
* learn more: http://brettbeauregard.com/blog/2011/04/improving-the-beginners-pid-introduction/
*
* 1. Get the Proportional working first. A fast and easy trick is to increase the proportional gain until oscillations start (the critical or ultimate gain) then cut the gain in half.
*
*/
//PID myPID(&temperatureA, &Output, &smokerSetpoint, aggKp, aggKi, aggKd, DIRECT);
AutoPID myPID(&temperatureB, &smokerSetpoint, &Output, OUTPUT_MIN, OUTPUT_MAX, KP, KI, KD);
#define ACTIVATIONTEMPERATURERANGE 10 // at what temperature delta below or above the target temperature should the PID take over the heating proces? So if the target is 100, then this would be between 70 and 130 degrees.
#define HASOLEDSCREEN // Remove this line if you are not using an OLED screen on the node.
#define DONTCHECKCONNECTION // Uncomment this line if you do not care if the node loses connection with the controller.
#ifdef HASOLEDSCREEN
#define OLED_I2C_ADDRESS 0x3C
//#include <SPI.h>
#include <SSD1306Ascii.h> // simple drivers for the screen.
#include <SSD1306AsciiAvrI2c.h>
SSD1306AsciiAvrI2c oled;
#endif
// if you uncomment this, you can get test and debug updates about everything the sensor is doing by using the serial monitor tool.
//#define MY_DEBUG
// Enable and select radio type attached
#define MY_RADIO_NRF24 // A 2.4Ghz transmitter and receiver, often used with MySensors.
//#define MY_RADIO_RFM69 // 433Mhz transmitter and reveiver.
//#define MY_RADIO_NRF5_ESB // NRF5 devices
//#define MY_RADIO_RFM95
//#define MY_RF24_PA_LEVEL RF24_PA_MIN
#define MY_RF24_PA_LEVEL RF24_PA_LOW // This sets a low-power mode for the radio. Useful if you use the version with the bigger antenna, but don't want to power that from a separate power source. It can also fix problems with fake Chinese versions of the radio.
//#define MY_RF24_PA_LEVEL RF24_PA_HIGH
//#define MY_RF24_PA_LEVEL RF24_PA_MAX
// Advanced settings
#define MY_TRANSPORT_WAIT_READY_MS 8000 // try connecting for a few seconds. Otherwise just continue.
#define MY_SPLASH_SCREEN_DISABLED // saves a little memory.
//#define MY_DISABLE_RAM_ROUTING_TABLE_FEATURE // saves a little memory.
//#define MY_NODE_ID 100
//#define MY_PARENT_NODE_ID 0
//#define MY_PARENT_NODE_IS_STATIC
//#define MY_RF24_CHANNEL 100 // this helps to get a better reception in Europe. The default channel that MySensors uses (76) overlaps with European wifi band 13 :-(
// Easy to use security, yay!
//#define MY_SIGNING_SIMPLE_PASSWD "putyourpasswordhere"
//#define MY_SIGNING_SOFT_RANDOMSEED_PIN A7 // setting a pin to pickup noise makes encryption more secure.
// Choose if you want this sensor to also be a repeater.
//#define MY_REPEATER_FEATURE // Just remove the two slashes at the beginning of this line to also enable this sensor to act as a repeater for other sensors. If this node is on battery power, you probably shouldn't enable this.
// LIBRARIES (in the Arduino IDE go to Sketch -> Include Library -> Manage Libraries to add these if you don't have them installed yet.)
#include <MySensors.h>
#include "Adafruit_MAX31855.h"
// VARIABLES YOU CAN CHANGE
#define RELAY_ON 0 // GPIO value to write to turn on attached relay. Some relays are reversed.
#define RELAY_OFF 1 // GPIO value to write to turn off attached relay Some relays are reversed.
#define HEATER_RELAY_PIN 14 // Arduino Digital I/O pin number for heater relay. 14 = A0, 19 = A5 (A6 and A7 are input only)
#define MAXDOA 3 // Pins for the two K-type sensors.
#define MAXCSA 4 // Pins for the two K-type sensors.
#define MAXCLKA 5 // Pins for the two K-type sensors.
#define MAXDOB 6 // Pins for the two K-type sensors.
#define MAXCSB 7 // Pins for the two K-type sensors.
#define MAXCLKB 8 // Pins for the two K-type sensors.
#define ASECOND 4000 // How long does a second take? (default is 1000 milliseconds)
#define SAFEGUARD_TEMP 160 // Maximum temperature (currently in celcius) that may be detected before the relay is shutdown.
#define RETURNTONORMAL_TEMP 100 // After a safeguard shutdown, at what cooled down temperature (currently in celcius) should the system go back to normal state?
#define MAXIMUMCONNECTIONLOSSCOUNT 6 // How many safetycheck will we allow the connected to be down? (6 = 60 seconds)
#define MAXIMUMTEMPERATURESENSORERRORS 100 // How many faulty measurements to accept per 10 second period. A faulty sensor will give one error per second.
#define SECURITYCHECKINTERVAL 15 // How many seconds before a new security check is performed
//VARIABLES YOU PROBABLY SHOULDN'T CHANGE
#define TEXT_CHILD_ID 1 // for MySensors. Within a node each sensor/actuator should have its own ID number.
#define THERMOSTAT_CHILD_ID 2
#define TEMP_A_CHILD_ID 3
#define TEMP_B_CHILD_ID 4
#define TEMP_C_CHILD_ID 5 // Internal temperature sensor
#define POWER_CHILD_ID 6 // The PID's current power output level, as a percentage.
#define MEATTARGET_CHILD_ID 7
byte powerPercentage = 0; // The PID's current power output level (relative to the output_max), recalculated as a percentage.
boolean meatTemperatureReached = false; // Changes to true when the meat has reached the desired temperature.
//boolean runEverySecondThings = true; // this moves the things that are done every second to beyond the part of the second where the device is heating.
// initialize the Thermocouple
Adafruit_MAX31855 thermocouple(MAXCLKA, MAXCSA, MAXDOA); // This is the enclosure thermometer. This temperature is used to safety checks.
Adafruit_MAX31855 thermocoupleb(MAXCLKB, MAXCSB, MAXDOB); // This is the mean temperature.
// Security variables
boolean runSafetyCheck = true;
boolean safetyShutdown = true; // Set to true if something is wrong with the system. This then turns off the relay.
boolean targetTooHot = false; // A safety feature. If the device somehow gets really hot, disable the heater.
byte connectionLossCounter = 0; // How often did a request to the controller not result in any response?
byte tempSensorErrorCount = 0; // How often did the temperature sensor give an error?
// Mysensors settings
MyMessage statusMsg(TEXT_CHILD_ID,V_TEXT); // Sets up the message format that we'll be sending to the MySensors gateway later. The first part is the ID of the specific sensor module on this node. The second part tells the gateway what kind of data to expect.
MyMessage thermostatMsg(THERMOSTAT_CHILD_ID, V_HVAC_SETPOINT_HEAT);
MyMessage temperatureMsg(TEMP_A_CHILD_ID, V_TEMP);
MyMessage powerMsg(POWER_CHILD_ID, V_PERCENTAGE); // the current powerlevel of the heater, as a percentage.
void before()
{
pinMode(HEATER_RELAY_PIN, OUTPUT);
digitalWrite(HEATER_RELAY_PIN, RELAY_OFF);
}
void setup()
{
Serial.begin(115200); // for serial debugging.
delay(500);
Serial.println(F("starting smoker"));
// autopid extra options
myPID.setTimeStep(ASECOND);
myPID.setBangBang(ACTIVATIONTEMPERATURERANGE); // if temperature is more than X degrees below or above setpoint, OUTPUT will be set to min or max respectively.
// myPID.setTimeStep(WindowSize); // set autoPID update interval. Currently once every loop.
// myPID.setOutputRange(0,maxOutputTime); // what range should the output be between? Maximum size can be the entire loop time. (perhaps this could make the cripledelay superfluous? Just set this to 60% of the window size?)
// myPID.SetOutputLimits(0, WindowSize); // tell the PID to range between 0 and the full window size
#ifdef HASOLEDSCREEN
oled.begin(&Adafruit128x64, OLED_I2C_ADDRESS);
oled.setFont(Adafruit5x7);
//oled.set2X(); // big letters
oled.ssd1306WriteCmd(SSD1306_DISPLAYON);
//oled.setScroll(true);
oled.setCursor(0,0);
oled.print(F("Smoker 1.6"));
delay(1000);
#endif
if(isTransportReady()){
Serial.println(F("Connected to gateway!"));
#ifdef HASOLEDSCREEN
oled.setCursor(90,0);
oled.print(F("W"));
#endif
send(statusMsg.setSensor(TEXT_CHILD_ID).set( F("Smoker starting") ));
//send(thermostatMsg.setSensor(THERMOSTAT_CHILD_ID).set(smokerSetpoint,2)); // should that 2 be a one? Only one decimal? Hmm
send(powerMsg.set(powerPercentage));
//send(thermostatMsg.setSensor(MEATTARGET_CHILD_ID).set(meatSetpoint,2));
request(THERMOSTAT_CHILD_ID,V_HVAC_SETPOINT_HEAT);
request(MEATTARGET_CHILD_ID,V_HVAC_SETPOINT_HEAT);
}else{
Serial.println(F("! NO CONNECTION"));
}
}
void presentation()
{
// Send the sketch version information to the gateway and Controller
sendSketchInfo("PID Smoker", "1.6");
present(TEXT_CHILD_ID, S_INFO,"status");
present(THERMOSTAT_CHILD_ID, S_HEATER, "SmokerSetpoint");
present(TEMP_A_CHILD_ID, S_TEMP, "Temperature A");
present(TEMP_B_CHILD_ID, S_TEMP, "Temperature B");
present(TEMP_C_CHILD_ID, S_TEMP, "Temperature internal");
present(POWER_CHILD_ID, S_DIMMER, "Powerlevel");
present(MEATTARGET_CHILD_ID, S_HEATER, "Meat target temperature");
}
void loop()
{
// the clock
static unsigned long lastClockTick = 0; // When was the last second of the clock.
static byte secondCounter = 0; // How many seconds have passed
//
// A.
// CONTINUOUSLY
// call the PID function, check if the heating element should be on or off.
//
if (safetyShutdown == true) {
myPID.stop();
digitalWrite(HEATER_RELAY_PIN, RELAY_OFF);
} else {
myPID.run(); //autopid, call every loop, updates automatically at certain time interval
//if (ASECOND - (millis() - lastClockTick) < Output{
if ((millis() - lastClockTick) < Output){
digitalWrite(HEATER_RELAY_PIN, RELAY_ON);
Serial.print(F("|"));
}else{
digitalWrite(HEATER_RELAY_PIN, RELAY_OFF);
Serial.print(F("_"));
}
delay(100);
/*
if(temperatureB > smokerSetpoint){
digitalWrite(HEATER_RELAY_PIN, RELAY_ON);
}else{
digitalWrite(HEATER_RELAY_PIN, RELAY_OFF);
}
*/
}
//
// B.
// EVERY SECOND
// check temperature, calculate new PID value, update display.
//
if(millis() - lastClockTick >= ASECOND) {
lastClockTick = millis();
secondCounter++;
//runEverySecondThings = true;
Serial.println();
if(secondCounter > SECURITYCHECKINTERVAL){
secondCounter = 0;
runSafetyCheck = true;
}
Serial.print(F("#"));Serial.println(secondCounter);
//}
//if(runEverySecondThings == true && millis() - lastClockTick >= OUTPUT_MAX + 10){ // this moves all the calculations for getting temperature and pdating the screen to the part of the second loop after the heating is finished.
// this moves all the calculations for getting temperature and pdating the screen to the part of the second loop after the heating is finished.
// output the value form the PID algorithm.
Serial.println();
Serial.print(F("output: ")); Serial.println(Output);
powerPercentage = map(Output, 0, OUTPUT_MAX, 0, 100);
Serial.print(F("power percentage: ")); Serial.println(powerPercentage);
// getting latest temperature data
double temperatureAreading = 0;//thermocouple.readCelsius();
double temperatureBreading = thermocoupleb.readCelsius();
temperatureC = thermocouple.readInternal();
Serial.print(F("A: "));Serial.println(temperatureA);
Serial.print(F("B: "));Serial.println(temperatureB);
Serial.print(F("Int: "));Serial.println(temperatureC);
// Check if the temperature values are realistic, or that they indicate a sensor problem.
if (isnan(temperatureAreading) || temperatureAreading == 0) {
tempSensorErrorCount++;
} else {
temperatureA = temperatureAreading; // avoiding NaN
}
if (isnan(temperatureBreading) || temperatureBreading == 0) {
tempSensorErrorCount++;
} else {
temperatureB = temperatureBreading; // This makes sure the PID algorithms is only fed with real temperatures.
}
if (isnan(temperatureC) || temperatureC == 0) {
tempSensorErrorCount++;
}
// every second update the display
#ifdef HASOLEDSCREEN
if(safetyShutdown == false){
//oled.set2X();
oled.setCursor(0,0);
if(myPID.atSetPoint(ACTIVATIONTEMPERATURERANGE)){
oled.print(F("PID:"));
}else{
oled.print(F("PRE:"));
}
oled.print(powerPercentage); oled.print(F("% "));
//}else{
// if(temperatureB < smokerSetpoint){
// oled.print(F("HEAT: ")); oled.print(powerPercentage); oled.print(F("% "));
// }else{
// oled.print(F("COOLING"));
// }
//}
// show temperature sensor values
oled.set2X();
oled.setCursor(0,2);
oled.print(F("Pot: ")); oled.print(temperatureB); oled.println(F(" "));
oled.setCursor(0,5);
oled.print(F("Meat:")); oled.print(temperatureA); oled.println(F(" "));
// show setpoint target temperatures
oled.set1X();
oled.setCursor(60,4);
oled.print(F("-> ")); oled.print(smokerSetpoint);
oled.setCursor(60,7);
oled.print(F("-> ")); oled.print(meatSetpoint);
// show wireless connection icon (if there is a connection)
oled.setCursor(90,0);
if(connectionLossCounter > 1){ // If the connection is bad, hide the wireless icon.
oled.print(F(" "));
}
//show second counter
oled.setCursor(100,0);
oled.print(secondCounter); oled.print(F(" "));
}
#endif
// some debug options.
//double pulseLength = myPID.getPulseValue();
//Serial.print(F("pulse value: ")); Serial.println(pulseLength);
double integraal = myPID.getIntegral();
Serial.print(F("integraal: ")); Serial.println(integraal);
//runEverySecondThings = false;
} // end of the part that runs every second
//
// C.
// EVERY TEN SECONDS
// safety check, communicate with server, is the meat hot?
//
if(runSafetyCheck == true){ // the second part moves this work to beyond the heating part of the cycle. This way it shouldn't influence the heating length, and this the PID calculations.
Serial.println(F(""));
Serial.println(F("STARTING SAFETY CHECK ETC"));
runSafetyCheck = false;
// A.
// CHECKING - Every 10 seconds we do a safety check.
// is the server up?
connectionLossCounter++;
if ( connectionLossCounter > 250 ) { connectionLossCounter = 251; }
// get latest setpoint values. (might not be required, some controllers send this when the values update.)
//request(THERMOSTAT_CHILD_ID,V_HVAC_SETPOINT_HEAT); // every 10 seconds, request the latest smokerSetpoint data. Also used to check if the wireless connection if still alive. In theory domoticz should now pro-actively send the new data to the node, so then this code is just useful to check the connection.
//request(MEATTARGET_CHILD_ID,V_HVAC_SETPOINT_HEAT);
// check connection
if(connectionLossCounter > MAXIMUMCONNECTIONLOSSCOUNT){ // connected lost for X amount of safety checks.
Serial.println(F("! LOST CONNECTION TO SERVER"));
#ifdef HASOLEDSCREEN
oled.setScroll(true);
oled.println(F("NO CONNECTION"));
#endif
}
// heater not too hot?
if(temperatureA > SAFEGUARD_TEMP || temperatureB > SAFEGUARD_TEMP){
targetTooHot = true;
Serial.println(F("! TOO HOT"));
#ifdef HASOLEDSCREEN
oled.setScroll(true);
oled.println(F("TOO HOT"));
#endif
}
// Not too many errors with the temperature sensor(s)?
Serial.print(F("tempSensorErrorCount: ")); Serial.println(tempSensorErrorCount);
if(tempSensorErrorCount > MAXIMUMTEMPERATURESENSORERRORS){
Serial.println(F("TEMPERATURE SENSOR ERROR"));
#ifdef HASOLEDSCREEN
oled.setScroll(true);
oled.println(F("SENSOR ERROR"));
#endif
}
// B.
// HEALING - Some functions might return, and then the system could return to normal.
// It has cooled down enough
if(safetyShutdown == true && targetTooHot == true && temperatureB > RETURNTONORMAL_TEMP){ // For safety, the "return to normal" temperature is lower than the maximum room temperature. This avoids flip-flopping.
Serial.println(F("too hot, cooling down"));
#ifdef HASOLEDSCREEN
oled.println(F("COOLING DOWN!"));
#endif
}else if(targetTooHot == true && temperatureB <= RETURNTONORMAL_TEMP){
targetTooHot = false;
}
// C.
// DECIDE IF OPERATION IS SAFE
#ifdef DONTCHECKCONNECTION
connectionLossCounter = 0; // pretend there is no connection error, even if there is.
#endif
if(tempSensorErrorCount > MAXIMUMTEMPERATURESENSORERRORS || connectionLossCounter > MAXIMUMCONNECTIONLOSSCOUNT || targetTooHot == true){
// Decision: something is wrong, so SHUTDOWN the relay.
Serial.println(F("! ERROR DETECTED"));
if(safetyShutdown == false){ // first time that the error is detected
send(statusMsg.setSensor(TEXT_CHILD_ID).set( F("ERROR") ));
}
safetyShutdown = true;
Serial.println(F("CURRENTLY IN SAFETY SHUTDOWN MODE"));
#ifdef HASOLEDSCREEN
oled.setScroll(true);
oled.println(F("SAFETY SHUTDOWN!"));
#endif
}else{
// Decision: everything looks OK.
Serial.println(F("EVERYTHING LOOKS OK"));
if(safetyShutdown == true){
send(statusMsg.setSensor(TEXT_CHILD_ID).set( F("SMOKER OK") ));
Serial.println(F("heater is ok again"));
#ifdef HASOLEDSCREEN
oled.setScroll(false); // the scrollmode causes flickering of the screen. For normal operation, the display function only redraws parts of the screen.
#endif
}
safetyShutdown = false;
}
tempSensorErrorCount = 0; // reset for next round of counting.
// send the temperature data to the controller
if(!isnan(temperatureB)){
Serial.println(F("sending temp B to controller"));
send(temperatureMsg.setSensor(TEMP_B_CHILD_ID).set(temperatureB, 1));
}
if(!isnan(temperatureA)){
Serial.println(F("sending temp A to controller"));
send(temperatureMsg.setSensor(TEMP_A_CHILD_ID).set(temperatureA, 1));
}
if(!isnan(temperatureC)){
Serial.println(F("sending temp C to controller"));
send(temperatureMsg.setSensor(TEMP_C_CHILD_ID).set(temperatureC, 1));
}
} // end of the part that runs every 10 seconds
} // end of main loop
void receive(const MyMessage &message){
Serial.println(F("+++receiving message+++"));
connectionLossCounter = 0; // reset the counter, indicating we have recently connected to the controller.
#ifdef HASOLEDSCREEN
// show wireless connection icon
oled.set1X();
oled.setCursor(90,0);
oled.print(F("W"));
#endif
/*
if (message.type == V_TEXT && message.sensor == THERMOSTAT_CHILD_ID) {
Serial.print(F("Received text data: "));
Serial.println(message.data);
// Not doing anything with this.
}*/
if (message.type == V_HVAC_SETPOINT_HEAT) {
if(message.sensor == THERMOSTAT_CHILD_ID){
smokerSetpoint = atof(message.data);
Serial.print(F("smokerSetpoint: ")); Serial.println(smokerSetpoint);
send(thermostatMsg.setSensor(THERMOSTAT_CHILD_ID).set(smokerSetpoint,2)); // this fixes a bug in domoticz where the display in domoticz doesn't itself update the new setpoint.
}
if(message.sensor == MEATTARGET_CHILD_ID){
meatSetpoint = atof(message.data);
Serial.print(F("meatSetpoint: ")); Serial.println(meatSetpoint);
send(thermostatMsg.setSensor(MEATTARGET_CHILD_ID).set(meatSetpoint,2)); // this fixes a bug in domoticz where the display in domoticz doesn't itself update the new setpoint.
}
}
}