Navigation

    • Register
    • Login
    • OpenHardware.io
    • Categories
    • Recent
    • Tags
    • Popular
    1. Home
    2. bgunnarb
    3. Posts
    • Profile
    • Following
    • Followers
    • Topics
    • Posts
    • Best
    • Groups

    Posts made by bgunnarb

    • RE: No merge into master in the last 5 years, should we use development?

      Well, my network with two handfulls of nodes in three different locations is still live and kicking! I agree that there does not seem to be a lot happening in the community. I'm running 2.4.0- alpha since this gives support for MQTT over TLS. Just managed today to create one more MQTT GW after reading a lot about support for ESP8266. You know, these things you do once per year and have to learn new each time.

      MySensors is the cheapest way I have found to create small sensor nodes etc. But now slowly running out of my supply of hardware. Well, time will tell...

      posted in General Discussion
      bgunnarb
      bgunnarb
    • RE: MQTT GW on ESP8266 supporting SSL/TLS?

      @eiten
      Hi Edi!
      You are an absolute STAR!
      Now I'm on the development branch 2.4.0 alpha and things work like a charm!
      I'm able to connect via SSL/TLS to a commercial broker account with a server certificate and messages have started flowing in the test rig.
      Now it's time to plan the migration of my MQTT clients.
      Thank you so much for pointing me in the right direction. I thought that TLS support was implemented in the master branch and could not understand why things did not work?
      Can I buy you a beer?

      Best regards
      /Gunnar

      posted in Development
      bgunnarb
      bgunnarb
    • RE: MQTT GW on ESP8266 supporting SSL/TLS?

      Hi Edi!
      I'm on the master branch.
      Regards /Gunnar

      posted in Development
      bgunnarb
      bgunnarb
    • RE: GatawayESP8266 - Compile error

      @eiten Ran into the same error but of course the community is always at hand, ready to help! Great! I'm using MySensors 2.3.2 release version. Downgrading the ESP8266 board library to 2.7.4 as suggested by @OldSurferDude did the trick.
      I'm still clinging to MySensors. So simple and inexpensive to use! All sensors and other stuff connects over three MQTT GW in three locations back to my Home Assistant.
      PS: Get well soon!

      Regards, Gunnar

      posted in General Discussion
      bgunnarb
      bgunnarb
    • MQTT GW on ESP8266 supporting SSL/TLS?

      I have been using a couple of ESP8266 MySensors MQTT GW for years, connected to a public broker. Now unfortunately they will no longer support a simple connection to port 1883 but will require a secure connection using TLS.
      Question: Is there code available for the ESP8266 MQTT GW with support for SSL/TLS? How would you go about adding that support?

      Since I have three GW in different places I cannot deploy my own mosquitto broker on my HA installation.

      posted in Development
      bgunnarb
      bgunnarb
    • RE: Gateway sends NACK to node

      Can you paste the code for the node please?
      Just a hint: Have you set the node ID manually? HA does not assign node ID automatically as far as I know. You have to set it manually in the code using:

      #define MY_NODE_ID 23
      

      Node-ID is a number between 1 and 254, unique to each node. The default is AUTO which requests an ID from the controller. HA does not assign node ID.

      posted in Troubleshooting
      bgunnarb
      bgunnarb
    • RE: Can a sensor "get lost" between a GW and a repeater?

      Thanks to @electrik and @mfalkvidd for your answers. I will try next time I have the opportunity. Currently the sensor is 400 km away from home.

      posted in Troubleshooting
      bgunnarb
      bgunnarb
    • Can a sensor "get lost" between a GW and a repeater?

      I have a battery operated sensor that is placed at a distance to the GW where it should get a good connection. Distance is only 5 meters with wooden walls in between. But very close to this sensor is another sensor with the REPEATER function enabled. The first sensor connects to the GW but looses contact after a few hours. After a reset of the sensor, it functions again.

      Question: Could the case be, that the battery operated sensor loses the path to the GW i.e. the routing is lost somehow if it starts oscillating between connecting to the GW and the repeater?

      I have checked obvious causes of failure like wiring, capacitor etc.

      If the answer is no, then I have other things to check. I just want to rule out this cause of failure.

      posted in Troubleshooting
      bgunnarb
      bgunnarb
    • RE: Problems ethernet GW with ESP8266- NodeMcu V3.4

      I also edited according to @Yveaux 's workaround and it works!

      I found however that in order to get the MQTT GW to listen to messages and forward them to the broker, I had to set wait(2000); in the void loop()
      If I set wait(0) the GW started but did not listen to messages. If I set wait(100); the GW started spamming the broker with the presentation message.

      Again, a big thank you to everybody involved. "Now we are cooking with gas again!"

      posted in Troubleshooting
      bgunnarb
      bgunnarb
    • RE: Problems ethernet GW with ESP8266- NodeMcu V3.4

      I have exactly the same problem with the ESP8266 MQTT GW. It compiles and loads but there is nothing on the serial output. The ESP does not appear on the WiFi either. I have run other sketches like the NTP-server and the Blink sketch with exactly the same settings for the compiler. There is no difference if the radio is connected or not. My wiring is very simple, nothing connected except the micro-USB.
      The suggestion by @peripi makes no difference. The bootload message comes at 74880 speed. Shifting to 9600 or setting any other speed for that matter makes no difference.

      Since I have compiled and run this same sketch earlier, I suspect there have been some breaking changes in the library version 3.0.2 or possibly elsewhere.

      I post my code below but I think it is identical to the reference sketches on MySensors.

      /**
       * The MySensors Arduino library handles the wireless radio link and protocol
       * between your home built sensors/actuators and HA controller of choice.
       * The sensors forms a self healing radio network with optional repeaters. Each
       * repeater and gateway builds a routing tables in EEPROM which keeps track of the
       * network topology allowing messages to be routed to nodes.
       *
       * Created by Henrik Ekblad <henrik.ekblad@mysensors.org>
       * Copyright (C) 2013-2015 Sensnology AB
       * Full contributor list: https://github.com/mysensors/Arduino/graphs/contributors
       *
       * Documentation: http://www.mysensors.org
       * Support Forum: http://forum.mysensors.org
       *
       * This program is free software; you can redistribute it and/or
       * modify it under the terms of the GNU General Public License
       * version 2 as published by the Free Software Foundation.
       *
       *******************************
       *
       * REVISION HISTORY
       * Version 1.0 - Henrik Ekblad
       * Version 1.1 - Gunnar Blockmar 2019-05-19 Configuration for Sjövik WLAN
       * 
       * DESCRIPTION
       * The ESP8266 MQTT gateway sends radio network (or locally attached sensors) data to your MQTT broker.
       * The node also listens to MY_MQTT_TOPIC_PREFIX and sends out those messages to the radio network
       *
       * LED purposes:
       * - To use the feature, uncomment WITH_LEDS_BLINKING in MyConfig.h
       * - RX (green) - blink fast on radio message recieved. In inclusion mode will blink fast only on presentation recieved
       * - TX (yellow) - blink fast on radio message transmitted. In inclusion mode will blink slowly
       * - ERR (red) - fast blink on error during transmission error or recieve crc error  
       * 
       * See http://www.mysensors.org/build/esp8266_gateway for wiring instructions.
       * nRF24L01+  ESP8266
       * VCC        VCC
       * CE         GPIO4          
       * CSN/CS     GPIO15
       * SCK        GPIO14
       * MISO       GPIO12
       * MOSI       GPIO13
       *            
       * Not all ESP8266 modules have all pins available on their external interface.
       * This code has been tested on an ESP-12 module.
       * The ESP8266 requires a certain pin configuration to download code, and another one to run code:
       * - Connect REST (reset) via 10K pullup resistor to VCC, and via switch to GND ('reset switch')
       * - Connect GPIO15 via 10K pulldown resistor to GND
       * - Connect CH_PD via 10K resistor to VCC
       * - Connect GPIO2 via 10K resistor to VCC
       * - Connect GPIO0 via 10K resistor to VCC, and via switch to GND ('bootload switch')
       * 
        * Inclusion mode button:
       * - Connect GPIO5 via switch to GND ('inclusion switch')
       * 
       * Hardware SHA204 signing is currently not supported!
       *
       * Make sure to fill in your ssid and WiFi password below for ssid & pass.
       */
      
      #include <EEPROM.h>
      #include <SPI.h>
      
      // Enable debug prints to serial monitor
      #define MY_DEBUG 
      
      // Use a bit lower baudrate for serial prints on ESP8266 than default in MyConfig.h
      #define MY_BAUD_RATE 9600
      
      // Enables and select radio type (if attached)
      #define MY_RADIO_RF24
      //#define MY_RADIO_RFM69
      
      #define MY_GATEWAY_MQTT_CLIENT
      #define MY_GATEWAY_ESP8266
      
      // Set this nodes subscripe and publish topic prefix
      #define MY_MQTT_PUBLISH_TOPIC_PREFIX "prefix-out"
      #define MY_MQTT_SUBSCRIBE_TOPIC_PREFIX "prefix-in"
      
      // Set MQTT client id
      #define MY_MQTT_CLIENT_ID "sensors"
      
      // Enable these if your MQTT broker requires usenrame/password
      #define MY_MQTT_USER "hidden"
      #define MY_MQTT_PASSWORD "xyz123"
      
      // Set WIFI SSID and password
      #define MY_WIFI_SSID "secret"  // Change this at deployment
      #define MY_WIFI_PASSWORD "secret"   //Change this at deployment
      
      // Set the hostname for the WiFi Client. This is the hostname
      // it will pass to the DHCP server if not static. 
      #define MY_HOSTNAME "test-gateway"
      
      // Enable MY_IP_ADDRESS here if you want a static ip address (no DHCP)
      //#define MY_IP_ADDRESS 192,168,178,87
      
      // If using static ip you need to define Gateway and Subnet address as well
      //#define MY_IP_GATEWAY_ADDRESS 192,168,178,1
      //#define MY_IP_SUBNET_ADDRESS 255,255,255,0
      
      
      // MQTT broker ip address.  
      //#define MY_CONTROLLER_IP_ADDRESS 192, 168, 178, 68
      #define MY_CONTROLLER_URL_ADDRESS "xxx.cloudmqtt.com"
      
      
      // The MQTT broker port to to open 
      #define MY_PORT 12345      
      
      
      // Flash leds on rx/tx/err does not work on ESP8266 no free pins
      // #define MY_LEDS_BLINKING_FEATURE
      // Set blinking period
      // #define MY_DEFAULT_LED_BLINK_PERIOD 300
      // Enable inclusion mode
      // #define MY_INCLUSION_MODE_FEATURE
      // Enable Inclusion mode button on gateway
      // #define MY_INCLUSION_BUTTON_FEATURE
      // Set inclusion mode duration (in seconds)
      // #define MY_INCLUSION_MODE_DURATION 60 
      // Digital pin used for inclusion mode button
      // #define MY_INCLUSION_MODE_BUTTON_PIN  3 
      // #define MY_DEFAULT_ERR_LED_PIN 1  // Error led pin
      // #define MY_DEFAULT_RX_LED_PIN  9  // Receive led pin
      // #define MY_DEFAULT_TX_LED_PIN  0  // Transmit led pin
      
      
      #include <ESP8266WiFi.h>
      #include <MySensors.h>
      
      void setup() { 
        
      }
      
      void presentation() {
        // Present locally attached sensors here    
      }
      
      
      void loop() {
        // Send locally attached sensors data here
      }
      

      So at the end of my wits.

      posted in Troubleshooting
      bgunnarb
      bgunnarb
    • RE: 3D printed housing for an MQTT-GW

      @evb Done that. Here is the link

      posted in Enclosures / 3D Printing
      bgunnarb
      bgunnarb
    • 3D printed housing for an MQTT-GW

      I recently designed a housing for my MQTT-Gateway, based on an ESP8266 module (Node-MCU) and an nRF24L01+PA+LNA. The housing printed great using PLA on my FF Creator Pro. Connections are made using Dupont cables cut in half and soldered directly to the nRF24 where the pins have been removed. I enclose a picture from FreeCad and a link to the stl-files on Github for the base and the cover.

      Screenshot 2020-12-21 at 11.41.02.png

      IMG_0670.jpeg

      posted in Enclosures / 3D Printing
      bgunnarb
      bgunnarb
    • RE: MySensors --> MQTT --> OpenHab 2.5

      Let me offer my thoughts and recommendations:

      For myself I have been using MQTT as the connection method for a number of years.

      Doing that, you must have an MQTT broker as the "middle-man" to receive MQTT messages from the MySensors MQTT gateway and then relaying them to OH, which then uses the MQTT binding. Then you do not use the MySensors binding to OH at all.

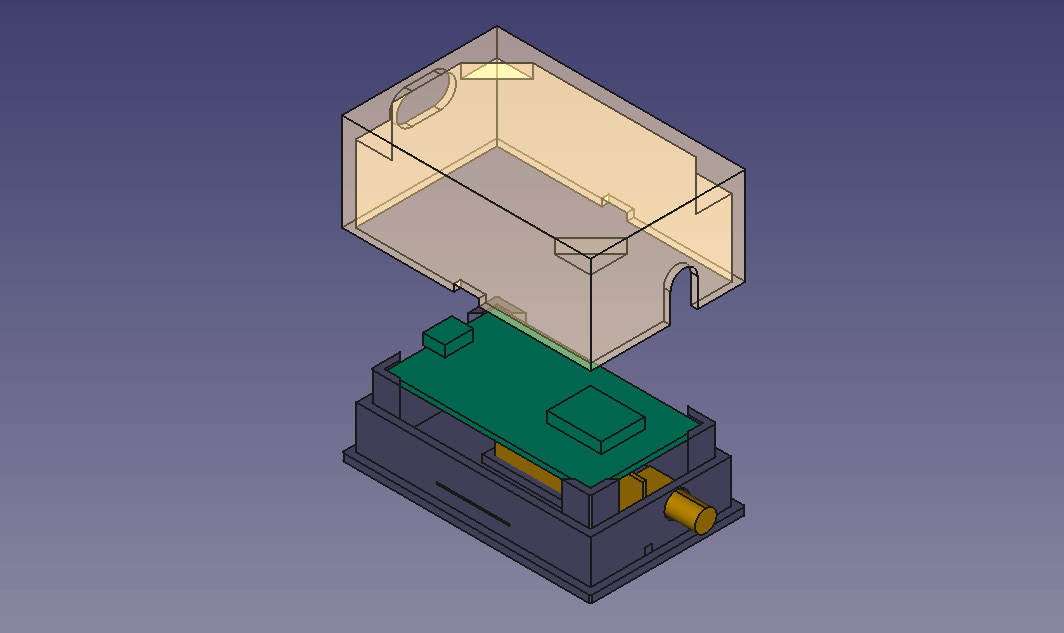
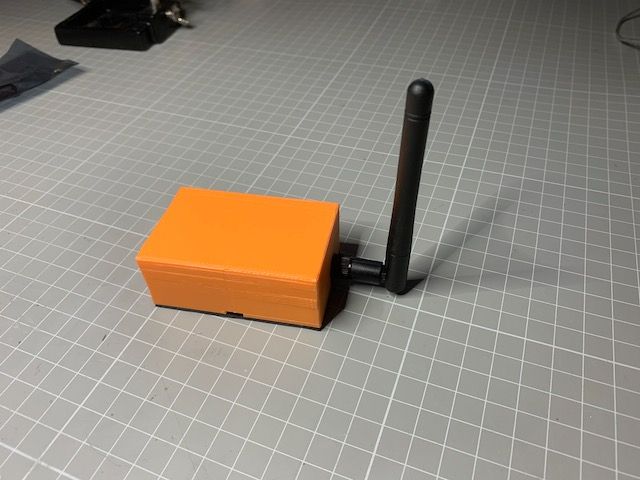
      The advantage is that you can have a number of sources/sensors feeding information to the MQTT broker. In my case I have three geographical sites with MySensors nodes, each with an MySensors MQTT gateway, feeding the broker. Actually at one of the sites there is also a Sonoff switch that also reports status and gets commands via MQTT. (I am using the Espurna SW on the Sonoff).

      Then my OH installation subscribes to the broker via the OH MQTT binding.
      To dive deeper into details, because of this geographical set-up, I am using a commercial MQTT broker, which is accessible over the internet from all three sites. If you only operate one site, then you are better off using e.g. Mosquitto inside your firewall.

      As far as I understand the OH MQTT binding does not offer auto-discovery unless you use the Homie naming convention. Check the OH documentation please.

      For MySensors nodes I use the MySensors notation so a typical message looks like: mqttgw1/28/3/1/0/0 23.2 for say, a node-ID 28 and child-ID 3 that reports a temperature of 23.2 °C

      When I started using MQTT and the 1.0 binding I made all definitions in the .items text file but when I converted to MQTT 2.0 I have made all the definitions in the PaperUI. It is either/or depending on your preferences but I think the general recommendation in the OH community is to use the PaperUI.

      If you stick with text files I strongly recommend that you use Visual Studio Code and the OpenHAB extension to VS. Then you get syntax checking and nice colours to all keywords.

      As far as I understand, the MySensors OH-binding uses the ethernet or serial MySensors GW. Probably the set-up is simpler in the beginning but offers less flexibility in the long run. I could never have achieved my set-up above using just a serial connection.

      posted in OpenHAB
      bgunnarb
      bgunnarb
    • RE: Home Assistent + Serial Gateway + Motion Sensor

      I'm not very good with HA but in the GW sketch, to me it seems that you test if the Arduino is running on 8 MHz (#if F_CPU == 8000000L), which I guess it is not. So the #DEFINE MY_BAUD_RATE 115200 is never executed.

      So then the GW runs at what baud rate?

      Try to move the #DEFINE outside of the #if -- #endif and maybe set a lower baud rate, also in the HA .yml

      posted in Home Assistant
      bgunnarb
      bgunnarb
    • RE: Is MQTT Necessary? or, Use Case for MQTT?

      @UglyKidJoe
      I have been using OpenHAB and MQTT for a number of years now.

      The reason for using MQTT and not just a serial connection from the MySensors GW is partly the flexibility as many have stated previously here. Easy to test, using e.g. the mqtt.fx tool. If you want to know what is going on you simply connect to the MQTT stream and "snoop" on the messages.

      Another reason is that I am running three geographical sites on one OH installation. OH is running on a NUC at my home. There is also an MQTT GW here. Two other My Sensors MQTT-GW are running remotely in two summer houses. The three GW connect over internet to a cloud-based MQTT broker and OH connects to the same broker. In that way I do not have to open any ports into my home network for access should I have had a local MQTT-broker at home.

      posted in Controllers
      bgunnarb
      bgunnarb
    • RE: DHT11, W5100, OLED display node

      Did you try commenting out #define MY_DEBUG ?
      That might save you a few bytes.

      posted in My Project
      bgunnarb
      bgunnarb
    • RE: Loosing relays state after OH restart

      OK!
      Sorry but I cannot help you there. I don't know enough about the Serial GW. At least it seems OH is doing the right thing.

      posted in OpenHAB
      bgunnarb
      bgunnarb
    • RE: Loosing relays state after OH restart

      @Dawidi
      Do you persist the relay states? This will make the previous state of the relays known after a restart of OH.
      Check this information: https://www.openhab.org/docs/configuration/persistence.html

      posted in OpenHAB
      bgunnarb
      bgunnarb
    • RE: Arduino with voltage regulator

      Filtering the power lines on input and output is generally not a critical issue when it comes to the value of the capacitors unless you plan to produce a large number of boards when cost of components become the issue.

      If you are looking for a trouble-free operation it is better to be safe than sorry and to be conservative in the dimensioning. So 10 uF on the output is better than 2.2 since it provides more filtering of low frequency noise. 0.1 uF is better than 470 pF since it provides more filtering of high frequency noise. 10 uF on the input also filter out spikes in the input power, should there be any, so that they do not pass through the regulator. It is good practice to have both a 10 uF and a 0.1 uF capacitor on the output since they have different electrical capabilities to filter low and high frequency noise.

      So in essence, the value of filtering capacitors is not that critical most of times. Too little filtering could give you issues with the radio, which is sensitive to noise on the power lines. This is why there always should be a capacitor of at least 4.7 uF close to the radio power input.

      posted in Hardware
      bgunnarb
      bgunnarb
    • RE: Trouble with the JSN SR04T

      Yes, I take five consecutive readings 100 ms apart and calculate the median value of the readings that fall within allowed limits. Off-scale readings are discarded before calculating the median value.

      It has been running for two weeks now and seems to be accurate and stable.

      posted in Troubleshooting
      bgunnarb
      bgunnarb
    • RE: Trouble with the JSN SR04T

      @sundeep-goel
      Oh! This sounds a lot like the problems I have had for the past year. Like @zboblamont I have been pulling my hair trying to find a solution.

      The tank is a square profile septic tank, cross section 1 x 1 m. Access to the tank is through a manhole some 60 cm diameter.

      First i tried mounting the sensor in the lid of the manhole but all the time I ended up with measurements like 20 - 30 cm, no matter what the liquid level was.

      I then tried to mount a baffle around the sensor trying to limit the beam spread so that the sensor would not see the corrugated wall of the manhole. No luck!

      Next idea was to increase the powerfeed to the sensor. First it was powered from one of the digital pins of the Arduino, giving some 4.x volts. So, thinking this was below specs, I built a circuit that gave the sensor proper 5 V as needed. No luck!

      The final solution was to mount the sensor at the bottom end of a plastic tube, 30 mm outer dia and then feed the cable through the tube and out to the electronics. The tube is attached to the wall of the manhole using a plastic clip. Please see attached photos. Success!

      So clearly my problem was caused by the sensor getting reflexes from the corrugated wall of the manhole.
      1_1563737602774_IMG_0212.jpg 0_1563737602773_IMG_0211.jpg

      posted in Troubleshooting
      bgunnarb
      bgunnarb
    • RE: pH Sensor probe (board PH-4502C)

      I think this question is best answered by a chemist, not an electronics expert. I do not claim to know much about water chemistry other than it is very complex. Probably pool water does not have the buffering capacity as the buffer solutions do so the measurements are affected by all other chemicals, gases and stuff in the water. But again, this is just what i learned from my father who indeed was a chemist.

      posted in Troubleshooting
      bgunnarb
      bgunnarb
    • RE: Battery Tank level node and Openhab

      @Crumpy10 The sendBatteryLevel is a method included in the library.
      How do you connect MySensors to OpenHAB? Do you use the serial GW or MQTT? What binding do you use on the OH-side?
      I am using MQTT myself so I am not that much at home with serial or with the MySensors binding for OH.

      posted in OpenHAB
      bgunnarb
      bgunnarb
    • RE: Lux sensor (BH1750) sending battery level (V)

      @mfalkvidd
      Yep, this is a great way of introducing errors that will be nearly impossible to find!😀

      posted in Development
      bgunnarb
      bgunnarb
    • RE: Lux sensor (BH1750) sending battery level (V)

      The line

      float Vcc = readVcc()/1000;
      

      should be:

      float Vcc = readVcc()/1000.;
      

      to start with. Note the decimal point! If read Vcc() returns a float, you cannot divide by an integer.

      posted in Development
      bgunnarb
      bgunnarb
    • RE: MQTT GW on RPi A drops connection after a while

      I did try another RPi but same result.

      I have switched the 3G router to a TP-link Archer MR400 with built-in 3G modem. The 3G connection appears very stable with high signal strength. Still the MQTT MysGW drops out now and then, approx. once every two days. Connection between router and GW is ethernet cable. Since the GW is located abt. 400 km from home, I am not able to troubleshoot effectively.

      So I applied brute force and set up a cron job that restarts mysgw once every 24 hours. This seems to do the trick. I am not disconnected for any longer time than that.

      Strange though that I do not have to restart the RPi. If the issue is caused by the internet connection dropping out, the RPi seems to be able to recover. The GW however seems unable to recover from such a short interruption. So, something similar as @CrankyCoder has experienced.

      posted in Troubleshooting
      bgunnarb
      bgunnarb
    • RE: NODE NOT REG - Node not registered?

      That is my conclusion as well!

      posted in Troubleshooting
      bgunnarb
      bgunnarb
    • RE: NODE NOT REG - Node not registered?

      @alowhum
      Could you post the code for the node please?

      posted in Troubleshooting
      bgunnarb
      bgunnarb
    • RE: Communication problems between MQTT Gateway (OrangePi) and Node (Arduino Nano)

      @gammlerstyle said in Communication problems between MQTT Gateway (OrangePi) and Node (Arduino Nano):

      --my-port=1883
      --my-mqtt-client-id=MySensors-SmartHome1
      -my-mqtt-publish-topic-prefix=mysensors-out
      --my-mqtt-subscribe-topic-prefix=mysensors-in

      Just an observation: There is one dash missing in the ./configure command line on the publish-topic-prefix.
      Also, all these configs should be on one line, no CR/LF between but maybe that is only the code block markers acting up. Maybe you have done so.

      I did implement this mqtt GW recently on an old RPi and I included --my-rf24-irq-pin=2 in the config but in reality I never connected that pin to the RPi. This caused some interesting problems I think.

      posted in Troubleshooting
      bgunnarb
      bgunnarb
    • RE: Problem with Mosquitto Topic

      @mfalkvidd said in Problem with Mosquitto Topic:

      MY_MQTT_PUBLISH_TOPIC_PREFIX

      @exblematique
      I am using three different MQTT gateways in three different geographical locations and have done so for years. Each having their own MY_MQTT_PUBLISH_TOPIC_PREFIX. It works perfectly!

      posted in Troubleshooting
      bgunnarb
      bgunnarb
    • RE: Ideal Sensor read interval

      Hi @dzjr
      Some things to consider:
      If the sensor is battery operated, the more you sleep, the better of course.

      Air pressure normally changes slowly so 5 min. is OK. Same with temperature.
      Ground moisture is probably OK with 15 min.

      If you use the lux sensor to control garden lighting, you may see the lamps go on and off every minute if you set a simple rule like if lux < 300, switch on lights. So to avoid driving neighbours crazy you may want to consider a longer time there. I use 2 minutes but the lights are indoors and it gives a nice hysteresis when clouds pass.

      To make programming easy you could set all time intervals the same. 5 or 10 min?

      If you plan to display graphs, 2 to 5 minutes will give you smooth curves without big jumps.

      posted in Development
      bgunnarb
      bgunnarb
    • RE: Beginner Problems

      @sharpy
      I have no good idea why one radio worked and the other not. The PA+LNA radio requires more power but that should not be an issue on the gateway. I assume you have a good capacitor, 4.7 μF or more on the radio power connection. I normally use 22 μF since I have plenty of them.

      You set the node-ID manually by including:

      #define NY_NODE_ID    4
      

      or whatever number you like to use. This should be in your sketch before the

      #include <MySensors.h>
      

      Like all other #defines
      Look under Configuration on this page: https://www.mysensors.org/download/sensor_api_20

      posted in Troubleshooting
      bgunnarb
      bgunnarb
    • RE: Beginner Problems

      @sharpy

      It looks like your sensor does not find the gateway.
      What does your sensor sketch look like?
      What interface do you use to OpenHab? Openhab binding?
      Did you set a node-ID manually in the sketch? OH does not assign node-IDs automatically as far as I know.

      posted in Troubleshooting
      bgunnarb
      bgunnarb
    • RE: Node not working with existing Gateway

      @neo-mod
      To me, the log seems to indicate that the radio connection is not working.
      If the HW is identical (with capacitor on the radio power connection) then I can see two causes:

      1. Faulty nRF24. Try switching the radion module
      2. Distance between node 2 and GW too far or something blocking the radio transmission. Try moving node closer to GW.
      posted in Troubleshooting
      bgunnarb
      bgunnarb
    • RE: MQTT GW on RPi A drops connection after a while

      @crankycoder
      Interesting!
      I am using a mobile broadband connection and it seems to have some issues with drop-outs in the connection. I'll pursue this path first.
      Power should not be an issue. I have a 2.5 A wall-wart supplying the Pi.

      posted in Troubleshooting
      bgunnarb
      bgunnarb
    • RE: MQTT GW on RPi A drops connection after a while

      I suspect the OS or maybe hardware as well. When this happens remote ssh is also broken so difficult to know what is going on. I'll try another RPi. Or maybe an ESP.

      posted in Troubleshooting
      bgunnarb
      bgunnarb
    • MQTT GW on RPi A drops connection after a while

      I have built an MQTT GW on an RPi model A based on the sketch provided on the MySensors Build page.
      The settings are as follows:

      ./configure --my-gateway=mqtt --my-controller-url-address=m24.cloudmqtt.com --my-port=18784 --my-mqtt-client-id=sjovsensors --my-mqtt-user=xxxxx --my-mqtt-password=xxxxx --my-mqtt-publish-topic-prefix=sjov-out --my-mqtt-subscribe-topic-prefix=sjov-in --my-transport=rf24 --my-rf24-ce-pin=22 --my-rf24-cs-pin=24 --my-leds-err-pin=12 --my-leds-rx-pin=16 --my-leds-tx-pin=18
      

      It all works fine for a while but after an hour or so, no more mqtt messages are transmitted to the broker. The logs do not provide any useful information. Either they show that messages are received and relayed to the broker although they are not, or I am not able to log in to the RPi at all. SSH connection refused. I have tried both cable connect and WLAN connection to the router. The router incidentally is a 3G mobile data connection.

      I suspect that the RPi somehow has lost the link to the broker or the router for a short while and then is unable to reconnect but otherwise I have no clue.

      Ideas welcome!

      posted in Troubleshooting
      bgunnarb
      bgunnarb
    • RE: Node unable to find parent

      @ElCheekytico
      I cannot find that you set your NODE_ID in the beginning of the sensor sketch.
      Since OpenHAB does not hand out node-id as far as I know (I do not use the MySensors binding in OpenHAB since I connect over mqtt) you have to set NODE_ID manually.

      Note: The GW does not assign node id either.

      In your sensor sketch, start by adding

      #define MY_NODE_ID   5
      

      for example and see if you are able to connect.

      posted in Troubleshooting
      bgunnarb
      bgunnarb
    • RE: Requests from gateway

      @patrickl When looking at the log it seems like your sensor with ID=1 is sending data at quite irregular intervals. Looking at the time stamps transmissions happen sometimes 30 seconds apart then one minute, sometimes 3 minutes.

      Measurements seem to come in pairs, humidity and temperature?

      What does your sensor code look like? Is there something that makes the sensor go wild from time to time and send bursts of measurements, overloading the Vera?

      posted in Vera
      bgunnarb
      bgunnarb
    • RE: pi gateway just stops communicating

      My two cents worth:

      I have been battling this issue as well for the last couple of days.
      I am now using the master version on an Rpi 1, a really old one. It did work for a few hours, 1 - 10 and then stopped communicating.

      The discovery I made today was that I goofed up and built the mqtt version of the gw with the option --my-rf24-irq-pin=15 set in the config file. All well only if I had not forgotten to connect the IRQ from the rf24 to pin 15 on the RPi. Stupid!

      So, I rebuilt the gw today without this option and it is still running well after a few hours. We'll see tomorrow.

      posted in Troubleshooting
      bgunnarb
      bgunnarb
    • RE: Possible problem with sketch?

      Hi @Homer
      The reason that the controller does not reflect the status of the relay is that you are not telling it that the status has changed.

      This is a snippet of how I have coded the same thing:

      void receive(const MyMessage &message) {
        if (message.type == V_STATUS) {   
            state = message.getBool();          // Change relay state
            setRelayState(RELAY_PIN, state);    
            saveState(CHILD_ID_RELAY, state);        // Store state in eeprom
            // Write some debug info
            printStateChangedDebug(CHANGE_STATE_SOURCE_RADIO, CHILD_ID_RELAY, state);
        }
      } 
      
      // Set status of relay pin
      void setRelayState(byte relayPin, bool value) {
        digitalWrite(relayPin, value ? RELAY_ON : RELAY_OFF);
        send(msgSW.set(state), false);           // acknowledge new state to controller, no ack requested
      }
      

      When the message is received, I first change the relay, then I confirm the status with the send-message.

      posted in Troubleshooting
      bgunnarb
      bgunnarb
    • What do "error-blinks" say?

      Is there any documentation available about what different "error-blinks" mean in the MySensors MQTT gateway?

      I just built one based on an RPi A and it works just fine. Now and then I get error blinks, different number of red blinks. They signal failure in some way but what failure? Collision, bad reception or what?

      posted in Development
      bgunnarb
      bgunnarb
    • RE: Trying to design MySensors PCB / Fritzing

      Hi!
      I absolutely recommend that you invest the time needed to learn KiCad. Then you get all this stuff with clearances for free. You also get a whole library with footprints for components. KiCad will print originals for making the PCBs if you do that yourself.
      You could also send the KiCad .pcb file to e.g. www.oshpark.com in the US. They charge $5 per sq. inch of 2-layer board and you get 3-boards for that price. They normally take one week to do the job and the result is excellent!

      posted in Hardware
      bgunnarb
      bgunnarb
    • RE: Where do i start?

      I have made the same journey starting a few years back.

      I am using OpenHab www.openhab.org as the controller. First running on an RPi, now on a NUC-clone.

      Two MySensors MQTT GWs. One using an NodeMCU the other an old RPi A. About a dozen of sensors based on Arduino Pro Mini, most on battery.

      One piece of advise: Do not start by trying to put everything (sensor, GW (and controller)) in one node. It makes debugging much more difficult. Get yourself a couple of Arduinos (Mini or Nano) as sensor nodes. Then e.g. a Node MCU as GW and an RPi as controller. I think it makes understanding the system more easy.

      Also, start with a simple sensor like temperature. Building a PIR sensor as your first project is difficult, especially if you want it to operate on batteries.

      posted in My Project
      bgunnarb
      bgunnarb
    • RE: Temp-Monitoring using OpenHab, MQTT, Pi 3 & Uno

      @nizoo91 Hi!
      I'll try to shed some light on your questions 1 and 3.

      Question 3. Right. If the Broker is hosted on the same RPi as OpenHab (OH), then localhost is correct.

      Question 1. The question is not correct. The sequence of transmission from sensor to OH is the following:

      a.) The Arduino sensor sends its data to the MySensors MQTT GW, which in your case is hosted on the RPi.
      b.) The MySensors MQTT GW publishes the data to the MQTT Broker, which in your case also is hosted on the RPi. The MQTT broker acts like a hub for the MQTT messages.
      c.) OH uses the MQTT-binding to subscribe to the messages that come into the MQTT Broker and does its magic.

      This is a very efficient set-up especially if you have, as I have, several places with sensors, each reporting via their own MySensors MQTT GW to one MQTT Broker which then OH can subscribe to.
      But for learning both MySensors and OH at the same time, it will be a bit complicated.

      Some good sources of knowledge is www.openhab.org where you will learn everything about OH. The OH community is also very much alive. I recommend that you use that site for learning OH instead of other sources.

      To learn MQTT and how this works, you can start using a tool called mqtt.fx which is available from the website with the same name. Then you can connect to your broker and watch incoming messages from the MySensors GW. You can also inject MQTT messages with that tool and make OH do things.

      For a simpler set-up just install the MySensors serial GW and have that talk directly to OH. There is an OH binding available for MySensors I think but I have no experience with that.

      Coming to grips with all of this is a bit of a steep learning curve but don't give up. Start piece by piece and get the different parts working and then connect them together. I have done it! Good luck!

      posted in Troubleshooting
      bgunnarb
      bgunnarb
    • RE: Getting started issue

      I am using OpenHAB 2.3 and in my experience OH does not assign node ID to the sensor at presentation.
      You will have to assign node ID manually in each sensor sketch by defining as an example:
      #define MY_NODE_ID 24

      In my setup I connect from the sensor to an MQTT-GW that talks to the MQTT broker.
      Then OH subscribes to the same broker and receives messages. Most people use mosquitto as a local broker, often on the same machine that runs OH.

      OH recently released 2.4 where the MQTT binding is substantially updated so I recommend you read up on that before changing.

      posted in Troubleshooting
      bgunnarb
      bgunnarb
    • RE: Using RaspPi as Gateway + Controller AND MQTT

      @robertjuric Hi!
      For a number of years I was running OpenHAB with influx and grafana on an RPi and it worked very well but eventually I gave that up. A few months back I got a NUC, Intel Celeron based with SSD, $200 from China.

      The reason for switching HW was that sooner or later, after a year or so, the SD-card would get corrupt. I would get all sorts of mystical errors. The response time increased and the system got harder and harder to maintain. I suspect that influx data storage to the card was the main culprit. Of course you can connect an SSD and move the system to that but it all got too complex and at the end I felt that the RPi in the long run would not provide the power needed.

      Now I run OH 2.3 + influx + grafana under Ubuntu 18.04 and it runs very cool. CPU-load is almost never above 1%.
      In my set-up I have two geographical sites with a number of MySensors nodes and some 433 MHz switches. They connect to an MQTT GW on each site. One is a 1:st gen RPi, the other is an MCU.

      Since I then have two MQTT streams I use an external, commercial MQTT broker and OH connects as a client to that broker and subscribes to the various topics. I prefer this rather than setting up a VPN from the remote site, which would be an alternative to using the commercial MQTT broker.

      If you only have a local set-up of course you could run your mosquitto broker on the same node as OH, influx and grafana. Personally I would still use a separate GW. I feel that this would be easier to maintain but I recognise that this brings one more node to the "closet".

      posted in Controllers
      bgunnarb
      bgunnarb
    • RE: MQTT GW issues with sending MQTT msg

      Did you try MQTT.fx? I use that SW (free of charge) a lot when troubleshooting MQTT.

      Start by checking that MQTT.fx really does connect with the MQTT broker. Then subscribe first to the topic #, which means everything. Then narrow down by subscribing to mygateway1-out/# and so on.

      The latest version of MQTT.fx also has a Topics Collector that shows all topics on the broker as they arrive.

      posted in Troubleshooting
      bgunnarb
      bgunnarb
    • RE: PIR sensor firing every 20 seconds

      In my experience PIR sensor are very sensitive to spikes in the power supply, especially if you run them on voltages close to the lower limit. I feed mine with a separate +8 volt supply. If you run it on the same 5 volt supply as the ESP8266 you are almost guaranteed to get false triggers. The 20 seconds is probably the time after which the PIR resets. This causes a spike on the supply which triggers the PIR again. This happened to me.

      posted in Troubleshooting
      bgunnarb
      bgunnarb
    • RE: DHT11 Example Code on Arduino

      Don't feel stupid! If I had gotten 10 cents for each stupid mistake I have done over the years I would be a millionaire now. 😀

      posted in Troubleshooting
      bgunnarb
      bgunnarb
    • RE: DHT11 Example Code on Arduino

      Oops! I may have misled you.
      The #define MY_NODE_ID 1 has to go into the sketch before you call #include <MySensors.h>

      as pointed out in the description of the Library API definitions:
      "Remember to set configuration defines before including the MySensors.h."
      In my sketches I always do all the #define (s) first like below:

      // Enable debug prints to serial monitor
      #define MY_DEBUG
      #define MY_NODE_ID 23
      #define BATTERY_SENSE_PIN A0  // Input pin for battery sense
      #define VMIN 1.0  // (Min input voltage to regulator according to datasheet or guessing. (?) )
      #define VMAX 3.22 // (Known or desired voltage of full batteries. If not, set to Vlim.)
      #define CHILD_ID_HUM 0
      #define CHILD_ID_TEMP 1
       
      
      // Enable and select radio type attached
      #define MY_RADIO_NRF24
      //#define MY_RADIO_RFM69
      
      #include <SPI.h>
      #include <AM2320.h>
      #include <Wire.h>
      #include <MySensors.h>
      // Rest of code goes here...  
      
      posted in Troubleshooting
      bgunnarb
      bgunnarb
    • RE: DHT11 Example Code on Arduino

      I think the reason is that you have not set a node ID. At least this is not visible in the sketch.
      OpenHab does not hand out node IDs. I have good experience.
      You should try setting
      #define MY_NODE_ID 1
      In the beginning of your sketch where you define Child ID.

      posted in Troubleshooting
      bgunnarb
      bgunnarb
    • RE: Voltage regulator differences

      @thecricketer
      There are so many things to consider when selecting components but for us hobby-tinkerers there are a few that are most important e.g.
      Max input voltage: Vinmax
      Max output current: Iout
      Size or package
      Price

      You will find all these answers in the data sheets. Normally available from your components supplier or else on the internet. Below is a simple table:

      Type Vinmax Iout Package Price (SEK, single units)
      LD1117 15 V 800 mA TO220 5:50
      LE33 20 V 100 mA TO92 9:-
      LP2950 30 V 100 mA TO92 9:-
      LM317 40V delta 1500 mA TO220 9:- (There is also an 100 mA version for 6:25)

      If you are using the Sundberg newbiePCB the design is for an TO92 package so either LE33 or LP2950 is the choice.
      The LD1177 is TO220 package and you do not need 800 mA for the radio. It only consumes about 30 mA when transmitting.
      The LM317 is an adjustable regulator so it can regulate to 5 V or 3.3 V or whatever you like but it takes two more resistors to set the voltage. In this case it is overkill and does not fit the Sundberg board.

      If you plan to run your design on batteries I think the LP2950 is better than the LE33 because the LP2950 consumes less power internally, only 75 microamps. The LE33 can use as much as 500 microamps internally.

      This is just scratching the surface of component choice but keep it simple in the beginning.
      Happy tinkering!

      posted in Hardware
      bgunnarb
      bgunnarb
    • RE: How to calibrate a gauge sensor

      @pierrot10
      1 mm of rain over 1 square meter is 1 liter of water. Correct!
      One liter makes 358 tips so one tip is then 2,7932 milliliters that is correct.
      But rainfall mm/hr is 2,7932 * nbr of tips only if the area of the funnel is 1 square meter.

      Your funnel is only 55 square centimeters so you will only collect 55/10000 of the rain that falls on the whole square meter.

      The example you are using at the top of your post does not have the size of the funnel anywhere in the code.

      posted in General Discussion
      bgunnarb
      bgunnarb
    • RE: How to calibrate a gauge sensor

      @pierrot10
      Since I am using almost the same tipping bucket rain gauge, let me try to explain how it works:

      The top of my funnel measures 109 x 49 mm = 5341 mm2 (square millimeters). For now, let us not worry about the rounded corners of the funnel.
      If it rains 1 mm the funnel will collect 5341 mm3 (cubic millimeters) which is 5,341 cubic centimeters equal to 5,34 milliliters. This is difficult to use for calibration so let's try with 10 mm of rain which then equals 53,4 milliliters or 0,53 deciliters of water.

      So, you pour 53,4 milliliters of water into the funnel, not spilling any and you count the number of bucket tips. In my example, when I do this, the bucket tips 30 times. So if the bucket tips 30 times during a time period, it has rained 10 mm during that time. Or, the other way around: One tip of the bucket = 10/30 = 0,33 mm of rain.

      Do not worry about the size of the bucket inside. What matters is how many times the bucket tips for a given amount of water. It is the area of the funnel which is important.
      When it rains 1 mm an area of one square meter will receive 1 liter of water but the little funnel will only receive 5,34 milliliters as explained above.

      Now, if you really want to be accurate, you should take away the area of the rounded corners. But that will be less than 0,5% and there are other sources of inaccuracy.

      posted in General Discussion
      bgunnarb
      bgunnarb
    • RE: Interrupted sleep

      I had the same issue some time ago, measuring time while asleep and running on batteries. I ended up building this project: Battery operated rain gauge..
      The time between reports is controlled by a CMOS 555 timer, independently from the Arduino. Needless to say I did not include any other sensors.

      posted in Development
      bgunnarb
      bgunnarb
    • RE: Battery life for Motion Sensor

      @popsyann
      In your sketch, please check that you have defined the input pin for the PIR pin as pinMode (PIR_PIN, INPUT) and not pinMode (PIR_PIN, INPUT_PULLUP). If you have activated the internal pullup in the arduino this will prevent the PIR from pulling the input low when there is no motion.

      posted in Hardware
      bgunnarb
      bgunnarb
    • RE: 💬 Air Humidity Sensor - DHT

      Yes but the issue is with the sensor node. What sketch are you using there?

      posted in Announcements
      bgunnarb
      bgunnarb
    • RE: 💬 Air Humidity Sensor - DHT

      Hi!
      What controller are you using?
      From the logs it seems that the sensor is asking for an ID but does not get any.
      Node ID is handed out by the controller. Or else you have to set the node ID in the sketch. What does the sketch look like?

      posted in Announcements
      bgunnarb
      bgunnarb
    • RE: I2C Communications between 5v and 3v Arduinos....

      @zboblamont This is maybe OT but I am extremely interested in the mechanical design of the "gun-barrel" mounting of the transducers. I have tried measuring the level in a septic tank using the DYP-ME007 transducer. It all works fine in open air but as soon as I mount the transducer in the tank, the measurement reported is that the tank is full to the brim, no matter what.

      I suspected echos in the tank so I enclosed the transducer by a piece of PVC sewage pipe, 70 mm dia and 150 mm long, but this made no change. You mention 1/2" pipe. Is the transducer mounted at one end, transmitting through the pipe? How long is the pipe in that case? Any photo or drawing would be much appreciated!

      posted in General Discussion
      bgunnarb
      bgunnarb
    • RE: Battery life for Motion Sensor

      Hi!
      Sorry to say, but the Arduino Nano may not be the best choice for battery operation and maybe the Motion Detector also is not the most power economic application. I guess, to start with you have not done any modification to the Nano like removing the power LED? There goes a few milliamps the whole time.

      The PIR need rather high voltage to be stable and not generate random detects. I run mine on 8V. But the Nano needs only 5V so you burn off a bit of power in the voltage regulator chip, even if the sleep current of the Nano is very low. Of course, the more detections there are, the more power is used during the day.

      The Arduino ProMini is a better choice for battery operation. Please see Battery Powering in the left-hand column on the MySensors site. There are a few tricks there to really bring down power consumption. Then again the PIR needs more than 5V so you will have to use a power booster if you use the ProMini 8 MHz version that runs on 3.3 V.

      I think sleeping for 600000 mS will only marginally improve battery economy. I went through the same ordeal as you and I run my Motion Detector on a 9 V wall-wart.

      For sensors that really work well on battery I would suggest Light, Temperature and Humidity. I have a few of these built around ProMini 8 MHz and they typically run for 9 months or more on 2 x AA reporting every 2 minutes, but if you look at the link above, people achieve much better results. But I'm happy with 9 months.😀

      Best of luck and keep experimenting!

      posted in Hardware
      bgunnarb
      bgunnarb
    • RE: High-performance controllers

      @Avamander I'm using OpenHab together with influxdb and grafana. All running on the same RPi. influxdb collects temperatures from half a dozen sensors and also a rain gauge every 2-5 minutes. Grafana plots the values every five minutes.

      OpenHab has rather a steep learning curve but the support forum is excellent. Openhabian is the easiest way to get running with OpenHab on and RPi

      posted in Controllers
      bgunnarb
      bgunnarb
    • RE: 💬 Battery operated rain-gauge

      So this is why i implemented a timer. I want rain reports every five minutes, no more, no less. Since it is battery operated I need the node to sleep if there is no bucket tip. But if the bucket tips, and generates an interrupt, then the node will sleep for another five minutes. And I don't want the node to report rain as soon as the bucket tips either. I started messing around with an RTC but that got much too complicated and I don't need real-time. The controller OpenHAB handles that together with Influxdb and Grafana.

      posted in OpenHardware.io
      bgunnarb
      bgunnarb
    • RE: 💬 Battery operated rain-gauge

      Well, maybe I missed something. So, if the node sleeps for say 30000 mS and it receives an interrupt from the bucket: After handling the interrupt, does it sleep for the remaining time until 30000 mS have passed or does it start over, sleeping for another 30000mS? Not fully clear from the API. What I wanted to achieve is to have a rain report every 5 minutes regardless if there is rain or not.

      posted in OpenHardware.io
      bgunnarb
      bgunnarb
    • RE: Relays not working through MySensors Relay, MQTT, and Openhab

      @fals3illusion said in Relays not working through MySensors Relay, MQTT, and Openhab:

      https://www.mysensors.org/build/relay

      I think you have the MQTT-messages wrong.
      Try this: (I left out the curls and other stuff. That syntax is correct)
      for relay 1
      mosquitto:mysensors-in/3/1/1/0/2:command:ON:1 and then /3/1/1/0/2:command:OFF/0

      for relay 2 it should be:
      mosquitto:mysensors-in/3/2/1/0/2:command:ON:1 and then /3/2/1/0/2:command:OFF/0
      Why?
      The message structure is:
      /node-id/child-id/command which in this case is 1=set/ack=0/type which in this case is 2=V_STATUS The payload is then either 1 or 0 just as you have it translated from ON and OFF

      What I think confused you is that when the relay is presenting the command type is 0 and the presentation type is 3 S_BINARY, whereas when setting the relay, the command type is 1 and the set type is 2 V_STATUS

      Have a look at the Serial protocol definition under the Download/API section. The blue box. Then it will become much more clear I hope.

      posted in Troubleshooting
      bgunnarb
      bgunnarb
    • RE: The temperature and humidity sensor sends only humidity. Please help me understand.

      I agree with @mfalkvidd. This is not due to the sensor code but this is the way OH handles the data.

      I'm using OH but the MQTT 1.x binding that does not support discovery. I manually define three logical devices, temp, hum and batt in the .items file. I think this is the expected behaviour of OH.

      If you want them presented as one device you could combine the measurements into one string by using a rule and do some string manipulation. I do this to combine wind speed and direction into one string.

      posted in OpenHAB
      bgunnarb
      bgunnarb
    • RE: Connect MySensors to OpenHab with MQTT gateway on a Raspberry Pi

      @masmat Yes. I am using the old 1.x binding. I have not tried the 2.x version.

      posted in OpenHAB
      bgunnarb
      bgunnarb
    • RE: Pro Mini issues

      @dbemowsk Strange! I have never made a manual reset when programming my Pro Minis.

      posted in Troubleshooting
      bgunnarb
      bgunnarb
    • RE: Connect MySensors to OpenHab with MQTT gateway on a Raspberry Pi

      As far as I understand the MQTT binding for OH is still version 1.x and does not support discovery of items via PaperUI. I have added all items via the .items file.

      On the other question I cannot offer any support, sorry.

      posted in OpenHAB
      bgunnarb
      bgunnarb
    • RE: Adding Door sensor to Multisensor not working...

      Hi!
      This is how I see it:
      You sleep most of the time so both the motion sensor and the door sensor will have to generate an interrupt in order for the sensor to transmit.

      The Arduino only has two interrupts, 0 and 1. Pin 2 generates interrupt 0 and pin 3 generates interrupt 1.

      The motion sensor is attached to pin 3 which generates interrupt 1 (3-2 = 1) but only pins 3 and 2 are able to generate interrupts. You have attached your door sensor to BUTTON_PIN = pin 7 but pin 7 cannot generate an interrupt. This is why you never see this triggered.

      Try attaching the door sensor to pin 2 and re-use the code for the motion sensor, transmitting the message msgDoor.

      You will have to change the sleep message also to handle two interrupts. This is the constructor for the sleep message, taken from the 2.x API-definition:
      int8_t sleep(uint8_t interrupt1, uint8_t mode1, uint8_t interrupt2, uint8_t mode2, unsigned long ms=0);

      posted in Troubleshooting
      bgunnarb
      bgunnarb
    • RE: Mysensors mqtt gateway (noob question).

      @capibara
      Yes, you are getting there!
      The topic prefix is just as you say defined by the #define statement.
      The rest of the topic is defined as described in the API definition (Serial protocol) so:
      /node-id/sensorchild-id/command/ack/type/
      The content of the message is the payload.
      Example: this is copied from my GW:
      ib9sensors-out/21/2/1/0/4 1014 => So the sensor id is 21/ the child is 2/ this is a "set" message/ no-ack/ payload type is V_PRESSURE. The content of the message is 1014 which is just the atmospheric pressure here today.
      I recommend using an MQTT client test tool like MQTT.fx It helps a lot when debugging.

      I am not the right guy to answer how to re-define the topic structure. I guess you will have to do some serious work on the MQTT GW software.

      posted in Development
      bgunnarb
      bgunnarb
    • RE: RGB LED strip

      @maghac
      No, I have not experienced loss of response like that. At least not since I upgraded my GW to 2.2.0.

      One thing happened though: I was testing the relax, alarm and party modes several times. After that, when fading from one colour to the next in normal mode, it looked like the program first wanted to fade through a number of colours before reaching the final value. This happened a few times and after that it became unresponsive. Cycling power made it go back to normal. I have not been able to repeat the behaviour.

      posted in My Project
      bgunnarb
      bgunnarb
    • RE: NRF24L01 radio not connecting

      @kontrollable I think you should update the GW as well. I had a lot of problems with downlink messages from GW to an RGB controller. Updating the GW solved all of this immediately.

      posted in Hardware
      bgunnarb
      bgunnarb
    • RE: Connect MySensors to OpenHab with MQTT gateway on a Raspberry Pi

      I am also using almost the same setup as @mbj above. The main difference being that I am using an external cloud MQTT broker, not Mosquitto locally. The reason for that is that I actually have two MySensorsMQTT GWs running in two different geographical locations and I don't want to expose a local Mosquitto server inside my network. They publish their messages on two different topics in the cloud service and OpenHAB subscribes to both. One GW is ESP-based and connects over WiFi. The other is Arduino-based and connects over Ethernet.

      The OpenHAB MQTT binding can subscribe to two different MQTT streams.

      I have found that it is very helpful to have an MQTT test tool available so that you can test both the publishing and the subscription functions on either side. I am using MQTT.fx very good and free of charge!

      But then, as @mbj said; I also started long before the other binding was available.

      So, @mtnbikerjoshua if you want to follow this path, the next thing to do is to have your MQTT GW publish the topics to your Mosquitto server. Then using the OpenHAB binding, Openhab shall subscribe to the same topics. This is when it is so nice to have the test tool. You can test one half of the connection at a time. If you have not done this, you should read up on the MQTT protocol. There is plenty of stuff to read on the net.

      posted in OpenHAB
      bgunnarb
      bgunnarb
    • RE: RGB LED strip

      @maghac I have implemented your 1.8 and I am impressed with the good structure and the performance of your code! Kudos!

      posted in My Project
      bgunnarb
      bgunnarb
    • RE: Reliable communication.

      I did notice a remarkable increase in performance upgrading to 2.2.0, especially downlink. It is worth a try.

      posted in Development
      bgunnarb
      bgunnarb
    • RE: Bad downlink radio solved by updating gateway

      Ah! Sorry, misprint. Now using 2.2.0, not 2.0.0!

      posted in Troubleshooting
      bgunnarb
      bgunnarb
    • Bad downlink radio solved by updating gateway

      Hi!
      I'm running a number of sensors connected to an NodeMCU1.0 ESP8266 MQTT gateway. It has been running very well for almost two years with sensors reporting uplink to the MQTT broker.

      But when I added an RGBW LED-strip and tried to send messages downlink I ran into all kinds of problems with the radio link. I tried more decoupling on the NRF radio, moving the units closer, swapping the radio board but downlink messages were not transmitted reliably. It took several tries to get one message through and rgbw messages did not transmit at all.

      After ruling out all other possibilities, I decided to re-compile and upload the ESP8266MQTTgw sketch now using the 2.0.0 API. After that things work perfectly!

      So, it pays off to do as suggested on the API-page: We recommend updating both gateway and sensors to the the latest release.

      posted in Troubleshooting
      bgunnarb
      bgunnarb
    • RE: RGB LED strip

      @Plantex
      In my opinion that should work just fine. The specs are fairly similar. I am using the IRLZ44N myself to drive a five meter long RGBW LED-strip and they do not get warm, even without a heat sink. Total current consumption at 24V is just above 2A when all LEDs are lit.
      Schematics below:
      0_1511539204888_LEDstrip_sch.pdf

      posted in My Project
      bgunnarb
      bgunnarb
    • RE: RGB LED strip

      Hi!
      I'm doing some further development based on the sketch by @maghac and @DrJeff above and I have found two potential bugs that could create some unexpected behaviour.
      The first is that if you have #DEFINE RELAX_SPEED 50 in the sketch and then set fadespeed (V_VAR1) to anything greater than 650 or so, you will get an overflow when you call the function init_fade (t, r, g, b ) since t is defined as int in init_fade.
      fadespeed can be set between 0 and 2000 in the sketch. So then the resulting fadespeed could be anything, even negative.

      init_fade(fadespeed * RELAX_SPEED,
                      program_param_RELAX[program_cycle][0],
                      program_param_RELAX[program_cycle][1],
                      program_param_RELAX[program_cycle][2]);
      

      Also in this function there is a potential risk of a "divide by zero" crash since the input variable t is used as fade_step to divide in order to get the size of each step in the fade cycle.

      void init_fade(int t, int r, int g, int b) {
        Serial.print( "Init fade" );
        light_mode = LIGHT_FADING;
        target_r = r;
        target_g = g;
        target_b = b;
        fade_step = t;
        delta_r = (target_r - current_r) / float(fade_step);
        delta_g = (target_g - current_g) / float(fade_step);
        delta_b = (target_b - current_b) / float(fade_step);
      }
      

      It might be that this function is never called with fadestep = t = 0 but since this is a value allowed in the input check of V_VAR1 nasty things may happen.
      Part from this I am impressed by the sketch. Once I have debugged my own additions I will post the project here.

      posted in My Project
      bgunnarb
      bgunnarb
    • RE: MySensors in my Smart Home

      Great news!
      I am on the same path, using MySensors and OpenHAB 1.8. But I am using a commercial MQTT broker - CloudMQTT in order to collect data from two physical sites.

      I am looking forward to reading more about your progress. Keep up the good work! As we move into autumn and I play less golf, I might enter my own story on this forum.

      posted in My Project
      bgunnarb
      bgunnarb
    • RE: What is the time code in debug messages?

      Follow-up question:
      Does the millisecond counter advance when the node sleeps as in:

      sleep(INTERRUPT, RISING, SLEEP_TIME);
      

      It does not seem so (which is fine, just want to know)

      posted in Troubleshooting
      bgunnarb
      bgunnarb
    • What is the time code in debug messages?

      Hi!
      What does the timecode that starts every debug message mean?
      This is what I can see on the serial monitor:

      149852 !TSF:SND:TNR
      150855 MCO:SLP:MS=600000,SMS=0,I1=0,M1=3,I2=255,M2=255
      150859 !MCO:SLP:TNR
      160861 MCO:SLP:MS=590000
      160863 MCO:SLP:TPD
      160865 MCO:SLP:WUP=-1

      posted in Troubleshooting
      bgunnarb
      bgunnarb
    • RE: Board and hardware failures

      @ileneken3 and @sundberg84
      Hi!
      I agree with @sundberg84 , the only time I have had problems, and that is only once, is when I had a very noisy DC/DC booster connected. It took an extra 22uF capacitor at the output of the booster to get the radio to connect to the GW. The booster generated spikes of more than 150 mV peak. I connected the capacitor in the experimental area where Vcc and GND are available. I also switched the capacitor close to the radio to 22uF instead of 4.7 uF. For my next design, I will make sure to connect the radio directly to 2xAA as suggested many times

      posted in Hardware
      bgunnarb
      bgunnarb
    • RE: Preferred MySensors Gateway choice for OpenHAB right now?

      I have been playing around for a while with MySensors and OpenHAB, first 1.8, which I now have running on an RPi. Now I am planning to upgrade to OH 2 but have not decided on the HW yet.

      Since I originally wanted to collect sensor data from two sites, one of which is very far away, I decided on using MQTT as transport protocol. There is a public MQTT broker service available on cloudmqtt.com. For small data volumes you can sign up free of charge. I am using the MySensors MQTT GW at home, based on an ESP8266 which collects data from the sensors on one of the sites and publishes to cloudmqtt.com.

      The OH installation has a binding to MQTT and subscribes to the various topics published by the sensors.

      At the other site I am using an old Arduino Uno as MQTT GW. I am struggling a bit with recovery of the remote site after power outages. It is difficult to press reset buttons from 400 km away.

      Figuring out MQTT topics and messages coming from MySensors was a bit of an uphill battle but wit the help of the tool MQTT.fx I eventually got that sorted also. The CloudMQTT service also takes a bit of study to get to understand with the different passwords, ports and access control mechanisms but I got there at the end.

      posted in OpenHAB
      bgunnarb
      bgunnarb
    • RE: DHT22 - humidity problem

      @warmaniac Oops! My humidity sensor is AM2320 and I was using I2C communication which uses SDA and SCL lines. I did this because I also wanted to combine this sensor with an BH1750 to measure light level.
      The DHT22 uses SPI and only one line (pin 2) for data communication. According to the datasheet no external components should be needed. Sorry to put you on the wrong track!

      posted in Hardware
      bgunnarb
      bgunnarb
    • RE: DHT22 - humidity problem

      @warmaniac I'm not sure if I answer the right question so I'll answer two questions: On the SDA and SCL lines you should use one resistor 4.7 kohm each to ground. So they are pull-down resistors, not pull-up as I wrote.

      The capacitor you should use on the Vcc line to the radio, as close to the radio as possible. At least 4.7 uF but anything higher is good. I normally use 10 uF or 22 uF which I have a large supply of.

      posted in Hardware
      bgunnarb
      bgunnarb
    • RE: DHT22 - humidity problem

      @warmaniac I had a similar problem with another humidity/temperature sensor until I realised that this sensor did not have any pull-up resistors on the SDA and SCL lines. Most break-out boards do have them and that is why I forgot.

      posted in Hardware
      bgunnarb
      bgunnarb
    • RE: 💬 Atmospheric Pressure Sensor

      Hi!
      I had exactly the same problem until I realised I had compiled for the 8 MHz version of the Arduino Pro Mini instead of the 16 MHz version.
      Also, recently building an humidity sensor I realised there are no pull-up resistors on the SDA SDL lines, but that should be built-in if you use a break-out module.

      posted in Announcements
      bgunnarb
      bgunnarb
    • Node does not re-connect to the GW after loss of contact

      I have built a handful of nodes that talk to two MQTT GW in different locations. One GW is based on an ESP8266, the other on an Arduino UNO with a W5100. I have found that two nodes, that are placed fairly far away from the GW, now and then loose contact over the RF. That could be due to bad radio conditions or a power outage on the GW. The problem is that after that, the node does not re-attach when conditions improve.

      This does not happen to nodes placed closer to the GW. Is there any way that the node can be made aware of that it has lost contact and then enter presentation mode again? Could the 'ack' be used for that?

      I am using MySensors 2.1.1

      posted in Troubleshooting
      bgunnarb
      bgunnarb
    • Motion detector with temperature and barometer function

      I have built an intrusion detector that also measures barometer pressure and indoor and outdoor temperatures.

      The pressure and indoor temperature is measured by a BMP280 and a number of DS18B20 sensors can be connected to measure the temperature in remote locations.

      When movement is detected two red LEDs flash during 20 sec.

      Everything is built into a frightening wooden mask, bought in Indonesia. The LEDs poke out through the nostrils.

      Here is the sketch:

      /**
       * File name: MotionSensor_LED_2_temp_baro_280
       * The MySensors Arduino library handles the wireless radio link and protocol
       * between your home built sensors/actuators and HA controller of choice.
       * The sensors forms a self healing radio network with optional repeaters. Each
       * repeater and gateway builds a routing tables in EEPROM which keeps track of the
       * network topology allowing messages to be routed to nodes.
       *
       * Created by Henrik Ekblad <henrik.ekblad@mysensors.org>
       * Copyright (C) 2013-2015 Sensnology AB
       * Full contributor list: https://github.com/mysensors/Arduino/graphs/contributors
       *
       * Documentation: http://www.mysensors.org
       * Support Forum: http://forum.mysensors.org
       *
       * This program is free software; you can redistribute it and/or
       * modify it under the terms of the GNU General Public License
       * version 2 as published by the Free Software Foundation.
       *
       *******************************
       *
       * REVISION HISTORY
       * Version 1.0 - Henrik Ekblad
       * Version 2.1 - Gunnar Blockmar includes PMB280 temp/baro sensor and DS18B20 temp sensor
       * 
       * DESCRIPTION
       * Motion Sensor example using HC-SR501 
       * http://www.mysensors.org/build/motion
       *
       * Now with 1 fading LEDs when sensor is triggered
       * Measuring temp and pressure with BMP 280. Local pressure
       * Measuring remote temp via DS18B20
       */
      
      #include <Adafruit_BMP280.h>
      #include <Adafruit_Sensor.h>
      #include <OneWire.h>
      #include <DallasTemperature.h>
      #include <SPI.h>
      
      unsigned long SLEEP_TIME = 60000; // Sleep time between reports (in milliseconds)
      
      #define MY_DEBUG
      #define DIGITAL_INPUT_SENSOR 3   // The digital input you attached your motion sensor.  (Only 2 and 3 generates interrupt!)
      #define INTERRUPT DIGITAL_INPUT_SENSOR-2 // Usually the interrupt = pin -2 (on uno/nano anyway)
      #define CHILD_ID_MOT 0   // Id of the motion sensor child
      #define CHILD_ID_ITEMP 1  // Id of indoor temperature sensor
      #define CHILD_ID_BARO 2  // Id of pressure sensor
      #define CHILD_ID_OTEMP 3  // Id of outdoor temperature sensor 
      #define RED_LED 5    // Pin for LED
      #define RED_LED2 6  // Pin for LED2
      #define DELAY 40     // Wait for brightness change
      int fadeAmount = 5;   // brightness change per step
      #define ONE_WIRE_BUS 2 // Pin where dallas sensor is connected 
      #define MAX_ATTACHED_DS18B20 16
      OneWire oneWire(ONE_WIRE_BUS); // Setup a oneWire instance to communicate with any OneWire devices (not just Maxim/Dallas temperature ICs)
      DallasTemperature sensors(&oneWire); // Pass the oneWire reference to Dallas Temperature. 
      int numSensors=0;
      bool receivedConfig = false;
      
      
      const char *weather[] = { "Stabilt", "Bättre", "Sämre", "Ostadigt", "Åska!", "Okänt" };
      enum FORECAST
      {
        STABLE = 0,     // "Stable Weather Pattern"
        SUNNY = 1,      // "Slowly rising Good Weather", "Clear/Sunny "
        CLOUDY = 2,     // "Slowly falling L-Pressure ", "Cloudy/Rain "
        UNSTABLE = 3,   // "Quickly rising H-Press",     "Not Stable"
        THUNDERSTORM = 4, // "Quickly falling L-Press",    "Thunderstorm"
        UNKNOWN = 5     // "Unknown (More Time needed)
      };
      
      Adafruit_BMP280 bmp;      // Digital Pressure Sensor
      
      float lastPressure = -1;
      float lastTemp = -1;
      int lastForecast = -1;
      
      const int LAST_SAMPLES_COUNT = 5;
      float lastPressureSamples[LAST_SAMPLES_COUNT];
      
      // this CONVERSION_FACTOR is used to convert from Pa to kPa in forecast algorithm
      // get kPa/h by dividing hPa by 10 
      #define CONVERSION_FACTOR (1.0/10.0)
      
      int minuteCount = 0;
      bool firstRound = true;
      // average value is used in forecast algorithm.
      float pressureAvg;
      // average after 2 hours is used as reference value for the next iteration.
      float pressureAvg2;
      float dP_dt;


      // Enable debug prints to serial monitor
      // #define MY_DEBUG 
      
      // Enables and select radio type (if attached)
      #define MY_RADIO_NRF24
      //#define MY_RADIO_RFM69
      
      #define MY_NODE_ID 41
      
      #include <MySensors.h>
      
      // Initialize motion message
      MyMessage msgm(CHILD_ID_MOT, V_TRIPPED);
      // Initialize temp baro and forecast messages
      MyMessage msgit(CHILD_ID_ITEMP, V_TEMP);
      MyMessage msgp(CHILD_ID_BARO, V_PRESSURE);
      MyMessage forecastMsg(CHILD_ID_BARO, V_FORECAST);
      MyMessage msgot(0, V_TEMP);
      
      bool metric = true;
      void before()
      {
        // Startup up the OneWire library
        sensors.begin();
      }
      
      
      void setup()  
      {  
        pinMode(DIGITAL_INPUT_SENSOR, INPUT);      // sets the motion sensor digital pin as input
        pinMode(RED_LED, OUTPUT);   // sets the pin for the LEDs as output
        pinMode(RED_LED2, OUTPUT);
        analogWrite(RED_LED, 0);    // make sure LEDs are OFF
        analogWrite(RED_LED2, 0);
        bmp.begin();
        if (!bmp.begin()) 
        {
          Serial.println("Could not find a valid BMP280 sensor, check wiring!");
          while (1) {}
        }
        // requestTemperatures() will not block current thread
        sensors.setWaitForConversion(false);
      }
      
      void presentation()
      {
        // Send the sketch version information to the gateway and Controller
        sendSketchInfo("M. Sens_LED_2t/b/f 280", "2.2");
      
        // Fetch the number of attached temperature sensors  
        numSensors = sensors.getDeviceCount();
        
        // Register all sensors to gw (they will be created as child devices)
        present(CHILD_ID_MOT, S_MOTION);
        present(CHILD_ID_ITEMP, S_TEMP);
        present(CHILD_ID_BARO, S_BARO);
        for (int i=0; i<numSensors && i<MAX_ATTACHED_DS18B20; i++) {   
           present(i+CHILD_ID_OTEMP, S_TEMP);
        }   
      }
      
      void loop()     
      {     
        
        // Read digital motion value
        boolean tripped = digitalRead(DIGITAL_INPUT_SENSOR) == HIGH; 
              
          
        Serial.println(tripped);
        send(msgm.set(tripped?"1":"0"));  // Send tripped value to gw
         
      
        if (tripped) {
         int brightness = 0;   // brightness of LED
         int count = 0;  // number of half cycles to fade LED
         while (count < 12) {    // run 6 full fade cycles
            analogWrite(RED_LED, brightness);
            analogWrite(RED_LED2, brightness);
            brightness = brightness + fadeAmount;
            if (brightness == 0 || brightness == 255) {
              fadeAmount = -fadeAmount;  // change direction of fade
              count ++;
            }
            wait (DELAY);  //wait to see brightness change
          }
          analogWrite(RED_LED, 0);  // turn off LEDs
          analogWrite(RED_LED2, 0);
        }
      
        int long pressure = bmp.readPressure() / 100;
        float temperature = bmp.readTemperature();
        int forecast = sample(pressure);
      
        send(msgit.set(temperature, 1));
        send(msgp.set(pressure, 0));
        send(forecastMsg.set(weather[forecast]));
      
        // Fetch temperatures from Dallas sensors
        sensors.requestTemperatures();
      
        sleep (750);
      
        // Read temperatures and send them to controller 
        for (int i=0; i<numSensors && i<MAX_ATTACHED_DS18B20; i++) {
        // Fetch and round temperature to one decimal
        float otemperature = static_cast<float>(static_cast<int>((sensors.getTempCByIndex(i)) * 10.)) / 10.;
      
        // Only send data if no error
          
        if (otemperature != -127.00 && otemperature != 85.00) {
        // Send in the new temperature
            send(msgot.setSensor(i+CHILD_ID_OTEMP).set(otemperature,1));
        }  
      }


        // Sleep until interrupt comes in on motion sensor but send update every minute. 
        tripped = false;  //reset tripped
        sleep(INTERRUPT,CHANGE, SLEEP_TIME);
      }
      
      float getLastPressureSamplesAverage()
      {
        float lastPressureSamplesAverage = 0;
        for (int i = 0; i < LAST_SAMPLES_COUNT; i++)
        {
          lastPressureSamplesAverage += lastPressureSamples[i];
        }
        lastPressureSamplesAverage /= LAST_SAMPLES_COUNT;
      
        return lastPressureSamplesAverage;
      }
      
      // Algorithm found here
      // http://www.freescale.com/files/sensors/doc/app_note/AN3914.pdf
      // Pressure in hPa -->  forecast done by calculating kPa/h
      int sample(float pressure)
      {
        // Calculate the average of the last n minutes.
        int index = minuteCount % LAST_SAMPLES_COUNT;
        lastPressureSamples[index] = pressure;
      
        minuteCount++;
        if (minuteCount > 185)
        {
          minuteCount = 6;
        }
      
        if (minuteCount == 5)
        {
          pressureAvg = getLastPressureSamplesAverage();
        }
        else if (minuteCount == 35)
        {
          float lastPressureAvg = getLastPressureSamplesAverage();
          float change = (lastPressureAvg - pressureAvg) * CONVERSION_FACTOR;
          if (firstRound) // first time initial 3 hour
          {
            dP_dt = change * 2; // note this is for t = 0.5hour
          }
          else
          {
            dP_dt = change / 1.5; // divide by 1.5 as this is the difference in time from 0 value.
          }
        }
        else if (minuteCount == 65)
        {
          float lastPressureAvg = getLastPressureSamplesAverage();
          float change = (lastPressureAvg - pressureAvg) * CONVERSION_FACTOR;
          if (firstRound) //first time initial 3 hour
          {
            dP_dt = change; //note this is for t = 1 hour
          }
          else
          {
            dP_dt = change / 2; //divide by 2 as this is the difference in time from 0 value
          }
        }
        else if (minuteCount == 95)
        {
          float lastPressureAvg = getLastPressureSamplesAverage();
          float change = (lastPressureAvg - pressureAvg) * CONVERSION_FACTOR;
          if (firstRound) // first time initial 3 hour
          {
            dP_dt = change / 1.5; // note this is for t = 1.5 hour
          }
          else
          {
            dP_dt = change / 2.5; // divide by 2.5 as this is the difference in time from 0 value
          }
        }
        else if (minuteCount == 125)
        {
          float lastPressureAvg = getLastPressureSamplesAverage();
          pressureAvg2 = lastPressureAvg; // store for later use.
          float change = (lastPressureAvg - pressureAvg) * CONVERSION_FACTOR;
          if (firstRound) // first time initial 3 hour
          {
            dP_dt = change / 2; // note this is for t = 2 hour
          }
          else
          {
            dP_dt = change / 3; // divide by 3 as this is the difference in time from 0 value
          }
        }
        else if (minuteCount == 155)
        {
          float lastPressureAvg = getLastPressureSamplesAverage();
          float change = (lastPressureAvg - pressureAvg) * CONVERSION_FACTOR;
          if (firstRound) // first time initial 3 hour
          {
            dP_dt = change / 2.5; // note this is for t = 2.5 hour
          }
          else
          {
            dP_dt = change / 3.5; // divide by 3.5 as this is the difference in time from 0 value
          }
        }
        else if (minuteCount == 185)
        {
          float lastPressureAvg = getLastPressureSamplesAverage();
          float change = (lastPressureAvg - pressureAvg) * CONVERSION_FACTOR;
          if (firstRound) // first time initial 3 hour
          {
            dP_dt = change / 3; // note this is for t = 3 hour
          }
          else
          {
            dP_dt = change / 4; // divide by 4 as this is the difference in time from 0 value
          }
          pressureAvg = pressureAvg2; // Equating the pressure at 0 to the pressure at 2 hour after 3 hours have past.
          firstRound = false; // flag to let you know that this is on the past 3 hour mark. Initialized to 0 outside main loop.
        }
      
        int forecast = UNKNOWN;
        if (minuteCount < 35 && firstRound) //if time is less than 35 min on the first 3 hour interval.
        {
          forecast = UNKNOWN;
        }
        else if (dP_dt < (-0.25))
        {
          forecast = THUNDERSTORM;
        }
        else if (dP_dt > 0.25)
        {
          forecast = UNSTABLE;
        }
        else if ((dP_dt > (-0.25)) && (dP_dt < (-0.05)))
        {
          forecast = CLOUDY;
        }
        else if ((dP_dt > 0.05) && (dP_dt < 0.25))
        {
          forecast = SUNNY;
        }
        else if ((dP_dt >(-0.05)) && (dP_dt < 0.05))
        {
          forecast = STABLE;
        }
        else
        {
          forecast = UNKNOWN;
        }
      
        // uncomment when debugging
        //Serial.print(F("Forecast at minute "));
        //Serial.print(minuteCount);
        //Serial.print(F(" dP/dt = "));
        //Serial.print(dP_dt);
        //Serial.print(F("kPa/h --> "));
        //Serial.println(weather[forecast]);
      
        return forecast;
      }


      and here are a couple of photos, front and back:
      ![alt text](0_1487498680609_upload-7deee0a5-263a-42b0-989a-55d1aae32cf4 image url)DSC_0669 (1).jpg
      ![alt text](0_1487498717047_upload-cd76f838-04f6-4fab-a4b8-e37823a7419c image url)DSC_0668 (1).jpg

      posted in My Project
      bgunnarb
      bgunnarb
    • RE: 💬 Motion Sensor

      I have found in my experiments with the PIR motion sensor that at least the type that I am using is extremely sensitive to ripple in the Vcc voltage.

      First of all, it is unstable as the feed voltage approaches 5V and then it triggers spontaneously again and again. I then tried to rise the voltage to around 11V which is the voltage that the battery eliminator gives. But that voltage has a ripple of 0.1 volt amplitude so this triggers the sensor again and again also since the arduino introduces small changes in the voltage when it processes the script.

      The solution was to install a LM317 voltage regulator to bring down the voltage to 8V which is then ripple free and stable. Now the PIR works very well and does not give false triggers.

      The arduino is fed from a separate voltage regulator giving 5V. I tried to connect the battery eliminator directly to RAW but that released the smoke from the on-board voltage regulator and as you know, when you let the smoke out from components, they no longer work. 😀

      Apparently the battery eliminator also produces some voltage spikes that are not healthy.

      posted in Announcements
      bgunnarb
      bgunnarb
    • RE: AM2320 will this work as a replacement for AM2302 / DHT22

      @Omemanti
      I think the AM2320 has got an "One-wire mode", at least if you look at the datasheet. I have not tried it though.

      I also had great difficulties in getting the AM2320 to work with I2C until I realised late last night that I had forgotten to include the pull-up resistors, 4k7 each from SDC and SDA to Vcc. All other I2C sensors I have used have had them included on the breakout board but this sensor does not have them built in the sensor body.
      Now it works like a charm, one measurement of temp and hum every 2 minutes.
      There are a few arduino-libraries for AM2320 floating around. I use this: (https://github.com/thakshak/AM2320)

      Here is my sketch:


      /**
       * The MySensors Arduino library handles the wireless radio link and protocol
       * between your home built sensors/actuators and HA controller of choice.
       * The sensors forms a self healing radio network with optional repeaters. Each
       * repeater and gateway builds a routing tables in EEPROM which keeps track of the
       * network topology allowing messages to be routed to nodes.
       *
       * Created by Henrik Ekblad <henrik.ekblad@mysensors.org>
       * Copyright (C) 2013-2015 Sensnology AB
       * Full contributor list: https://github.com/mysensors/Arduino/graphs/contributors
       *
       * Documentation: http://www.mysensors.org
       * Support Forum: http://forum.mysensors.org
       *
       * This program is free software; you can redistribute it and/or
       * modify it under the terms of the GNU General Public License
       * version 2 as published by the Free Software Foundation.
       *
       *******************************
       *
       * DESCRIPTION
       *
       * Temperature and humidity measurement using the AM2320 with I2C interface
       * Battery voltage also monitored using internal reference
       * 
       */
      
      
      // Enable debug prints to serial monitor
      #define MY_DEBUG
      #define MY_NODE_ID 23
      #define BATTERY_SENSE_PIN A0  // Input pin for battery sense
      #define VMIN 1.0  // (Min input voltage to regulator according to datasheet or guessing. (?) )
      #define VMAX 3.22 // (Known or desired voltage of full batteries. If not, set to Vlim.)
      #define CHILD_ID_HUM 0
      #define CHILD_ID_TEMP 1
       
      
      // Enable and select radio type attached
      #define MY_RADIO_NRF24
      //#define MY_RADIO_RFM69
      
      #include <SPI.h>
      #include <AM2320.h>
      #include <Wire.h>
      #include <MySensors.h>  
      
      #define DEBUG_PRINT 0  // Print temperature and humidity measurements on serial i/f. 1 = Yes 0 = No
      
      unsigned long SLEEP_TIME = 120000; // Sleep time between reads (in milliseconds)
      bool receivedConfig = false;
      bool metric = true;
      float temp, hum;
      
      
      // Create an AM2320 instance
      AM2320 th;
      // Initialize AM temperature message
      MyMessage msgt(CHILD_ID_TEMP,V_TEMP);
      // Initialize AM humidity message
      MyMessage msgh(CHILD_ID_HUM,V_HUM);
      
      
      void before()
      {
        // use the 1.1 V internal reference
        #if defined(__AVR_ATmega2560__)
          analogReference(INTERNAL1V1);
        #else
          analogReference(INTERNAL);
        #endif
        
      }
      
      void setup()  
      { 
      Serial.begin(115200);
      Wire.begin();
      }
      
      void presentation() {
        // Send the sketch version information to the gateway and Controller
        sendSketchInfo("Temp. Hum Sensor", "1.4");
        
        // Present temp/humidity sensor to controller
        present(CHILD_ID_TEMP, S_TEMP);
        present(CHILD_ID_HUM, S_HUM);
      }
      
      void loop()     
      {
        //Get temperature and humidity from AM2320
        switch(th.Read()) {
          case 2:
            Serial.println("CRC failed");
            break;
          case 1:
            Serial.println("Sensor offline");
            break;
          case 0:
            temp = th.t;
            send(msgt.set(temp, 1));
            hum = th.h;
            send(msgh.set(hum, 0));
            if (DEBUG_PRINT == 1) {
              Serial.print("humidity: "); 
              Serial.print(th.h);
              Serial.print("%, temperature: ");
              Serial.print(th.t);
              Serial.println("*C");
            }
            break;
        }
          
        sleep (200);
        // get the battery voltage
        int batValue = analogRead(BATTERY_SENSE_PIN);    // Battery monitoring reading
        float Vbat  = batValue * 0.003363;
        int batteryPcnt = static_cast<int>(((Vbat-VMIN)/(VMAX-VMIN))*100.);   
        sendBatteryLevel(batteryPcnt);
        
        sleep(SLEEP_TIME);
      }```
      posted in Hardware
      bgunnarb
      bgunnarb
    • RE: 💬 Motion Sensor

      Hi ben999
      I don't know what your sketch looks like but in my implementation I catch the movement in a boolean variable called tripped which I use to set the message sent to the controller.

      // Read digital motion value
      boolean tripped = digitalRead(DIGITAL_INPUT_SENSOR) == HIGH; 
      send(msgm.set(tripped?"1":"0"));  // Send tripped value to gw
      

      Then I do some other stuff based on tripped being true or false.
      Before the node goes to sleep I reset tripped. Otherwise I will get the old value back next time the node wakes up after SLEEP_TIME regardless if there is movement or not.

      // Sleep until interrupt comes in on motion sensor but send update every minute. 
        tripped = false;  //reset tripped
        sleep(INTERRUPT,CHANGE, SLEEP_TIME);
      

      It goes without saying that SLEEP_TIME will have to be longer than the reset time of the sensor itself. My sensor element resets in about 20 seconds, which puts a lower limit to SLEEP_TIME.

      posted in Announcements
      bgunnarb
      bgunnarb
    • RE: 💬 Motion Sensor

      @Patrik Söderström I think this is normal. Please check the Serial Protocol spec. under Download & API above to understand what the different elements describe. You should get this message once every two minutes if SLEEP_TIME = 120000 and you do not trigger the PIR. If triggered you should get 0;1;1;0;16;1 followed by 0;1;1;0;16;0 when the PIR resets. I built the Motion detector using the MiniPIR module above but I found that it needs at least +5V to operate reliably. Below 5V I think I remember that I got a lot of false trigs.

      posted in Announcements
      bgunnarb
      bgunnarb
    • RE: 💬 Building a WiFi Gateway using ESP8266

      A couple of ESP-12E modules arrived in the mail last Friday and I uploaded the ESP8266 MQTT GW sketch. It worked immediately. Fantastic!
      I am using a cloudserver MQTT broker on cloudmqtt.com and the OpenHab controller subscribes to that as well.

      Just a question... I tried to enable the LED BLINKING feature but it seems there are no free pins on the ESP-12 module. I've tried the not connected pins but whatever pin I select (0,1,3,4,9,10) this seems to stop the GW from starting. Ideas anyone?

      posted in Announcements
      bgunnarb
      bgunnarb
    • RE: [SOLVED] Cannot get GwWS5100MQTT to connect to cloudmqtt.com

      @Yveaux I am so terribly embarrassed! In order to rule out something wrong with the WS5100 I rebuilt the GW using an old Arduino UNO with an Ethernet shield. Still same problem. Then to really make sure I pasted/copied username and password from the cloudmqtt into the sketch. Immediate success! It turned out that I had misread an uppercase I (indigo) for a lower case l (lima). Still the suggestions from the community were good since I could iron out one possible cause after another. Thanks for the support!

      posted in Troubleshooting
      bgunnarb
      bgunnarb
    • RE: [SOLVED] Cannot get GwWS5100MQTT to connect to cloudmqtt.com

      I have tried opening the port e.g. 19946 to tcp-traffic but no change. Should the port be open to udp as well?

      posted in Troubleshooting
      bgunnarb
      bgunnarb
    • RE: [SOLVED] Cannot get GwWS5100MQTT to connect to cloudmqtt.com

      Here is a copy of the parameter setup in the sketch:

      // Enable these if your MQTT broker requires usenrame/password
      #define MY_MQTT_USER "xxxxxxxx"
      #define MY_MQTT_PASSWORD "yyyyyyyyy"

      // Enable MY_IP_ADDRESS here if you want a static ip address (no DHCP)
      #define MY_IP_ADDRESS 192,168,1,210

      // If using static ip you need to define Gateway and Subnet address as well
      #define MY_IP_GATEWAY_ADDRESS 192,168,1,1
      #define MY_IP_SUBNET_ADDRESS 255,255,255,0

      // MQTT broker ip address or url. Define one or the other.
      #define MY_CONTROLLER_URL_ADDRESS "m21.cloudmqtt.com"
      //#define MY_CONTROLLER_IP_ADDRESS 192, 168, 1, 201

      // The MQTT broker port to to open
      #define MY_PORT 19946

      posted in Troubleshooting
      bgunnarb
      bgunnarb
    • RE: [SOLVED] Cannot get GwWS5100MQTT to connect to cloudmqtt.com

      Here is a printout at startup:

      0;255;3;0;9;Attempting MQTT connection...
      IP: 192.168.1.210
      0;255;3;0;9;Starting gateway (RNNGA-, 2.0.0)
      0;255;3;0;9;TSM:INIT
      0;255;3;0;9;TSM:RADIO:OK
      0;255;3;0;9;TSM:GW MODE
      0;255;3;0;9;TSM:READY
      IP: 192.168.1.210
      0;255;3;0;9;No registration required
      0;255;3;0;9;Init complete, id=0, parent=0, distance=0, registration=1
      IP: 192.168.1.210
      0;255;3;0;9;Attempting MQTT connection...
      IP: 192.168.1.210
      0;255;3;0;9;Attempting MQTT connection...
      IP: 192.168.1.210
      0;255;3;0;9;Attempting MQTT connection...
      IP: 192.168.1.210
      0;255;3;0;9;Attempting MQTT connection...

      I am using a fixed IP but have also tried with DHCP without success.

      posted in Troubleshooting
      bgunnarb
      bgunnarb