💬 Building a Raspberry Pi Gateway
-
@Oli
Stupid question... Did you mount the radio? Because I thought I would like to test if it works. (without radio) but that doesn't work.Mounted a radio and ethernet gateway is working.
-
Maybe i'm wrong but IRQ is used on all gateways if you read above :
"""
Improving throughput for nrf24
There is another method were the interrupt pin from the nrf24 modules is used to inform when a new message arrives and it's immediately added to a queue for further processing
"""
for the second part yes you can use other pins on RPi ... i have RF module NRF24L01 for gateway and DHT11 on RPi.
-
@luizrrocha said:
Ditto, @Robinek70 !
Thank you, Marcelo Aquino, for your fantastic work .
I have Domoticz, Cacti, Heyu and MySensors Gateway running in a 30 dollars RASPBERRY PI 2, all without a glitch, all talking to each other and hopefully soon will also have Alexa for RASPBERRY PI running there also.
If in doubt, by a RASPBERRY PI and thank people who develop and support it for free instead of complaining all the time.
'nuff said.
Luiz Roberto
Can you please give me the instructions for Domoticz setup?
I have a node with DHT11 sensor and I can see mygsw service is getting messages. How do I connect Domoticz with mysensors ?
I have been following openhab until today and I'm switching to Domoticz now.
-
Hello, @musthafa .
For installation I used the tutorial at http://www.domoticz.com/wiki/Installing_and_running_Domoticz_on_a_Raspberry_PI. It looks like they changed the tutorial that I used to just a single curl command to install it, although there are complaints about it not working alright. You'll have to try it as I cannot reinstall mine.
Setting up MySensors Gateway is also covered in the wiki : http://www.domoticz.com/wiki/MySensors, very easy. I recommend you go thru the wiki pages as I did, they are a treasure of information, as the manual on www.domoticz.com is outdated though useful.
Good luck.
Luiz
-
@luizrrocha said:
Thank you!Hello, @musthafa .
For installation I used the tutorial at http://www.domoticz.com/wiki/Installing_and_running_Domoticz_on_a_Raspberry_PI. It looks like they changed the tutorial that I used to just a single curl command to install it, although there are complaints about it not working alright. You'll have to try it as I cannot reinstall mine.
Domoticz Installation was straight forward as per their wiki.
Setting up MySensors Gateway is also covered in the wiki : http://www.domoticz.com/wiki/MySensors, very easy. I recommend you go thru the wiki pages as I did, they are a treasure of information, as the manual on www.domoticz.com is outdated though useful.
Good luck.
Luiz
MySensors I tried Ethernet didn't work. Virtual Serial Port worked for me. However I have 1 light (LED Test at PIN 4 of Node) & a DHT sensor. Domoticz only lists the DHT sensor. It doesn't show me the light child.
-
@musthafa : look on the MySensors forum for the MYSController, install it and you can monitor the messages going to the gateway.
Most likely your declaration of the LED output pin on the MySensors arduino is not correct. I still did not use arduinos as actuators with MySensors so I will probably not be of much help here.
Cheers,
Luiz
-
@luizrrocha said:
@musthafa : look on the MySensors forum for the MYSController, install it and you can monitor the messages going to the gateway.
Most likely your declaration of the LED output pin on the MySensors arduino is not correct. I still did not use arduinos as actuators with MySensors so I will probably not be of much help here.
Cheers,
Luiz
In OpenHAB it worked as a dimmer. Later on OpenHAB was stuck and my mobile app was frozen. Then I start discovering Domoticz. If it can be discovered in OH2 why not in Domoticz ?
-
@eyesoft
Thank you for the answer, I am happy to get a confirmation about sensors works on a Pi Gateway. Since at least one of my sensor is analogue, I still have to add an Arduino board to the gateway, I plan to connect it via USB.
I have tested and get very good results with Home Assistant controller running on a Pi where I add sensors directly on Pi and to an Arduino (USB to Pi).
The Ethernet Gateway do not use IRQ: https://www.mysensors.org/build/ethernet_gateway
Nor the nodes: https://www.mysensors.org/build/connect_radio Even if the wire is connected at Arduino pin 2, is mentioned: Note: The IRQ is currently not used by the MySensors library so it can be left un-connected
If you know how to connect and manage this IRQ on Arduino sketch, please let me know.
I have built this some time ago and works without the IRQ connected. Now I have updated the MySensors to 2.1.0 , IRQ is still unconnected and works the same. As far as I see, it is used for the Pi Gateway. I plan to migrate to this configuration of Pi Gateway, but I would like to get more info before change my working system:- this IRQ improve the reliability? (sometimes I have encountered problems due the load of NRF24 network with many messages)
- I would like to set retain=true for the MQTT Gateway, this will improve the reliability.
I already addressed the last question somwhere else, still waiting for more info if somebody know.
Thank you
-
After installing a Raspberry Gateway, is this output OK, or have I forgotten something?
mysgw: Starting gateway...
mysgw: Protocol version - 2.2.0-beta
mysgw: MCO:BGN:INIT GW,CP=RNNG---,VER=2.2.0-beta
mysgw: TSF:LRT:OK
mysgw: TSM:INIT
mysgw: TSF:WUR:MS=0
mysgw: TSM:INIT:TSP OK
mysgw: TSM:INIT:GW MODE
mysgw: TSM:READY:ID=0,PAR=0,DIS=0
mysgw: MCO:REG:NOT NEEDED
mysgw: MCO:BGN:STP
mysgw: MCO:BGN:INIT OK,TSP=1
I configured with (should be a serial gateway with a controller on the same machine):
./configure --soc=BCM2835 --my-gateway=serial --my-serial-is-pty --my-serial-pty=/dev/ttyMySensorGateway --my-serial-groupname=dialout --my-debug=enable
-
Has there been any progress on the RFM69 version? Looking at the repository, it looks like some of the code is there. I did find this RFM69 driver for the Pi that has a LowPowerLabs interface. Would this help in moving forward?
https://github.com/dconstructing/rfm69
thanks for all the work on this - a great community moving things forward.
-
@Mihai
you can attach analogue sensor to ESP2866 with espeasy firmware ... more info here : http://www.letscontrolit.com/wiki/index.php/ESPEasy ... i'm using one ESP8266-12E and i have good results and Uptime: 74209 minutes (usb powered).
i'm using IRQ on NRF24L01 connected to my Rpi, but i don't have many sensor with nrf+arduino (only 2) and i had no problems ... i don't if IRQ improve the reliability and i never play with irq fron nrf on arduino.
regarding retain=true have a look here : http://www.hivemq.com/blog/mqtt-essentials-part-8-retained-messages
for more reliability on mqtt i think you can use qos=1 ( The broker/client will deliver the message at least once, with confirmation required.), but all depends on your set-up .. not all messages need special attention.
-
@Mihai I have not done any extensive testing with IRQ functionality in RPi, I plan to do it in the future, so for now you will have to test it for yourself.
@Madhias Yes, this is the expected output, the gateway is now waiting for messages to arrive.
@pjeran Yes, there is a work in progress with many improvements: https://github.com/mysensors/MySensors/pull/722
-
Is it possible to use the second ISP on my raspberypi 3 to connect NRF24L01+ and what will be the wiring diagram, also what have to change in mygsw library
-
I have created a patch to enable the use of the RFM69 with a RaspberryPi gateway without the use of an Arduino gateway board.
It has only been tested with my configuration, but it seems to work well for me.
Pull request is here with configuration instructions:
https://github.com/mysensors/MySensors/pull/728Note that it currently requires using some pin other than CS0/CS1 for the chip-select
-
-
This post is deleted!
-
@eyesoft
As far as I understand, MySensors relay on PubSubClient for MQTT and it does not allow to publish messages with QOS=1 or 2, only 0.
Retain is different that QOS, it offers the possibility to recover the state for a device that loose connection for a while (e.g. after a restart). I find it very usefull. For example I have to restart the controller. When come back I got all states to their real values if retain=true. Otherwise they goes to the default, usually 0.
I have now 6 nodes, each with several sensors and relays.
-
please help

every time after reboot i have to run this codesudo ./bin/mysgw -dso built a virtual usb but after reboot ....
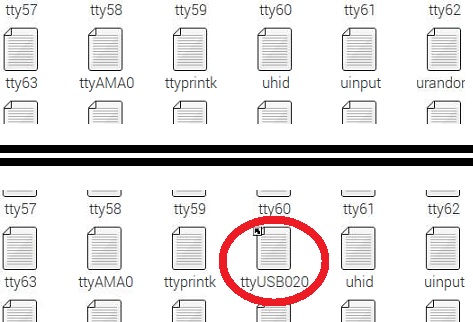
how put this code in startup ?
 please help thank you
-
From the Building a Raspberry Pi Gateway article:
If you wish to install:
sudo make installThe last command will provide instructions for your system on how to start the gateway on every boot.
-
@marceloaqno
i do it but after reboot serial lost again
just with command work againsudo ./bin/mysgw -d
-
@marceloaqno
i'm sorry
after sudo make install i must run this lines:sudo systemctl enable mysgw.service sudo systemctl start mysgw.servicesorry thank you
-
@marceloaqno can you build a rs485 gateway on raspberry pi ?
-
@Mihai yes you are right
-
This data that I get when I run ./mysgw --d , where is it stored and how can I get it to push it on cloud? Please help.
-
Data is not stored... to store the data and do something usefull with it (or not) you need a controller. I use mycontroller, and from this software you can "push" data to an external server.
I use my controller, but i am sure that other controller software also has this feature.
-
@Tag , The controller must be using something to get the data right? How can we do it directly without using the controller?
-
@hek It looks like development is the default branch in the repository. I was following the build instructions and couldn't figure out why I kept getting "connection refused". Just typing up a troubleshooting post when I saw my log said 2.2.0-beta. Sure enough when I grabbed master(2.1.0) instead it ran fine. Should probably add a checkout in the instructions.
-
@pete1450 could you clarify which instructions should be updated?
The instructions at https://www.mysensors.org/about/arduino recommend using the Arduino IDE Board manager, which will get the latest stable version.
Edit: Now I see. The link in the first post in this thread. It doesn't mention the master branch because up until Dec 25th the development branch was required. But now that 2.1 has been released the instructions should indeed use the stable version. I've updated the instructions. Thanks for noticing!
-
This is also new for me since i do not send data into any cloud... but i can imagine that you can use MQTT. (see https://www.mysensors.org/build/mqtt_gateway for more details) is important that the receiving side supports MQTT. in this case google is your friend

if you do a ./configure --help you will find you can build the mysensors gateway with MQTT support
./configure --help
...
    --my-gateway=[ethernet|serial|mqtt]
                                Gateway type, set to none to disable gateway feature. [ethernet]
    --my-node-id=<ID>           Disable gateway feature and run as a node with given id.
    --my-controller-url-address=<URL>
                                Controller or MQTT broker url.
    --my-controller-ip-address=<IP>
                                Controller or MQTT broker ip.
    --my-port=<PORT>            The port to keep open on gateway mode.
                                If gateway is set to mqtt, it sets the broker port.
...
-
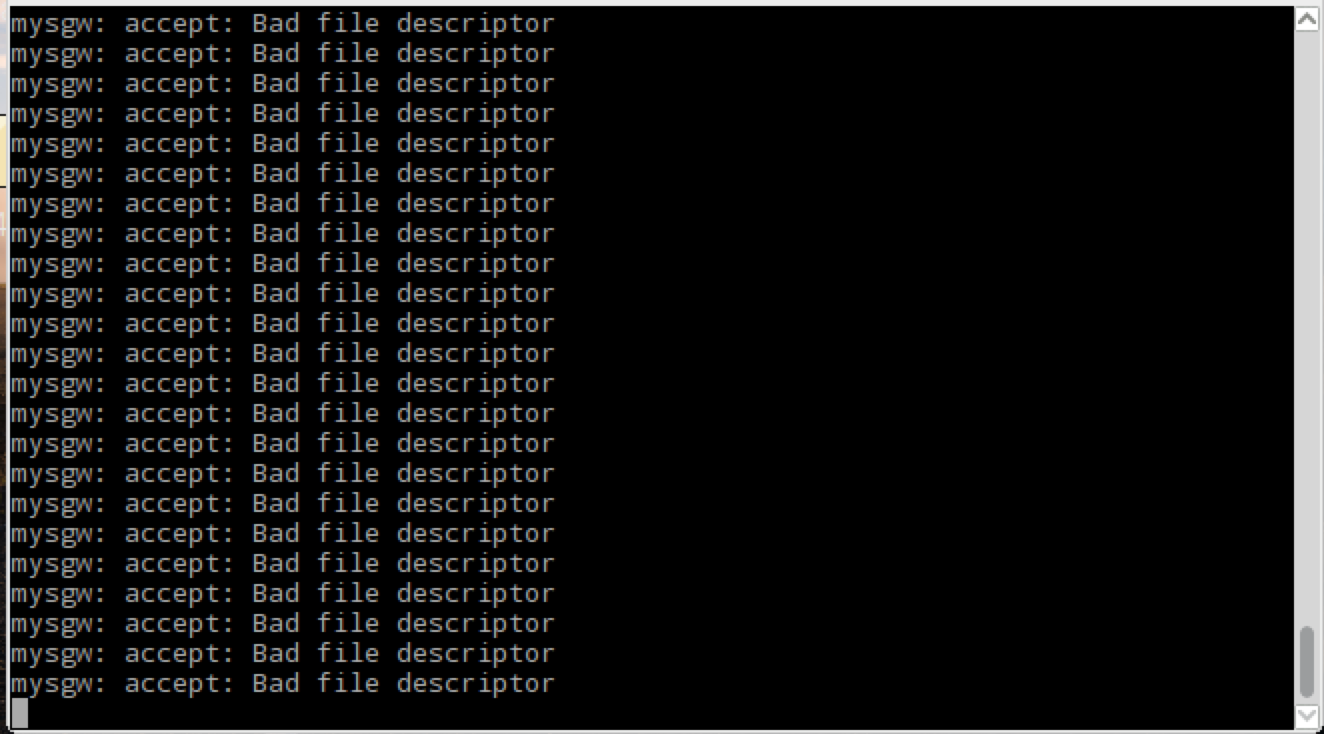
ran sudo ./bin/mysgw -d
I keep getting mysgw: accept: Bad File Descriptor.
Any possible cause ?
-
I am trying to get the raspi ethernet gateway running but on both my pi 3 (also running openHAB) and the pi B (pretty basic install).
Unfortunately I get the same error on both.
Any ideas what could be going on here?
I am running the latest gateway and the latest raspbian.
mysgw: Starting gateway...
mysgw: Protocol version - 2.1.0
mysgw: MCO:BGN:INIT GW,CP=RNNG---,VER=2.1.0
mysgw: TSF:LRT:OK
mysgw: TSM:INIT
mysgw: TSF:WUR:MS=0
mysgw: TSM:INIT:TSP OK
mysgw: TSM:INIT:GW MODE
mysgw: TSM:READY:ID=0,PAR=0,DIS=0
mysgw: MCO:REG:NOT NEEDED
mysgw: connect: Connection refused
mysgw: failed to connect
mysgw: Eth: connect
mysgw: connect: Connection refused
mysgw: failed to connect
mysgw: Eth: connect
-
I am using a Rasp Pi 3 as well.
I can't even proceed further in the tutorial cause of this error cause nothing works after it.
-
@marceltrapman @LaMB95
Could you post the complete ./configure command used to configure the gateway?
-
@marceloaqno Sure, forgot it

sudo ./configure \
    --my-gateway=ethernet \
    --my-controller-ip-address=192.168.1.xx \
    --my-port=5003 \
    --my-transport=nrf24
-
@marceltrapman Are you sure it's not a problem with your controller?
Have you tried connecting to your controller using telnet?telnet 192.168.1.x 5003
-
@marceloaqno !
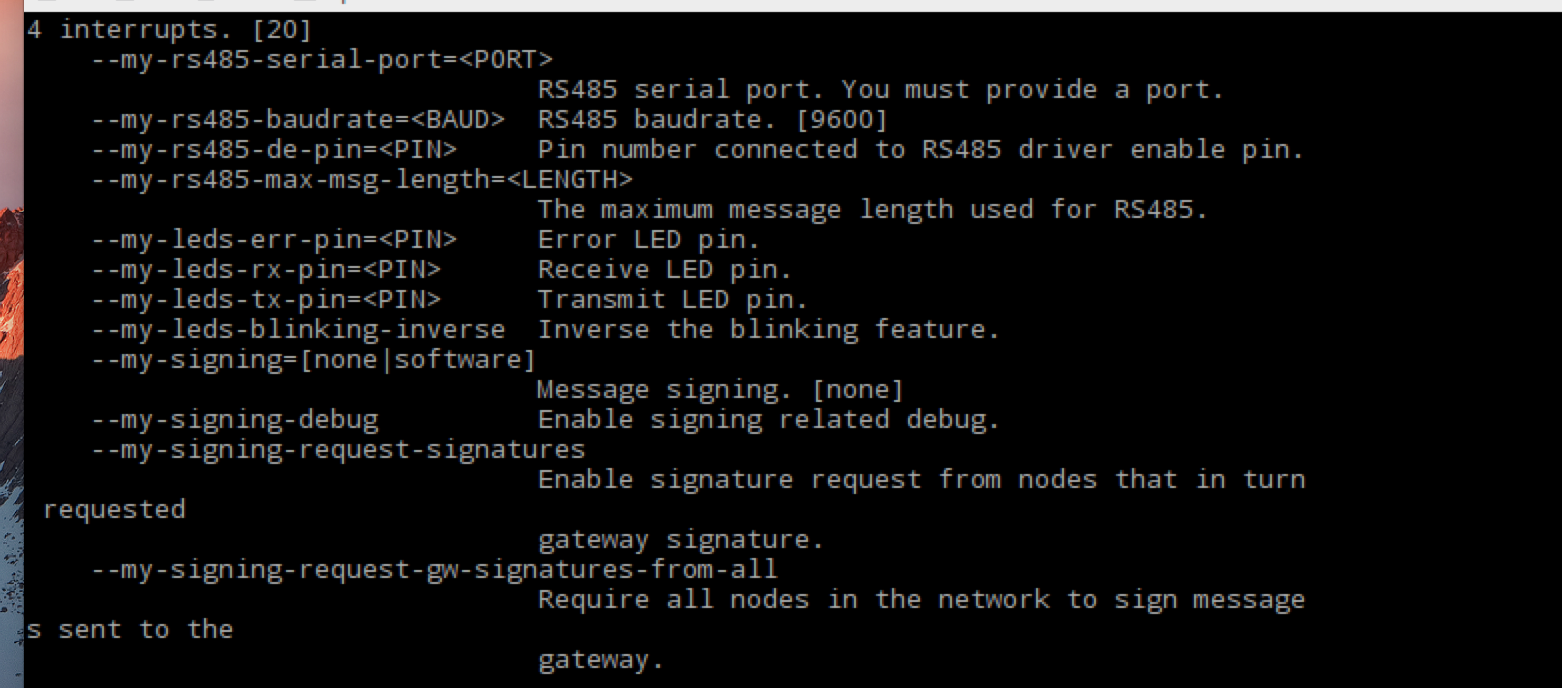
Is this what you meant?
-
@marceloaqno not sure no.
So, I downloaded telnet on the same raspi that I want to use as the gateway and the issue seems to be that port 5003 is not available.
Funny but how do I solve this.
It can't be an issue with the firewall because it allows all traffic on the internal network.
-
@marceloaqno and the same from the controller to the gateway gives the same error on that port

-
@Reza Yes, you can use rs485 in the RPi.
./configure --my-transport=rs485 --my-rs485-serial-port=<YOUR_SERIAL_PORT>For more options, run:
./configure -h
-
@LaMB95 No, I meant the options you used when you ran ./configure
-
@tiana
"The Broadcom SoC has three independant SPI interfaces, however only one of these is brought out to the GPIO connector, and that one SPI interface has 2 Chip enable lines."
More info here: https://www.raspberrypi.org/forums/viewtopic.php?f=44&t=22608
-
@marceloaqno from the docs I assume it is the gateway that has to open up port 5003 but I guess it does not because it can't connect to the ethernet (for some reason) or am I wrong?
-
@marceloaqno
i means that without arduino and usb port, similar to raspberry gateway ( raspberry +nrf24)
i means connect rs485 module to GPIO raspberry pi with domoticz
-
I m sorry I m new to using a raspberry pi and its for a project.
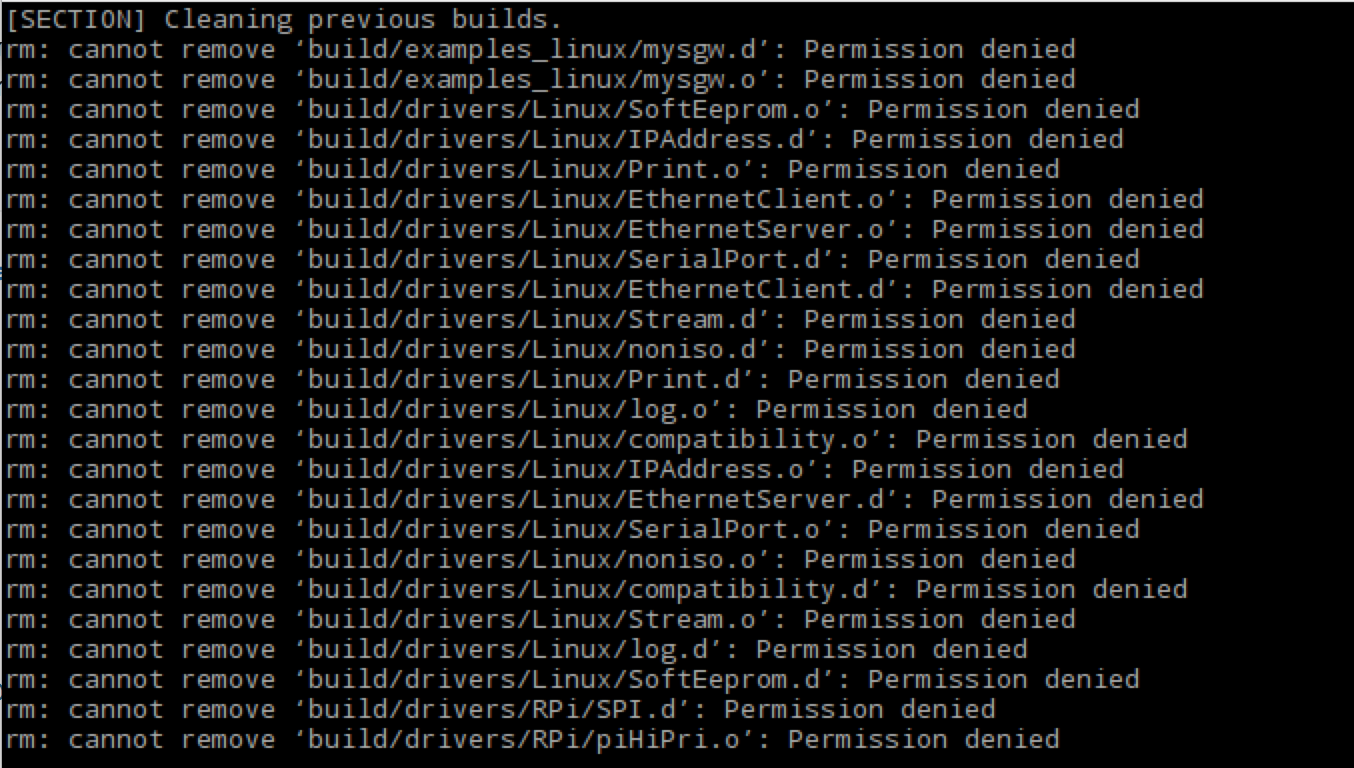
But if this is not what you asked for could you be a little more specific :$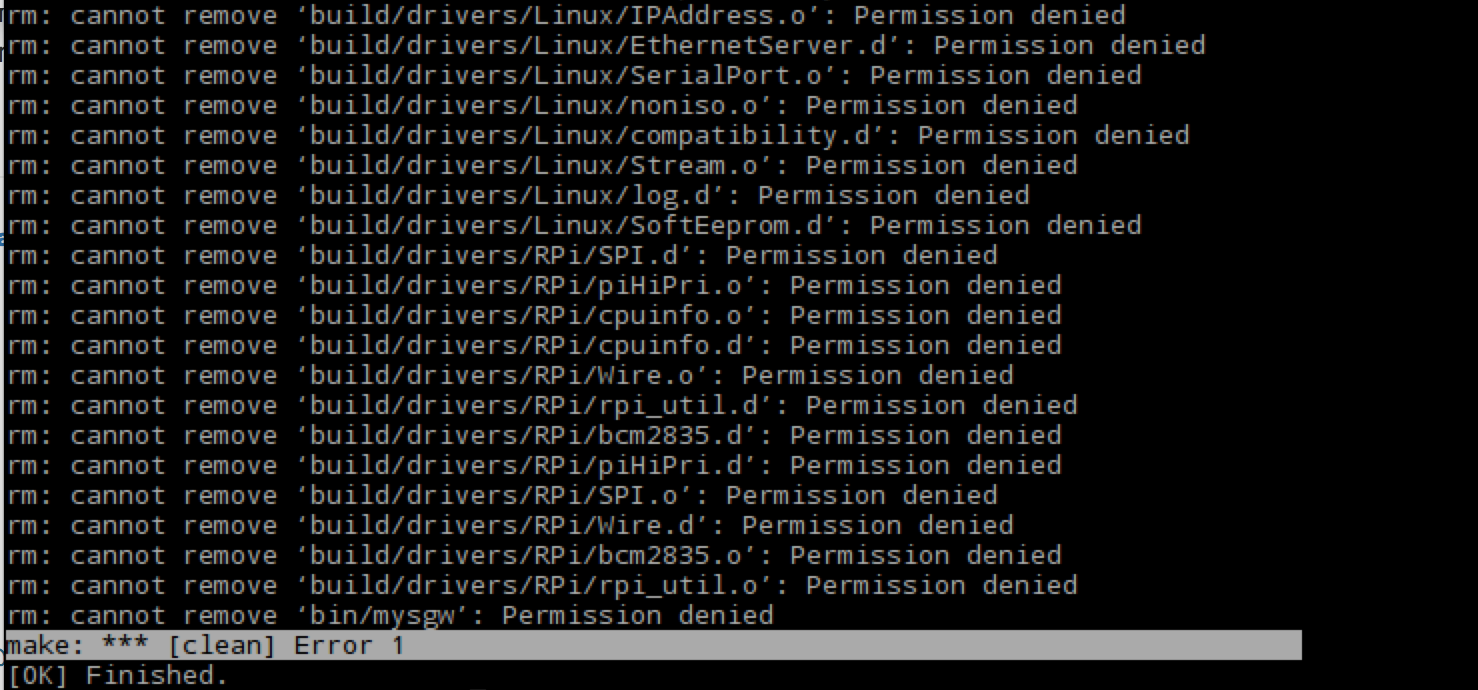
-
use sudo

-
Oh and one other thing, when I set the gateway up for MQTT it works.
-
If you use the --my-controller-ip-address= option, the gateway will act as a client and attempt to conect to the supplied ip and port. If you want the gateway to open port 5003, omit this option.
-
@Reza You could connect the rs485 to the RPi UART and use the option --my-rs485-serial-port=/dev/ttyAMA0, but you need to turning off the UART functioning as a serial console.
Or, to make things easier:
rs485 <==> TTL/USB <==> RPi
-
@marceloaqno
i am beginner and i can not turning off the UART functioning. . . also on some board usb port after power off/on lost and i should disconnect/connect cable... i test your steps serial gateway with raspberry and GPIO with virtual usb serial . and i see this problem solve and after power off/on gateway is connect .
i suggest that you add this commands to page of rs485 gateway step by step and update this .
(https://www.mysensors.org/build/rs485)I thank you for hard working and trying
-
if you want use rpi /dev/ttyAMA0 for rs485 gateway -
- remove string "console=serial0,115200" from /boot/cmdline.txt
- add strings "enable_uart=1" and "dtoverlay=pi3-disable-bt" to /boot/config.txt (only on rpi3)
- reboot raspi
-
@marceloaqno nice, working now

Thank you...
-
@b0rmann
thank you friend , but i am sorry i am very beginner in raspberry pi . because i use vera before and with raspberry and orange pi i use recently. so i need a full steps for a rs485 gateway(wiring and commands . . .) i dont know what is ttyAMA0 ! i use a serial gateway with usb port with raspberrypi 3 but i have some problem , but with a raspberrypi gateway and use a virtual serial port (ttyUSB020) all of my problem resolve. but i have problem with wireless. so i want have a wiring network. i want a full steps for setup a rs485 module with raspberrypi 3(wiring and steps for install...) thank you for help
-
Do I read that correctly, does this gateway also gives a ethernet link to a serial-only controller? How do I have to configure ip and port? In the build section I see no option to set them.
-
-
@Reza There are many guides on the web teaching how to connect and use rs485 with the RPi. I recommend you start with them and when you are sure it is working, you add MySensors to the equation.
-
@marceloaqno said:
There are many guides on the web teaching how to connect and use rs485 with the RPi. I recommend you start with them and when you are sure it is working, you add MySensors to the equation.
ok thank you

-
@Anduril
you will get all the build options for the mysgw with the command./configure -helpHere you can configure all options like serial and ethernet
-
just cloned and read the --help, but still I don't know how to use.
To make it a litte less abstract: I have a ethernet gateway (ESP8266) running at 192.168.38.19 with port 5003 to connect to. I want to have this accessible by a serial-only controller on the raspberry.I tried to do this config and
makeafterwards, but starting gave only FAILs..../configure --my-gateway=ethernet --my-controller-ip-address=192.168.38.19 --my-serial-is-pty --my-serial-pty=/dev/ttyMySensorsGateway~/MySensors$ sudo ./bin/mysgw -d mysgw: Starting gateway... mysgw: Protocol version - 2.1.0 mysgw: MCO:BGN:INIT GW,CP=RNNG---,VER=2.1.0 mysgw: TSF:LRT:OK mysgw: TSM:INIT mysgw: TSF:WUR:MS=0 mysgw: !TSM:INIT:TSP FAIL mysgw: TSM:FAIL:CNT=1 mysgw: TSM:FAIL:PDT mysgw: TSM:FAIL:RE-INIT mysgw: TSM:INIT mysgw: !TSM:INIT:TSP FAIL mysgw: TSM:FAIL:CNT=2 mysgw: TSM:FAIL:PDT mysgw: TSM:FAIL:RE-INIT mysgw: TSM:INIT mysgw: !TSM:INIT:TSP FAIL mysgw: TSM:FAIL:CNT=3 mysgw: TSM:FAIL:PDT mysgw: TSM:FAIL:RE-INIT mysgw: TSM:INIT mysgw: !TSM:INIT:TSP FAIL mysgw: TSM:FAIL:CNT=4 mysgw: TSM:FAIL:PDTI think my config is wrong and it tries to connect to a nrf24 at the rpi. So what's the correct config for my case?
Thanks in advance.
-
@Anduril
Why are you using an esp8266 as a serial gateway? Wouldn't it be easier to use a normal UNO?
-
I'm using a ESP8266 as ethernet gateway and want to have this connected as virtuall serial port to my raspberry pi so my controller can connect to that.
-
I using RPi2 and NRF24 for this. I followed the instructions, to clone the repo, and then added config
./configure --my-gateway=mqtt --my-controller-ip-address=127.0.0.1 --my-mqtt-publish-topic-prefix=mysensors-out --my-mqtt-subscribe-topic-prefix=mysensors-in --my-mqtt-client-id=mygateway1 --my-transport=nrf24make
when i run with sudo ./bin/mysgw -d, it is failing to connect to MQTT. Can you please help?
mysgw: Starting gateway...
mysgw: Protocol version - 2.1.0
mysgw: MCO:BGN:INIT GW,CP=RNNG---,VER=2.1.0
mysgw: TSF:LRT:OK
mysgw: TSM:INIT
mysgw: TSF:WUR:MS=0
mysgw: TSM:INIT:TSP OK
mysgw: TSM:INIT:GW MODE
mysgw: TSM:READY:ID=0,PAR=0,DIS=0
mysgw: MCO:REG:NOT NEEDED
mysgw: MCO:BGN:STP
mysgw: MCO:BGN:INIT OK,TSP=1
mysgw: Attempting MQTT connection...
mysgw: connect: Connection refused
mysgw: failed to connect
mysgw: Attempting MQTT connection...
mysgw: connect: Connection refused
mysgw: failed to connect
mysgw: Attempting MQTT connection...
mysgw: connect: Connection refused
mysgw: failed to connect
mysgw: Attempting MQTT connection...
mysgw: connect: Connection refused
mysgw: failed to connect
-
Have you aver considered Using the GatewayESP8266MQTTClient? What controller are you trying to connect?
-
I use pimatic which does not have a native compatibility to ethernet or mqtt. Thats why my question came up on how to configure it to do this...
Building a Raspberry Pi Gateway:
If you are running a controller on the Raspberry Pi that doesn't support communication with the gateway through ethernet, you can use a virtual serial port:
./configure --my-gateway=serial --my-serial-is-pty --my-serial-pty=/dev/ttyMySensorsGateway
-
@Anduril you might be able to use nodered or socat to convert the tcp connection to a serial port.
https://linux.die.net/man/1/socat
https://nodered.org/
-
that's what I tried in the past and am using now (socat), but it does not reconnect and has some other drawbacks. Reading of an officially supported way sounded interesting
-
@lakshmc Make sure you don't have the daemon running already
If not, I'm getting the same problem on the 2.1.1 that was just released. 2.1.0 was working "fine"(besides my suspecting a bug that doesn't let any inclusion happen, hence I tried the new version). Time to go back to the serial gateway right into the vera.
-
@pete1450 @lakshmc
Make sure you are not using an old version of mosquitto (or any other broker you're using):$ mosquitto -h mosquitto version 1.4.10 (build date 2016-09-20 11:02:07-0600)It's working fine with the 2.1.1 release:
[alarm@pi3 mysgw]$ sudo ./bin/mysgw -d
mysgw: Starting gateway...
mysgw: Protocol version - 2.1.1
mysgw: MCO:BGN:INIT GW,CP=RNNG---,VER=2.1.1
mysgw: TSF:LRT:OK
mysgw: TSM:INIT
mysgw: TSF:WUR:MS=0
mysgw: TSM:INIT:TSP OK
mysgw: TSM:INIT:GW MODE
mysgw: TSM:READY:ID=0,PAR=0,DIS=0
mysgw: MCO:REG:NOT NEEDED
mysgw: MCO:BGN:STP
mysgw: MCO:BGN:INIT OK,TSP=1
mysgw: Attempting MQTT connection...
mysgw: connected to 127.0.0.1
mysgw: MQTT connected
mysgw: Sending message on topic: mysensors-out/0/255/0/0/18
mysgw: TSF:MSG:READ,2-2-0,s=1,c=1,t=17,pt=7,l=5,sg=0:108.12
mysgw: TSF:MSG:ACK REQ
mysgw: TSF:MSG:SEND,0-0-2-2,s=1,c=1,t=17,pt=7,l=5,sg=0,ft=0,st=OK:108.12
mysgw: Sending message on topic: mysensors-out/2/1/1/0/17
mysgw: TSF:MSG:READ,2-2-0,s=2,c=1,t=17,pt=7,l=5,sg=0:48.31
mysgw: TSF:MSG:ACK REQ
mysgw: TSF:MSG:SEND,0-0-2-2,s=2,c=1,t=17,pt=7,l=5,sg=0,ft=0,st=OK:48.31
mysgw: Sending message on topic: mysensors-out/2/2/1/0/17
mysgw: TSF:MSG:READ,2-2-0,s=3,c=1,t=17,pt=7,l=5,sg=0:362.86
mysgw: TSF:MSG:ACK REQ
mysgw: TSF:MSG:SEND,0-0-2-2,s=3,c=1,t=17,pt=7,l=5,sg=0,ft=0,st=OK:362.86
mysgw: Sending message on topic: mysensors-out/2/3/1/0/17
-
@marceloaqno I should have specified, I'm getting the connection errors with the ethernet gateway.
-
@pete1450 Could you send the debug log with the connection errors?
-
@marceloaqno After installing broker and gateway fresh, seems to be working. Thanks for your help.
-
@marceloaqno
Ran as root and made sure I didn't have mysgw already running:rm -r MySensors/ git clone https://github.com/mysensors/MySensors.git --branch master cd MySensors/ ./configure --my-controller-ip-address=192.168.1.136 --my-port=5003 --my-rf24-irq-pin=15 makeroot@raspberrypi:~/downloads/MySensors# ./bin/mysgw -d mysgw: Starting gateway... mysgw: Protocol version - 2.1.1 mysgw: MCO:BGN:INIT GW,CP=RNNG--Q,VER=2.1.1 mysgw: TSF:LRT:OK mysgw: TSM:INIT mysgw: TSF:WUR:MS=0 mysgw: TSM:INIT:TSP OK mysgw: TSM:INIT:GW MODE mysgw: TSM:READY:ID=0,PAR=0,DIS=0 mysgw: MCO:REG:NOT NEEDED mysgw: connect: Connection refused mysgw: failed to connect mysgw: Eth: connect
-
every few days mysgw randomly dies

Jan 19 06:40:01 pi mysgw[17960]: TSF:MSG:READ,5-5-0,s=255,c=3,t=21,pt=1,l=1,sg=0:0
Jan 19 06:40:01 pi mysgw[17960]: Sending message on topic: mysensors/out/1/5/255/3/0/21
Jan 19 06:40:01 pi mysgw[17960]: TSF:MSG:READ,0-5-255,s=255,c=3,t=20,pt=0,l=0,sg=0:
Jan 19 06:40:01 pi mysgw[17960]: TSF:MSG:BC
Jan 19 06:40:01 pi systemd[1]: mysgw.service: main process exited, code=killed, status=11/SEGV
Jan 19 06:40:01 pi systemd[1]: Unit mysgw.service entered failed state.
-
@pete1450 If you use the --my-controller-ip-address= option, the gateway will act as a client and attempt to conect to the supplied ip and port. If you want the gateway to open port 5003, omit this option.
-
@marceloaqno what is the correct configure option to make this gatway connect to an ethernet gateway and let a serial-only-controller connect to it. I suppose to use the pty option, but didn't got this working. As said above, socat and nodered are no option.
-
@marceloaqno Well that fixed the connection issue. Now I'm just back to square one where pressing start doesn't do anything. Why do I not need to specify my controllers ip? That is the ip for my veralite. Whats the use case for that option.
-
@b0rmann Could you provide the following information?
- Your RPi model and which linux distribution you are using.
- gcc version
- The version and options you used to build the gateway (./configure --option)
- The number of nodes on your network that sends messages to the gateway.
- The broker you are using for MQTT and its version
-
@Anduril Sorry, the gateway does not support what you're trying to do.
-
@pete1450
I can't help you with this, I've never used the Vera controller. You need to search in the Vera settings where you set this option. If Vera supports being a server and opening a port for the gateway to connect, then you use the --my-controller-ip-address option.
-
Does anyone know if the Raspberry implementation have a UserPassword option for ./configure MQTT
-
@Michael-Curtis Nevermind, I fixed it.... you ned to add :
--my-mqtt-password=<PASS>   MQTT password
--my-mqtt-client-id=<ID>    MQTT client id.
Under "cat"
And for the actual options under "opt do"
--my-mqtt-user=*)
    CPPFLAGS="-DMY_MQTT_USER=\\\"${optarg}\\\" $CPPFLAGS"
    ;;
--my-mqtt-password=*)
    CPPFLAGS="-DMY_MQTT_PASSWORD=\\\"${optarg}\\\" $CPPFLAGS"
    ;;
then just add those option flags to the ./configure and run make
-
what means "5VReg -> 3.3V" in raspberry? can connect directly to 3.3V or if requied connecto to 5V with regulator to obtain 3.3v?
-
Hi
 Does anybody know how to use MY_SIGNING_NODE_WHITELISTING in gateway raspbery pi? Where I must create/edit white list with my nodes?
-
first sorry about the basics question but I think many people have the same questions and can't find the answers:
After connecting the radio (including IRQ on 15pin) and the info LEDs to the GPIO, how to config it?- Do I need to configure all the info on the same command, or can I send the command "./configure --" many times for different configs?
- Do I need to configure it as a MQTT gateway?
- Where did the 127.0.0.1 IP come from?
- Does MQTT use internet connection?
- Why do you talk about Serial Gateway here, once we have a specific type for it? this type is about using GPIO only, isn't it? That is confusing!!!
-
trying to config on a Home Assistant Rpi.
Sorry again for the newbie questions...!!!
-
Hi,
Can I use pin 18 (GPIO 24) on my RPi3 for IRQ usage? Should I?
If I compile with --my-rf24-irq-pin=18, no date is received when the gateway starts.
I Cannot use pin 15 because that pin is covered by my Z-wave.me board.
Regards,
Erik
-
@Roberto-Mo-Ca If you are using the nrf24 PA/LNA version you need to use a 5V->3.3V regulator otherwise you can connect to the 3.3v pin.
-
@macvictor For the MY_SIGNING_NODE_WHITELISTING, you can uncomment and edit it in MyConfig.h or add it to the examples/mysgw.cpp.
-
You execute ./configure once with all your options to set your gateway.
You need to decide what type of gateway you want to build: ethernet, serial or mqtt:
https://www.mysensors.org/build/select_gatewayTake a look at the link and let me know if you still have any questions.
-
thaks @marceloaqno but I was wondering there was a new type of gateway named Raspberry Gateway, were we could connect the radio directly on the GPIO and config it locally, without internet, because of that I also would like to know if MQTT uses internet connection.
I actually use a serial gateway connected to Pi USG and it works without internet...
I just want to have only one device...
Thanks
-
@OliverDog You can configure the RPi to be any of the 3 types: ethernet, serial or mqtt, with the nrf24 attached to it.
-
@marceloaqno WOWWW
now I understood... but I think this is not clear on the build steps...
I choose a Serial Gateway, but on that lines, they say:
"If for some reason you can't use the GPIO pins of the Raspberry Pi, you could connect the radio to a arduino with the GatewaySerial sketch and feed the pi through a serial port:"So I assumed the serial gateway is the same I already use...
So, where do I get directions to config a serial gateway with the radio attached to the GPIO?Thanks
-
@OliverDog Which controller are you using(or are planning to use)?
-
@Erik-Tamminga Some pins may have some restrictions, I couldn't find any good info about that. Try using another pin (GPIO 25).
-
@marceloaqno I already use Home Assistant with a Serial Gateway connected on pi USB.
-
@OliverDog Home Assistant supports ethernet gateways, I recommend you go with that.
./configure --my-gateway=ethernet --my-transport=nrf24(The default settings is to use ethernet and nrf24, so you could omit them)
and add to it any of your custom options.
-
I have a question regarding the
--my-serial-groupnameoption: since I start the gateway under an user account with sudo, the gateway device ([EDIT] symlink) will be created with ownership root:root. Shouldn't it be created with root:dialout (as I chose dialout as group in my case)?[DELETED]
-
@Madhias /dev/pts/2 it's the one who holds the specified group ownership
-
@marceloaqno OK, many thanks for that hint!
I was wrong from the beginning on, since I thought my configuration for the gateway was correct because of
--my-serial-groupname=dialout- but that was not compiled. I edited now the mysgw.cpp manually (there was tty instead of dialout; and of course there was all the time the warning when compiling...). Now it works! Without chmod, or chowning anything later!
-
@marceloaqno Thank's for you help. I have other question.. general I try configure my gateway to work with security & signing, but they doesn't work. Where is problem? On the bottom i send point what it do it:
Gateway:
./configure --my-gateway=mqtt --my-controller-ip-address=127.0.0.1 --my-mqtt-publish-topic-prefix=mysensors-out --my-mqtt-subscribe-topic-prefix=mysensors-in --my-mqtt-client-id=mygateway1 --my-mqtt-password=PASS --my-mqtt-user=USER --my-rf24-encryption-enabled --my-signing=software --my-signing-request-signatures --my-signing-request-gw-signatures-from-allmakesudo make installsudo systemctl enable mysgw.servicesudo systemctl start mysgw.servicesudo mysgw --gen-soft-hmac-keysudo mysgw --set-soft-hmac-key=02417628BC1573CC380...sudo mysgw --gen-soft-serial-keysudo mysgw --set-soft-serial-key=00762CD152B868F7EBsudo mysgw --gen-aes-keysudo mysgw --set-aes-key= A790AD78B2D8B4DBBB5B2C4B9DD6DAF3
Node:
- Load script
SecurityPersonalizer.ino - Uncomment and send sketch to arduino
#define USE_SOFT_SIGNING #define STORE_SOFT_KEY #define USER_SOFT_KEY #define STORE_SOFT_SERIAL #define STORE_AES_KEY #define USER_AES_KEY #define MY_SOFT_HMAC_KEY 0X2,0X41,0X76,0X28,0XBC,0X15,0X73,0XCC,0X38... #define MY_AES_KEY 0XA7,0X90,0XAD,0X78,0XB2,0XD8...- Read all value from EPROM (test save):
Personalization sketch for MySensors usage. ------------------------------------------- EEPROM configuration: SOFT_HMAC_KEY | 02417628BC1573CC380DE0FADF7C87D7D3C77272A783E6E438786A07C3A8C6CF SOFT_SERIAL | 39BB1370C289643251 AES_KEY | A790AD78B2D8B4DBBB5B2C4B9DD6DAF3 -------------------------------- Personalization is now complete.- Send sample sketch to arduino:
//!< Enable debug prints to serial monitor
#define MY_DEBUG
//!< Enable signing related debug prints to serial monitor
#define MY_DEBUG_VERBOSE_SIGNING
// Enable NRF24L01 radio type
#define MY_RADIO_NRF24

// Select soft signing
#define MY_SIGNING_SOFT

// Enable lockdown of node if suspicious activity is detected
//-->> #define MY_NODE_LOCK_FEATURE

// Enable node whitelisting
//#define MY_SIGNING_NODE_WHITELISTING {{.nodeId = GATEWAY_ADDRESS,.serial = {0x09,0x08,0x07,0x06,0x05,0x04,0x03,0x02,0x01}}}

// Enable this if you want destination node to sign all messages sent to this node.
#define MY_SIGNING_REQUEST_SIGNATURES

// SETTINGS FOR MY_SIGNING_SOFT
#define MY_SIGNING_SOFT_RANDOMSEED_PIN 7 //!< Unconnected analog pin for random seed

// Add repeater function to this sensor
#define MY_REPEATER_FEATURE


#include <SPI.h>
#include <MySensors.h>
#include <Bounce2.h>

#define RELAY_PIN  4    // Arduino Digital I/O pin number for relay
#define BUTTON_PIN  3   // Arduino Digital I/O pin number for button
#define CHILD_ID 1      // Id of the sensor child
#define RELAY_ON 1
#define RELAY_OFF 0

Bounce debouncer = Bounce();
int oldValue = 0;
bool state;

MyMessage msg(CHILD_ID, V_LIGHT);

void setup()
{
  // Setup the button
  pinMode(BUTTON_PIN, INPUT);
  // Activate internal pull-up
  digitalWrite(BUTTON_PIN, HIGH);

  // After setting up the button, setup debouncer
  debouncer.attach(BUTTON_PIN);
  debouncer.interval(5);

  // Make sure relays are off when starting up
  digitalWrite(RELAY_PIN, RELAY_OFF);
  // Then set relay pins in output mode
  pinMode(RELAY_PIN, OUTPUT);

  // Set relay to last known state (using eeprom storage)
  state = loadState(CHILD_ID);
  digitalWrite(RELAY_PIN, state ? RELAY_ON : RELAY_OFF);
}

void presentation()  {
  // Send the sketch version information to the gateway and Controller
  sendSketchInfo("Relay & Button", "1.0");

  // Register all sensors to gw (they will be created as child devices)
  present(CHILD_ID, S_LIGHT, "Switch Secure Sensor", false);
}

/*
   Example on how to asynchronously check for new messages from gw
*/
void loop()
{
  debouncer.update();
  // Get the update value
  int value = debouncer.read();
//  if (value != oldValue && value == 0) {
    send(msg.set(state ? false : true), true); // Send new state and request ack back
//  }
//  oldValue = value;
  delay(5000);
}

void receive(const MyMessage &message) {
  // We only expect one type of message from controller. But we better check anyway.
  if (message.isAck()) {
    Serial.println("This is an ack from gateway");
  }

  if (message.type == V_LIGHT) {
    // Change relay state
    state = message.getBool();
    digitalWrite(RELAY_PIN, state ? RELAY_ON : RELAY_OFF);
    // Store state in eeprom
    // saveState(CHILD_ID, state);

    // Write some debug info
    Serial.print("Incoming change for sensor:");
    Serial.print(message.sensor);
    Serial.print(", New status: ");
    Serial.println(message.getBool());
  }
}
And finally in Arduino Serial Monitor I see:
0 MCO:BGN:INIT REPEATER,CP=RNNRAS-,VER=2.1.1
4 TSM:INIT
5 TSF:WUR:MS=0
11 TSM:INIT:TSP OK
13 TSF:SID:OK,ID=105
15 TSM:FPAR
16 Will not sign message for destination 255 as it does not require it
58 TSF:MSG:SEND,105-105-255-255,s=255,c=3,t=7,pt=0,l=0,sg=0,ft=0,st=OK:
2065 !TSM:FPAR:NO REPLY
2067 TSM:FPAR
2068 Will not sign message for destination 255 as it does not require it
2110 TSF:MSG:SEND,105-105-255-255,s=255,c=3,t=7,pt=0,l=0,sg=0,ft=0,st=OK:
4117 !TSM:FPAR:NO REPLY
4119 TSM:FPAR
4120 Will not sign message for destination 255 as it does not require it
4162 TSF:MSG:SEND,105-105-255-255,s=255,c=3,t=7,pt=0,l=0,sg=0,ft=0,st=OK:
6169 !TSM:FPAR:NO REPLY
6171 TSM:FPAR
6172 Will not sign message for destination 255 as it does not require it
6214 TSF:MSG:SEND,105-105-255-255,s=255,c=3,t=7,pt=0,l=0,sg=0,ft=0,st=OK:
8221 !TSM:FPAR:FAIL
8222 TSM:FAIL:CNT=1
8224 TSM:FAIL:PDT
and in gateway i see:
sudo mysgw -d
mysgw: Starting gateway...
mysgw: Protocol version - 2.1.1
mysgw: MCO:BGN:INIT GW,CP=RNNG-S-,VER=2.1.1
mysgw: TSF:LRT:OK
mysgw: TSM:INIT
mysgw: TSF:WUR:MS=0
mysgw: TSM:INIT:TSP OK
mysgw: TSM:INIT:GW MODE
mysgw: TSM:READY:ID=0,PAR=0,DIS=0
mysgw: MCO:REG:NOT NEEDED
mysgw: MCO:BGN:STP
mysgw: MCO:BGN:INIT OK,TSP=1
mysgw: Attempting MQTT connection...
mysgw: connected to 127.0.0.1
mysgw: MQTT connected
mysgw: Sending message on topic: mysensors-out/0/255/0/0/18
mysgw: TSF:MSG:READ,171-107-54,s=221,c=2,t=131,pt=4,l=25,sg=0:-1418183441
mysgw: !TSF:MSG:PVER,3=2
mysgw: TSF:MSG:READ,135-23-172,s=20,c=3,t=200,pt=7,l=25,sg=0:-0.00000178
mysgw: !TSF:MSG:PVER,1=2
mysgw: TSF:MSG:READ,34-66-89,s=168,c=1,t=9,pt=1,l=25,sg=0:56
mysgw: !TSF:MSG:PVER,1=2
mysgw: TSF:MSG:READ,223-46-240,s=112,c=5,t=192,pt=5,l=11,sg=1:1407647670
mysgw: TSF:MSG:REL MSG
mysgw: !TSF:RTE:240 UNKNOWN
mysgw: !TSF:MSG:SEND,223-0-240-240,s=112,c=5,t=192,pt=5,l=11,sg=1,ft=0,st=NACK:1407647670
mysgw: TSF:MSG:READ,183-139-129,s=37,c=6,t=155,pt=1,l=21,sg=0:48
mysgw: !TSF:MSG:PVER,0=2
mysgw: TSF:MSG:READ,139-214-233,s=61,c=3,t=193,pt=7,l=0,sg=1:0.00000000
mysgw: TSF:MSG:REL MSG
mysgw: !TSF:RTE:233 UNKNOWN
mysgw: !TSF:MSG:SEND,139-0-233-233,s=61,c=3,t=193,pt=7,l=0,sg=1,ft=0,st=NACK:0.00000000
mysgw: TSF:MSG:READ,83-33-7,s=179,c=2,t=27,pt=4,l=25,sg=1:-2057270722
mysgw: !TSF:MSG:PVER,3=2
mysgw: TSF:MSG:READ,110-148-67,s=113,c=0,t=158,pt=1,l=9,sg=1:251
mysgw: !TSF:MSG:PVER,1=2
mysgw: TSF:MSG:READ,75-209-102,s=204,c=7,t=25,pt=1,l=11,sg=1:52
mysgw: !TSF:MSG:PVER,0=2
mysgw: TSF:MSG:READ,184-209-235,s=58,c=1,t=140,pt=6,l=23,sg=1:1DC404A5401119FACF0000000000000000000000000000
mysgw: !TSF:MSG:PVER,3=2
mysgw: TSF:MSG:READ,172-203-51,s=140,c=2,t=173,pt=0,l=1,sg=1:?
mysgw: TSF:MSG:REL MSG
mysgw: !TSF:RTE:51 UNKNOWN
mysgw: !TSF:MSG:SEND,172-0-51-51,s=140,c=2,t=173,pt=0,l=1,sg=1,ft=0,st=NACK:?
Where is problem?
-
@macvictor Did you also enable encryption on your node? (#define MY_RF24_ENABLE_ENCRYPTION)
