💬 Building a Raspberry Pi Gateway
-
also on banana pi pro when i trie to compile i'm getting this :
[SECTION] Detecting target machine.
[OK] machine detected: SoC=A20, Type=unknown, CPU=armv7l.
[OK] init system detected: sysvinit
[SECTION] Saving configuration.
[SECTION] Cleaning previous builds.
[OK] Finished.type i think must be BananaPro
on make :
-o build/examples_linux/mysgw.o
In file included from examples_linux/mysgw.cpp:74:0:
./MySensors.h:258:2: error: #error No support for nRF24 radio on this platform
#error No support for nRF24 radio on this platform
^
In file included from ./drivers/RF24/RF24.cpp:23:0,
from ./MySensors.h:294,
from examples_linux/mysgw.cpp:74:
./drivers/RF24/RF24.h:52:17: fatal error: SPI.h: No such file or directory
#include <SPI.h>
^
compilation terminated.
Makefile:98: recipe for target 'build/examples_linux/mysgw.o' failed
make: *** [build/examples_linux/mysgw.o] Error 1so Banana Pi Pro soc A20 it's also on wait list or never worked ?
-
Yes...I see. That error is that said @marceloaqno about own mysensors NRF24 drivers and SPI bus adapt for Raspberry, because for now mysensors is only supported at Raspi and arduinos.
On Banana CPU detection seems work better (I agree type seems not good...maybe you can change this on configure file and give a try to compile to see what happends) and I figure can work too on OPI too only changing that I said before, but then is raised NRF24 driver and SPI error.I see that mysensors RF24 driver are derivated from that https://github.com/mz-fuzzy/RF24 build that at same time last this is forked directly from http://tmrh20.github.io/RF24Installer/RPi/install.sh that we know are working fine on OPI and armbian, so I figure that maybe it´s not so much hard to modify mysensors RF24 to adapt to work on OPI.
Hope any mysensors "coder" ear our call and cand give us some hand to make the changes on the mysensors build and we can compile the mysgw to OPI soon.
Cheers
-
As a side coment, the configure file is on the root Mysensors directory that is buid when you complete the first step "git clone https://github.com/mysensors/MySensors.git" on the mysgw install process.
Anyone can edit the file with a plain text editor and change the values for see what happens when try compile.
Regards
-
@jirm The configure script from MySensor repo is based on the https://github.com/TMRh20/RF24/blob/master/configure. Could you try with theTMRh20 master branch and post the result?
git clone https://github.com/TMRh20/RF24.git
cd RF24
./configure
make
-
git clone https://github.com/TMRh20/RF24.git
cd RF24
./configure
[SECTION] Detecting arm compilation environment.
[OK] arm-linux-gnueabihf-gcc detected.
[OK] arm-linux-gnueabihf-g++ detected.
[SECTION] Detecting target machine.
[OK] machine detected: SoC=A20, Type=unknown, CPU=armv7l.
[SECTION] Detecting DRIVER
[OK] DRIVER detected:SPIDEV.
[SECTION] Detecting OS.
[INFO] OS detected:LINUX.
[SECTION] Preparing configuration.
[SECTION] Saving configuration.
[SECTION] Cleaning previous builds.
[OK] Finished.make
arm-linux-gnueabihf-g++ -fPIC -march=armv7-a -mtune=cortex-a7 -mfpu=neon-vfpv4 -mfloat-abi=hard -Ofast -Wall -pthread -c RF24.cpp
arm-linux-gnueabihf-g++ -fPIC -march=armv7-a -mtune=cortex-a7 -mfpu=neon-vfpv4 -mfloat-abi=hard -Ofast -Wall -pthread -c utility/SPIDEV/spi.cpp
arm-linux-gnueabihf-g++ -fPIC -march=armv7-a -mtune=cortex-a7 -mfpu=neon-vfpv4 -mfloat-abi=hard -Ofast -Wall -pthread -c utility/SPIDEV/gpio.cpp
arm-linux-gnueabihf-gcc -fPIC -march=armv7-a -mtune=cortex-a7 -mfpu=neon-vfpv4 -mfloat-abi=hard -Ofast -Wall -pthread -c utility/SPIDEV/compatibility.c
arm-linux-gnueabihf-g++ -fPIC -march=armv7-a -mtune=cortex-a7 -mfpu=neon-vfpv4 -mfloat-abi=hard -Ofast -Wall -pthread -c utility/SPIDEV/interrupt.c
[Linking]
arm-linux-gnueabihf-gcc -pthread -shared -Wl,-soname,librf24.so.1 -march=armv7-a -mtune=cortex-a7 -mfpu=neon-vfpv4 -mfloat-abi=hard -Ofast -Wall -pthread -o librf24.so.1.2.0 RF24.o spi.o gpio.o compatibility.o interrupt.o
-
@Oli After these steps:
git clone https://github.com/mysensors/MySensors.git
cd MySensors
to switch to the master branch, run:
git checkout masterand reinstall the gateway following the same steps from the instructions.
-
@marceloaqno
i've tried on banana pi pro :cat /etc/debian_version
8.6
cat /etc/bananian_platform
BananaPro
-
@eyesoft thanks for the feedback, we need to add support for SPIDEV driver in order to use the BananaPi.
-
@marceloaqno Sadly I´m so much bussy and traveling for few days and cannot acces to my OPI´s
 , but I´m sure someone here (@aand , @hausinger, etc.. ) can give a try on her OPI the things we said before. At least I hope this ...
-
@marceloaqno I see some huge steps up on BananaPi...seems only need add SPIDEV support for make it working...

-
@marceloaqno I am rather copy/paste not a programming kind a guy, so sorry for my lame questions.
pi@raspberrypi ~ $ git clone https://github.com/mysensors/MySensors.git
fatal: destination path 'MySensors' already exists and is not an empty directorypi@raspberrypi ~/MySensors $ git checkout master
Branch master set up to track remote branch master from origin.
Switched to a new branch 'master'but after that:
pi@raspberrypi ~/MySensors $ make
make: *** No targets specified and no makefile found. Stop.
pi@raspberrypi ~/MySensors $ sudo make install
make: *** No rule to make target 'install'. Stop.
-
@Oli ... try :
./configure
make
sudo make install
-
@eyesoft same errors
-
@Oli see commands above how to Install and Build, with git checkout master you are on master if you :
cat README.md
MySensors Library v2.1.0default on git clone you are on development :
cat README.md
MySensors Library v2.2.0-beta
-
@Oli First you need delete all Mysensors directory on your machine.
Then use step by step the guide on Mysensors Gateway installation process:
https://www.mysensors.org/build/raspberry
Dont forget put command sudo on sentences if needed.Regards
-
I wanna update not to re install of MySensors. I thought about something like ./updaterelease or ./updatebeta... I spend hours of make it work before, so I leave it as it is. No time or nerves for fighting next couple of days.
-
@Oli what did you have to do to make it work? It should just be a matter of following the instructions that @jirm linked to.
EDIT: Since you already have the MySensors repo cloned from git, you can update by running
pi@raspberrypi ~/MySensors $ git pullThan run configure, make, etc as per the original instructions.
-
@mfalkvidd I could not find ttyMySensorsGateway on Domoticz. Only ttyUSB0, ttyUSB20 and ttyAMA0. Even after I did ./configure --my-gateway=serial --my-serial-is-pty --my-serial-pty=/dev/ttyMySensorsGateway
-
@Oli so what did you do to make it work?
-
@Oli I´m thinking is hard to "only" update (changing from develop to master branch) directly from github if the repository is not been previously prepared to do this kind of updates... but maybe I´m wrong.
Will be good you give feedback if you get it.
Cheers
-
@mfalkvidd hah... thats a good question, don't know. After dozen or more reinstallations, spending hours on Google I finally make it work. Got some notes but frankly I am worrying it will happen again. Hahaha
-
@Oli ah, ok. Then I'd recommend backing up everything before doing git pull, configure, make, etc so you can restore if it stops working.
-
@Oli


Good !
I like when people can make something work that nobody even knows what it is
For me it usually happens just the opposite I am not able to make work even the things I know perfectly well ... maybe it will be a matter of "bad karma"

-
OK, I did it, I f....g did it, and guess what...
s...t happened again.
Everything went as it should, no errors at all, but no ttyUSBMySensorsGateway...
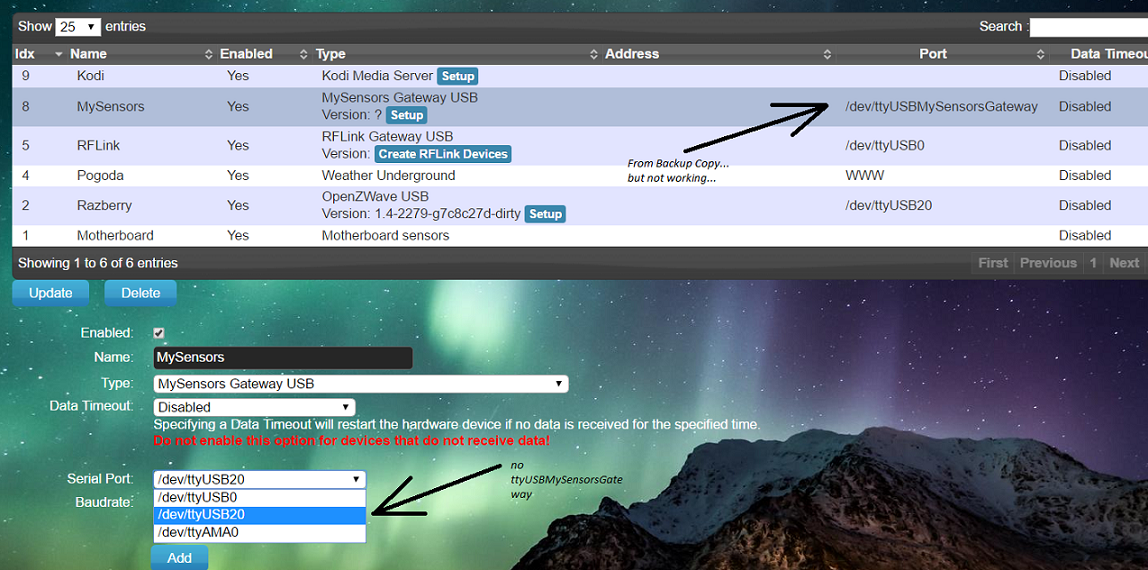
log error message:
2017-01-03 19:56:38.784 MySensors: Using serial port: /dev/ttyUSBMySensorsGateway
2017-01-03 19:56:38.785 Error: MySensors: Error opening serial port!
2017-01-03 19:56:39.785 MySensors: retrying in 30 seconds...and again...
and again...
...any help would be appreciated.
-
Hello,
Could someone answer: if i have RPi NRF24 GW, how I could connect MYSController from other computer (for example from Windows computer)?
- Is it possible to make that type connection with RPi NRF24 GW?
- May I use some integrated web server for this type of connection in RPi to make it work? Is there are easier solutions?
EDIT: no matter, already answered it by myself

Its easy becose it's like Ethernet GW.
-
@Oli: when you do a "ls /dev" is ttyUSBMySensorsGateway shown ?
-
@Oli: by the way, the name of the port you used is ttyMySensorsGateway, not ttyUSBMySensorsGateway:
@mfalkvidd I could not find ttyMySensorsGateway on Domoticz. Only ttyUSB0, ttyUSB20 and ttyAMA0. Even after I did ./configure --my-gateway=serial --my-serial-is-pty --my-serial-pty=/dev/ttyMySensorsGateway
Is the gateway running, ie, "ps -ef "grep my" shows a process there ?
Cheers,
Luiz
-
@Oli: sorry, correct syntax is ps -ef | grep my
-
@luizrrocha
pi@raspberrypi ~ $ ls /devautofs mmcblk0p1 stderr tty36 ttyAMA0
block mmcblk0p2 stdin tty37 ttyMySensorsGateway
btrfs-control net stdout tty38 ttyprintk
bus network_latency tty tty39 ttyUSB0
cachefiles network_throughput tty0 tty4 ttyUSB20
char null tty1 tty40 uhid
console ppp tty10 tty41 uinput
cpu_dma_latency ptmx tty11 tty42 urandom
cuse pts tty12 tty43 vc-cma
disk ram0 tty13 tty44 vchiq
fb0 ram1 tty14 tty45 vcio
fd ram10 tty15 tty46 vc-mem
full ram11 tty16 tty47 vcs
fuse ram12 tty17 tty48 vcs1
gpiomem ram13 tty18 tty49 vcs2
hwrng ram14 tty19 tty5 vcs3
i2c-1 ram15 tty2 tty50 vcs4
input ram2 tty20 tty51 vcs5
kmsg ram3 tty21 tty52 vcs6
log ram4 tty22 tty53 vcsa
loop0 ram5 tty23 tty54 vcsa1
loop1 ram6 tty24 tty55 vcsa2
loop2 ram7 tty25 tty56 vcsa3
loop3 ram8 tty26 tty57 vcsa4
loop4 ram9 tty27 tty58 vcsa5
loop5 random tty28 tty59 vcsa6
loop6 raw tty29 tty6 vhci
loop7 root tty3 tty60 watchdog
loop-control serial tty30 tty61 watchdog0
MAKEDEV shm tty31 tty62 xconsole
mapper snd tty32 tty63 zero
mem sndstat tty33 tty7
memory_bandwidth spidev0.0 tty34 tty8
mmcblk0 spidev0.1 tty35 tty9pi@raspberrypi ~ $ ps -ef | grep my
root 2079 1 1 18:40 ? 00:02:49 /usr/local/bin/mysgw -b
pi 4214 4181 0 21:25 pts/2 00:00:00 grep --color=auto my
-
@Oli : the port name is actually ttyMySensorsGateway, you have to correct the definition of the gateway on Domoticz to use it....
Luiz
-
@jacikaas : on MYSController go to Settings -> Gateway -> TCP/IP and add the IP address of the Gateway and use port 5003. It works even if the gateway is feeding data to Domoticz, so you can monitor your sensors in "raw" mode.
Cheers,
Luiz
-
@luizrrocha as You can see, on the picture above, I've wrote that ttyUSBMySensors.... is from my previous backup copy. On the same pictures You can also see that I can choose only from three serial ports: USB0, USB20 and AMA0. Thera are no ttyMySensorsGateway despite that it is present after ls /dev.
And that's the problem, I dont know how to make it present in the serial ports popup menu.
-
@Oli : why not remove the old definition to avoid any trash information and restarting Domoticz to make shure it rereads the port info before creating the new entry ?
And I do not understand why if you are running domoticz and the gateway on the same Pi, why not use a ethernet gateway and set 127.0.0.1 and port 5003 on the Domoticz gateway entry. I did that and never had to worry about USB ports at all.
-
@luizrrocha said:
@Oli : why not remove the old definition to avoid any trash information and restarting Domoticz to make shure it rereads the port info before creating the new entry ?
Of course I did that, I started from the scratch... but when it did not work I try to restore my backup... but it did not work also...
@luizrrocha said:
And I do not understand why if you are running domoticz and the gateway on the same Pi, why not use a ethernet gateway and set 127.0.0.1 and port 5003 on the Domoticz gateway entry. I did that and never had to worry about USB ports at all.
simple... I have no free LAN on my rotuer... there is more, I also have raZberry daughter board (Z-Wave) connected to same Raspberry Pi GPIO port. And till today everything works perfect until... "Better is the enemy of the good"

-
OK I found the solution (thanks to @luizrrocha). I change
./configure --my-gateway=serial --my-serial-is-pty --my-serial-pty=/dev/ttyMySensorsGateway
to
./configure --my-gateway=serial --my-serial-is-pty --my-serial-pty=/dev/ttyUSBMySensorsGateway and now its working.Question is, It's only workaround (in my case) or there is bug in the installation guide?
-
@Oli : if both the gateway and Domoticz run on the same Raspi, there is no physical network involved, hence the 127.0.0.1 dummy local address is used by Domoticz to talk to the gateway on the same machine, just using port 5003... and since you use localhost (127.0.0.1, a virtual network) there is no need to create a virtual USB port which is what you did...
-
@luizrrocha interesting... step by step instruction?
-
@Oli: delete the Makefile.inc file on mysensors folder
./configure --my-gateway=ethernet
make
sudo ./bin/mysgw -b
go to domoticz and create a new MySensors Gateway with LAN, inform 127.0.0.1 as the address and 5003 as the port...that should do the trick.
-
@Oli luizrocha's configuration seems interesting, but just in case your still wanting the serial, from above, has worked for me in the past, but I have since switched to OH2:
@ysinh said:
A tiny hint for the users of domoticz :
./configure --my-gateway=serial --my-serial-is-pty --my-serial-pty=/dev/ttyUSB20
make
sudo ./examples_linux/mysGateway -d i hope this helps
then in the hardware setup
MySensors Gateway USB
serial port: /dev/ttyUSB20
-
I am also not get it to work in Domoticz tried the USB serial and ethernet way.
It's a testing pi. Where i didn't connected the radio. Because it's still in the Nano. Could that be the issue? I guess not.
-
Hi!,
I started a new topic for Mysensors Gateway on OrangePI (OPI), Here
Hope this is okay,
Kind regards,
Tag
-
The Pi MQTT Gateway with IRQ connected may handle better the messages into a loaded network than Ethernet MQTT Gateway where IRQ is not used? (with NRF24)
Also I would like to know if I can use the other pins of RPi to connect some digital sensors directly there.
-
@Oli
Stupid question... Did you mount the radio? Because I thought I would like to test if it works. (without radio) but that doesn't work.Mounted a radio and ethernet gateway is working.
-
Maybe i'm wrong but IRQ is used on all gateways if you read above :
"""
Improving throughput for nrf24
There is another method were the interrupt pin from the nrf24 modules is used to inform when a new message arrives and it's immediately added to a queue for further processing
"""
for the second part yes you can use other pins on RPi ... i have RF module NRF24L01 for gateway and DHT11 on RPi.
-
@luizrrocha said:
Ditto, @Robinek70 !
Thank you, Marcelo Aquino, for your fantastic work .
I have Domoticz, Cacti, Heyu and MySensors Gateway running in a 30 dollars RASPBERRY PI 2, all without a glitch, all talking to each other and hopefully soon will also have Alexa for RASPBERRY PI running there also.
If in doubt, by a RASPBERRY PI and thank people who develop and support it for free instead of complaining all the time.
'nuff said.
Luiz Roberto
Can you please give me the instructions for Domoticz setup?
I have a node with DHT11 sensor and I can see mygsw service is getting messages. How do I connect Domoticz with mysensors ?
I have been following openhab until today and I'm switching to Domoticz now.
-
Hello, @musthafa .
For installation I used the tutorial at http://www.domoticz.com/wiki/Installing_and_running_Domoticz_on_a_Raspberry_PI. It looks like they changed the tutorial that I used to just a single curl command to install it, although there are complaints about it not working alright. You'll have to try it as I cannot reinstall mine.
Setting up MySensors Gateway is also covered in the wiki : http://www.domoticz.com/wiki/MySensors, very easy. I recommend you go thru the wiki pages as I did, they are a treasure of information, as the manual on www.domoticz.com is outdated though useful.
Good luck.
Luiz
-
@luizrrocha said:
Thank you!Hello, @musthafa .
For installation I used the tutorial at http://www.domoticz.com/wiki/Installing_and_running_Domoticz_on_a_Raspberry_PI. It looks like they changed the tutorial that I used to just a single curl command to install it, although there are complaints about it not working alright. You'll have to try it as I cannot reinstall mine.
Domoticz Installation was straight forward as per their wiki.
Setting up MySensors Gateway is also covered in the wiki : http://www.domoticz.com/wiki/MySensors, very easy. I recommend you go thru the wiki pages as I did, they are a treasure of information, as the manual on www.domoticz.com is outdated though useful.
Good luck.
Luiz
MySensors I tried Ethernet didn't work. Virtual Serial Port worked for me. However I have 1 light (LED Test at PIN 4 of Node) & a DHT sensor. Domoticz only lists the DHT sensor. It doesn't show me the light child.
-
@musthafa : look on the MySensors forum for the MYSController, install it and you can monitor the messages going to the gateway.
Most likely your declaration of the LED output pin on the MySensors arduino is not correct. I still did not use arduinos as actuators with MySensors so I will probably not be of much help here.
Cheers,
Luiz
-
@luizrrocha said:
@musthafa : look on the MySensors forum for the MYSController, install it and you can monitor the messages going to the gateway.
Most likely your declaration of the LED output pin on the MySensors arduino is not correct. I still did not use arduinos as actuators with MySensors so I will probably not be of much help here.
Cheers,
Luiz
In OpenHAB it worked as a dimmer. Later on OpenHAB was stuck and my mobile app was frozen. Then I start discovering Domoticz. If it can be discovered in OH2 why not in Domoticz ?
-
@eyesoft
Thank you for the answer, I am happy to get a confirmation about sensors works on a Pi Gateway. Since at least one of my sensor is analogue, I still have to add an Arduino board to the gateway, I plan to connect it via USB.
I have tested and get very good results with Home Assistant controller running on a Pi where I add sensors directly on Pi and to an Arduino (USB to Pi).
The Ethernet Gateway do not use IRQ: https://www.mysensors.org/build/ethernet_gateway
Nor the nodes: https://www.mysensors.org/build/connect_radio Even if the wire is connected at Arduino pin 2, is mentioned: Note: The IRQ is currently not used by the MySensors library so it can be left un-connected
If you know how to connect and manage this IRQ on Arduino sketch, please let me know.
I have built this some time ago and works without the IRQ connected. Now I have updated the MySensors to 2.1.0 , IRQ is still unconnected and works the same. As far as I see, it is used for the Pi Gateway. I plan to migrate to this configuration of Pi Gateway, but I would like to get more info before change my working system:- this IRQ improve the reliability? (sometimes I have encountered problems due the load of NRF24 network with many messages)
- I would like to set retain=true for the MQTT Gateway, this will improve the reliability.
I already addressed the last question somwhere else, still waiting for more info if somebody know.
Thank you
-
After installing a Raspberry Gateway, is this output OK, or have I forgotten something?
mysgw: Starting gateway...
mysgw: Protocol version - 2.2.0-beta
mysgw: MCO:BGN:INIT GW,CP=RNNG---,VER=2.2.0-beta
mysgw: TSF:LRT:OK
mysgw: TSM:INIT
mysgw: TSF:WUR:MS=0
mysgw: TSM:INIT:TSP OK
mysgw: TSM:INIT:GW MODE
mysgw: TSM:READY:ID=0,PAR=0,DIS=0
mysgw: MCO:REG:NOT NEEDED
mysgw: MCO:BGN:STP
mysgw: MCO:BGN:INIT OK,TSP=1
I configured with (should be a serial gateway with a controller on the same machine):
./configure --soc=BCM2835 --my-gateway=serial --my-serial-is-pty --my-serial-pty=/dev/ttyMySensorGateway --my-serial-groupname=dialout --my-debug=enable
-
Has there been any progress on the RFM69 version? Looking at the repository, it looks like some of the code is there. I did find this RFM69 driver for the Pi that has a LowPowerLabs interface. Would this help in moving forward?
https://github.com/dconstructing/rfm69
thanks for all the work on this - a great community moving things forward.
-
@Mihai
you can attach analogue sensor to ESP2866 with espeasy firmware ... more info here : http://www.letscontrolit.com/wiki/index.php/ESPEasy ... i'm using one ESP8266-12E and i have good results and Uptime: 74209 minutes (usb powered).
i'm using IRQ on NRF24L01 connected to my Rpi, but i don't have many sensor with nrf+arduino (only 2) and i had no problems ... i don't if IRQ improve the reliability and i never play with irq fron nrf on arduino.
regarding retain=true have a look here : http://www.hivemq.com/blog/mqtt-essentials-part-8-retained-messages
for more reliability on mqtt i think you can use qos=1 ( The broker/client will deliver the message at least once, with confirmation required.), but all depends on your set-up .. not all messages need special attention.
-
@Mihai I have not done any extensive testing with IRQ functionality in RPi, I plan to do it in the future, so for now you will have to test it for yourself.
@Madhias Yes, this is the expected output, the gateway is now waiting for messages to arrive.
@pjeran Yes, there is a work in progress with many improvements: https://github.com/mysensors/MySensors/pull/722
-
Is it possible to use the second ISP on my raspberypi 3 to connect NRF24L01+ and what will be the wiring diagram, also what have to change in mygsw library
-
I have created a patch to enable the use of the RFM69 with a RaspberryPi gateway without the use of an Arduino gateway board.
It has only been tested with my configuration, but it seems to work well for me.
Pull request is here with configuration instructions:
https://github.com/mysensors/MySensors/pull/728Note that it currently requires using some pin other than CS0/CS1 for the chip-select
-
-
This post is deleted!
-
@eyesoft
As far as I understand, MySensors relay on PubSubClient for MQTT and it does not allow to publish messages with QOS=1 or 2, only 0.
Retain is different that QOS, it offers the possibility to recover the state for a device that loose connection for a while (e.g. after a restart). I find it very usefull. For example I have to restart the controller. When come back I got all states to their real values if retain=true. Otherwise they goes to the default, usually 0.
I have now 6 nodes, each with several sensors and relays.
-
please help

every time after reboot i have to run this codesudo ./bin/mysgw -dso built a virtual usb but after reboot ....
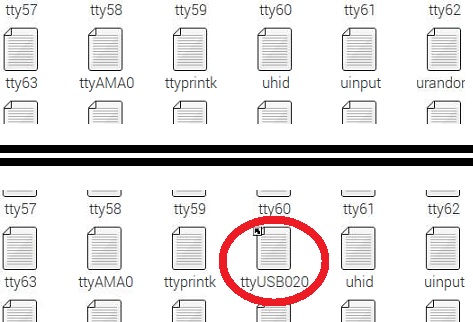
how put this code in startup ?
 please help thank you
-
From the Building a Raspberry Pi Gateway article:
If you wish to install:
sudo make installThe last command will provide instructions for your system on how to start the gateway on every boot.
-
@marceloaqno
i do it but after reboot serial lost again
just with command work againsudo ./bin/mysgw -d
-
@marceloaqno
i'm sorry
after sudo make install i must run this lines:sudo systemctl enable mysgw.service sudo systemctl start mysgw.servicesorry thank you
-
@marceloaqno can you build a rs485 gateway on raspberry pi ?
-
@Mihai yes you are right
-
This data that I get when I run ./mysgw --d , where is it stored and how can I get it to push it on cloud? Please help.
-
Data is not stored... to store the data and do something usefull with it (or not) you need a controller. I use mycontroller, and from this software you can "push" data to an external server.
I use my controller, but i am sure that other controller software also has this feature.
-
@Tag , The controller must be using something to get the data right? How can we do it directly without using the controller?
-
@hek It looks like development is the default branch in the repository. I was following the build instructions and couldn't figure out why I kept getting "connection refused". Just typing up a troubleshooting post when I saw my log said 2.2.0-beta. Sure enough when I grabbed master(2.1.0) instead it ran fine. Should probably add a checkout in the instructions.
-
@pete1450 could you clarify which instructions should be updated?
The instructions at https://www.mysensors.org/about/arduino recommend using the Arduino IDE Board manager, which will get the latest stable version.
Edit: Now I see. The link in the first post in this thread. It doesn't mention the master branch because up until Dec 25th the development branch was required. But now that 2.1 has been released the instructions should indeed use the stable version. I've updated the instructions. Thanks for noticing!
-
This is also new for me since i do not send data into any cloud... but i can imagine that you can use MQTT. (see https://www.mysensors.org/build/mqtt_gateway for more details) is important that the receiving side supports MQTT. in this case google is your friend

if you do a ./configure --help you will find you can build the mysensors gateway with MQTT support
./configure --help
...
    --my-gateway=[ethernet|serial|mqtt]
                                Gateway type, set to none to disable gateway feature. [ethernet]
    --my-node-id=<ID>           Disable gateway feature and run as a node with given id.
    --my-controller-url-address=<URL>
                                Controller or MQTT broker url.
    --my-controller-ip-address=<IP>
                                Controller or MQTT broker ip.
    --my-port=<PORT>            The port to keep open on gateway mode.
                                If gateway is set to mqtt, it sets the broker port.
...
-
ran sudo ./bin/mysgw -d
I keep getting mysgw: accept: Bad File Descriptor.
Any possible cause ?
-
I am trying to get the raspi ethernet gateway running but on both my pi 3 (also running openHAB) and the pi B (pretty basic install).
Unfortunately I get the same error on both.
Any ideas what could be going on here?
I am running the latest gateway and the latest raspbian.
mysgw: Starting gateway...
mysgw: Protocol version - 2.1.0
mysgw: MCO:BGN:INIT GW,CP=RNNG---,VER=2.1.0
mysgw: TSF:LRT:OK
mysgw: TSM:INIT
mysgw: TSF:WUR:MS=0
mysgw: TSM:INIT:TSP OK
mysgw: TSM:INIT:GW MODE
mysgw: TSM:READY:ID=0,PAR=0,DIS=0
mysgw: MCO:REG:NOT NEEDED
mysgw: connect: Connection refused
mysgw: failed to connect
mysgw: Eth: connect
mysgw: connect: Connection refused
mysgw: failed to connect
mysgw: Eth: connect
-
I am using a Rasp Pi 3 as well.
I can't even proceed further in the tutorial cause of this error cause nothing works after it.
-
@marceltrapman @LaMB95
Could you post the complete ./configure command used to configure the gateway?
-
@marceloaqno Sure, forgot it

sudo ./configure \
    --my-gateway=ethernet \
    --my-controller-ip-address=192.168.1.xx \
    --my-port=5003 \
    --my-transport=nrf24
-
@marceltrapman Are you sure it's not a problem with your controller?
Have you tried connecting to your controller using telnet?telnet 192.168.1.x 5003
-
@marceloaqno !
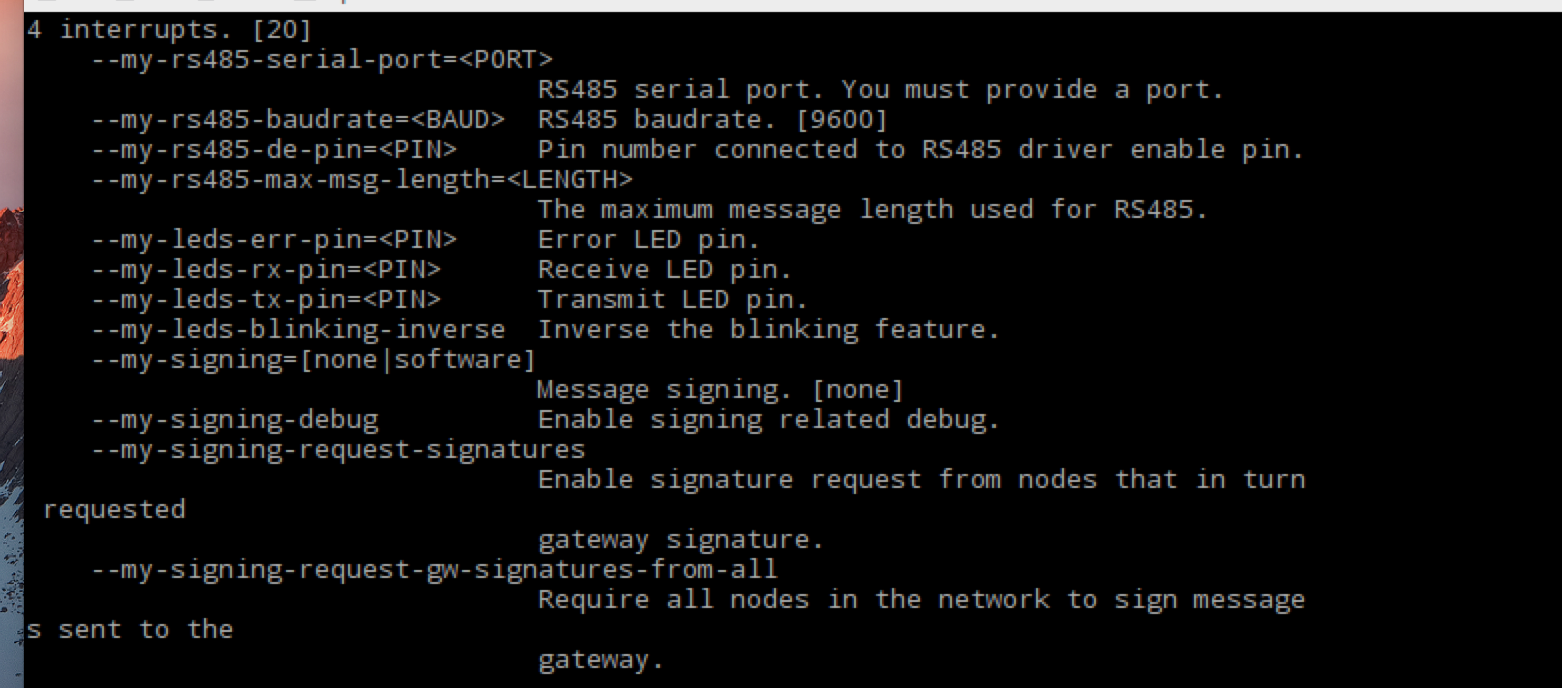
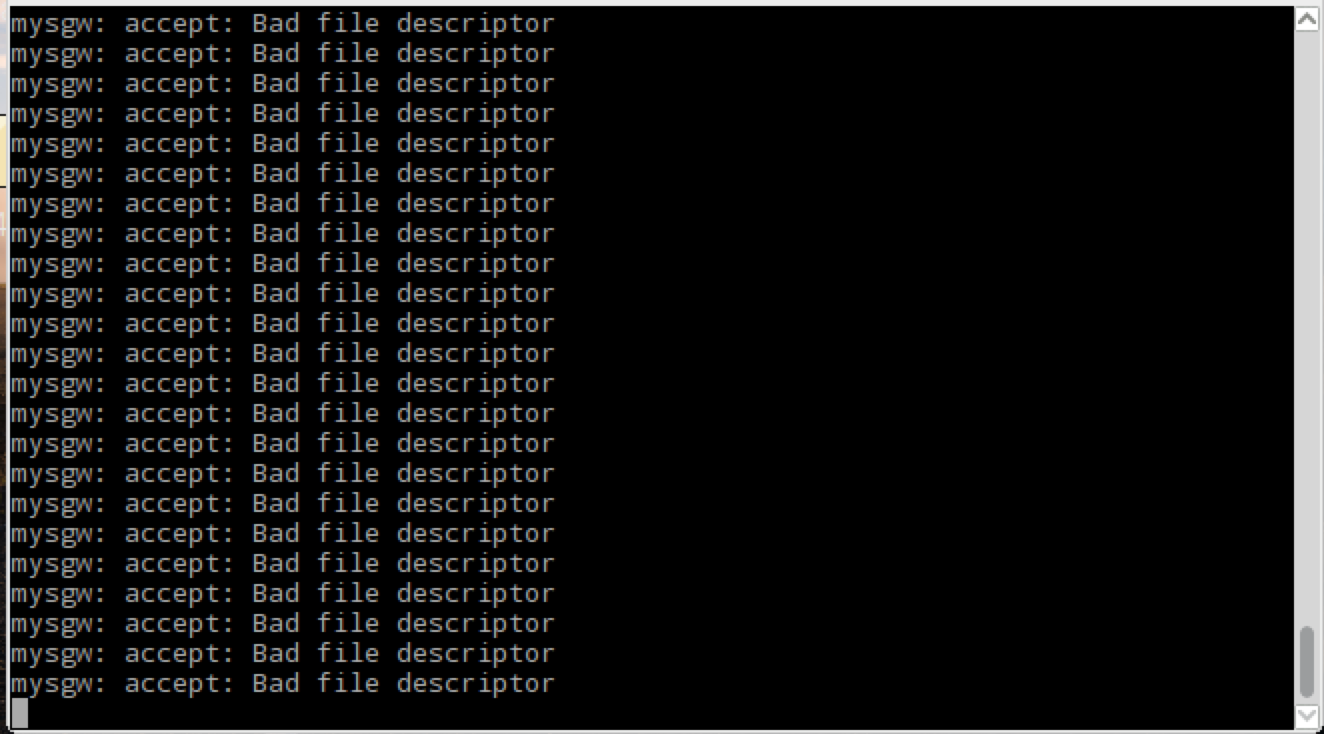
Is this what you meant?
-
@marceloaqno not sure no.
So, I downloaded telnet on the same raspi that I want to use as the gateway and the issue seems to be that port 5003 is not available.
Funny but how do I solve this.
It can't be an issue with the firewall because it allows all traffic on the internal network.
-
@marceloaqno and the same from the controller to the gateway gives the same error on that port

-
@Reza Yes, you can use rs485 in the RPi.
./configure --my-transport=rs485 --my-rs485-serial-port=<YOUR_SERIAL_PORT>For more options, run:
./configure -h
-
@LaMB95 No, I meant the options you used when you ran ./configure
-
@tiana
"The Broadcom SoC has three independant SPI interfaces, however only one of these is brought out to the GPIO connector, and that one SPI interface has 2 Chip enable lines."
More info here: https://www.raspberrypi.org/forums/viewtopic.php?f=44&t=22608
-
@marceloaqno from the docs I assume it is the gateway that has to open up port 5003 but I guess it does not because it can't connect to the ethernet (for some reason) or am I wrong?
-
@marceloaqno
i means that without arduino and usb port, similar to raspberry gateway ( raspberry +nrf24)
i means connect rs485 module to GPIO raspberry pi with domoticz
-
I m sorry I m new to using a raspberry pi and its for a project.
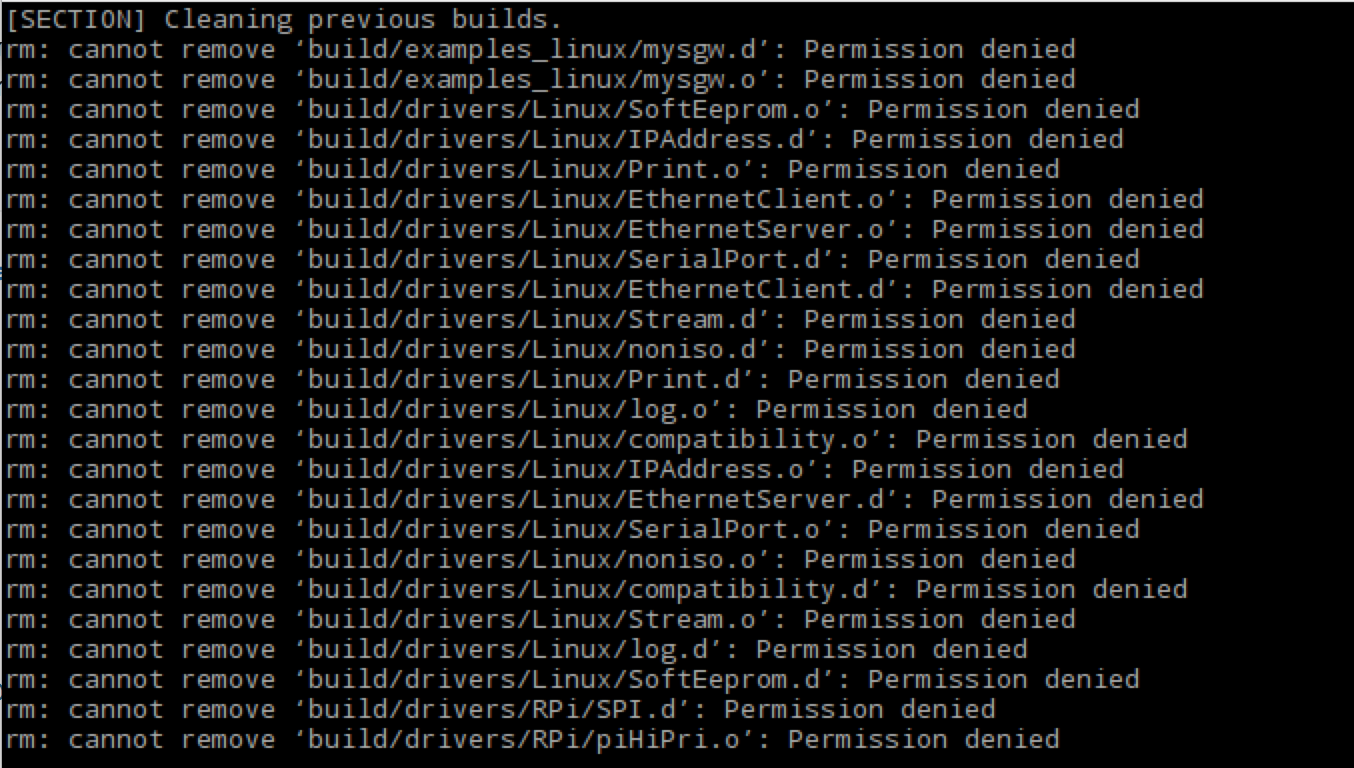
But if this is not what you asked for could you be a little more specific :$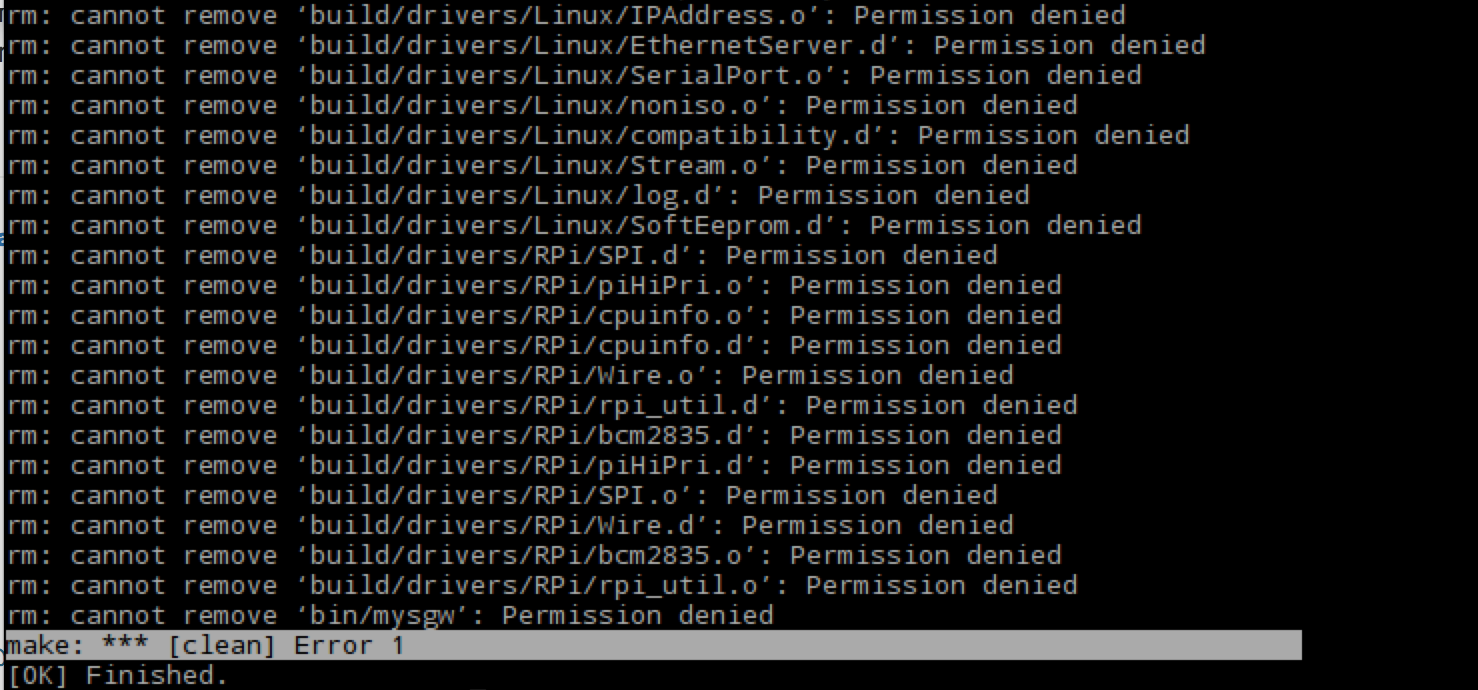
-
use sudo

-
Oh and one other thing, when I set the gateway up for MQTT it works.
-
If you use the --my-controller-ip-address= option, the gateway will act as a client and attempt to conect to the supplied ip and port. If you want the gateway to open port 5003, omit this option.
-
@Reza You could connect the rs485 to the RPi UART and use the option --my-rs485-serial-port=/dev/ttyAMA0, but you need to turning off the UART functioning as a serial console.
Or, to make things easier:
rs485 <==> TTL/USB <==> RPi
-
@marceloaqno
i am beginner and i can not turning off the UART functioning. . . also on some board usb port after power off/on lost and i should disconnect/connect cable... i test your steps serial gateway with raspberry and GPIO with virtual usb serial . and i see this problem solve and after power off/on gateway is connect .
i suggest that you add this commands to page of rs485 gateway step by step and update this .
(https://www.mysensors.org/build/rs485)I thank you for hard working and trying
-
if you want use rpi /dev/ttyAMA0 for rs485 gateway -
- remove string "console=serial0,115200" from /boot/cmdline.txt
- add strings "enable_uart=1" and "dtoverlay=pi3-disable-bt" to /boot/config.txt (only on rpi3)
- reboot raspi
-
@marceloaqno nice, working now

Thank you...
-
@b0rmann
thank you friend , but i am sorry i am very beginner in raspberry pi . because i use vera before and with raspberry and orange pi i use recently. so i need a full steps for a rs485 gateway(wiring and commands . . .) i dont know what is ttyAMA0 ! i use a serial gateway with usb port with raspberrypi 3 but i have some problem , but with a raspberrypi gateway and use a virtual serial port (ttyUSB020) all of my problem resolve. but i have problem with wireless. so i want have a wiring network. i want a full steps for setup a rs485 module with raspberrypi 3(wiring and steps for install...) thank you for help
-
Do I read that correctly, does this gateway also gives a ethernet link to a serial-only controller? How do I have to configure ip and port? In the build section I see no option to set them.
-
-
@Reza There are many guides on the web teaching how to connect and use rs485 with the RPi. I recommend you start with them and when you are sure it is working, you add MySensors to the equation.
-
@marceloaqno said:
There are many guides on the web teaching how to connect and use rs485 with the RPi. I recommend you start with them and when you are sure it is working, you add MySensors to the equation.
ok thank you

-
@Anduril
you will get all the build options for the mysgw with the command./configure -helpHere you can configure all options like serial and ethernet
-
just cloned and read the --help, but still I don't know how to use.
To make it a litte less abstract: I have a ethernet gateway (ESP8266) running at 192.168.38.19 with port 5003 to connect to. I want to have this accessible by a serial-only controller on the raspberry.I tried to do this config and
makeafterwards, but starting gave only FAILs..../configure --my-gateway=ethernet --my-controller-ip-address=192.168.38.19 --my-serial-is-pty --my-serial-pty=/dev/ttyMySensorsGateway~/MySensors$ sudo ./bin/mysgw -d mysgw: Starting gateway... mysgw: Protocol version - 2.1.0 mysgw: MCO:BGN:INIT GW,CP=RNNG---,VER=2.1.0 mysgw: TSF:LRT:OK mysgw: TSM:INIT mysgw: TSF:WUR:MS=0 mysgw: !TSM:INIT:TSP FAIL mysgw: TSM:FAIL:CNT=1 mysgw: TSM:FAIL:PDT mysgw: TSM:FAIL:RE-INIT mysgw: TSM:INIT mysgw: !TSM:INIT:TSP FAIL mysgw: TSM:FAIL:CNT=2 mysgw: TSM:FAIL:PDT mysgw: TSM:FAIL:RE-INIT mysgw: TSM:INIT mysgw: !TSM:INIT:TSP FAIL mysgw: TSM:FAIL:CNT=3 mysgw: TSM:FAIL:PDT mysgw: TSM:FAIL:RE-INIT mysgw: TSM:INIT mysgw: !TSM:INIT:TSP FAIL mysgw: TSM:FAIL:CNT=4 mysgw: TSM:FAIL:PDTI think my config is wrong and it tries to connect to a nrf24 at the rpi. So what's the correct config for my case?
Thanks in advance.
